This piece is part of a collaboration and written by our guest author
. Go check out his substack for more fantastic writing in this area!Parts of the Scythe
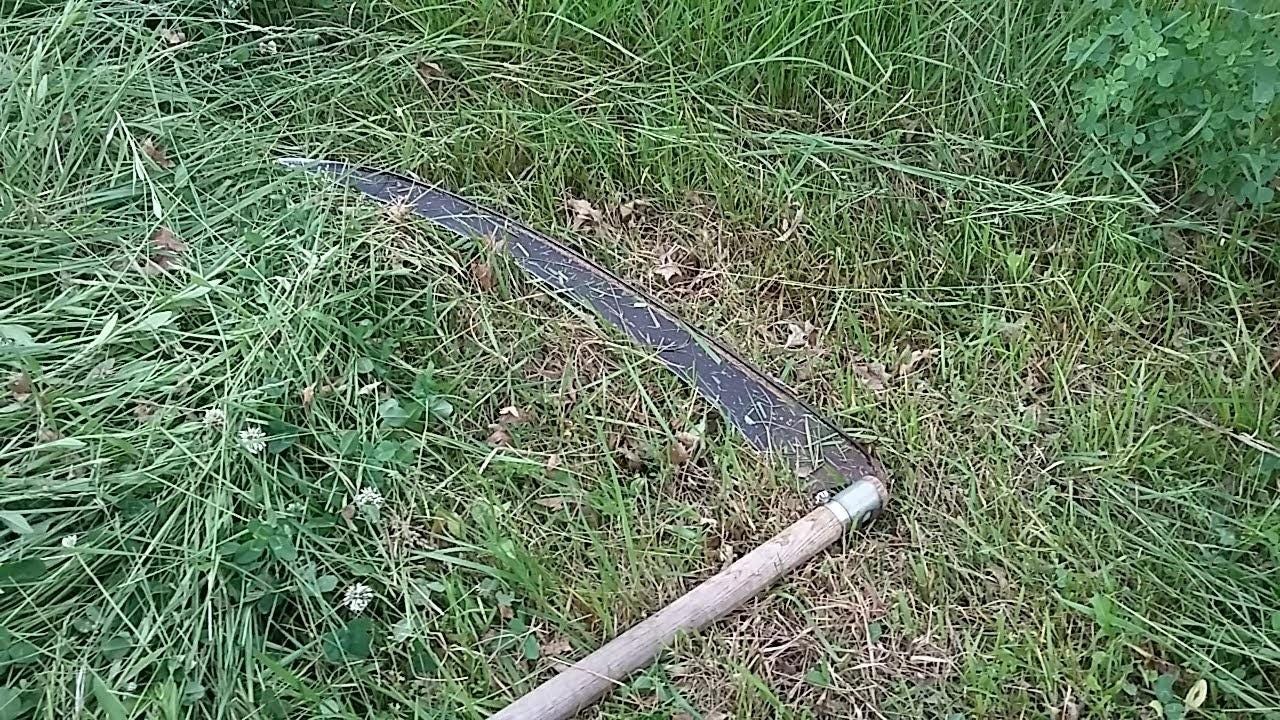
The scythe, in total, is fairly straightforward in its components. Some modifications can be made, but it is essentially a blade mounted with a clamp to a long handle with one or two grips. It is deceptively simple, and the geometric relationship between the different pieces ultimately influences how effective and ergonomic it is to use. Finding the perfect arrangement for your rig may take time and patience.
The Blade
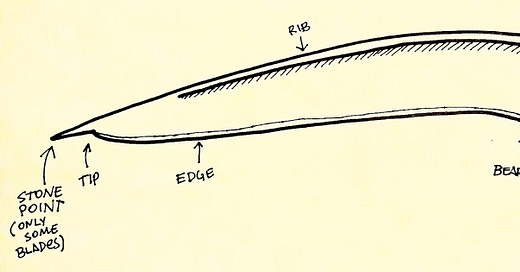
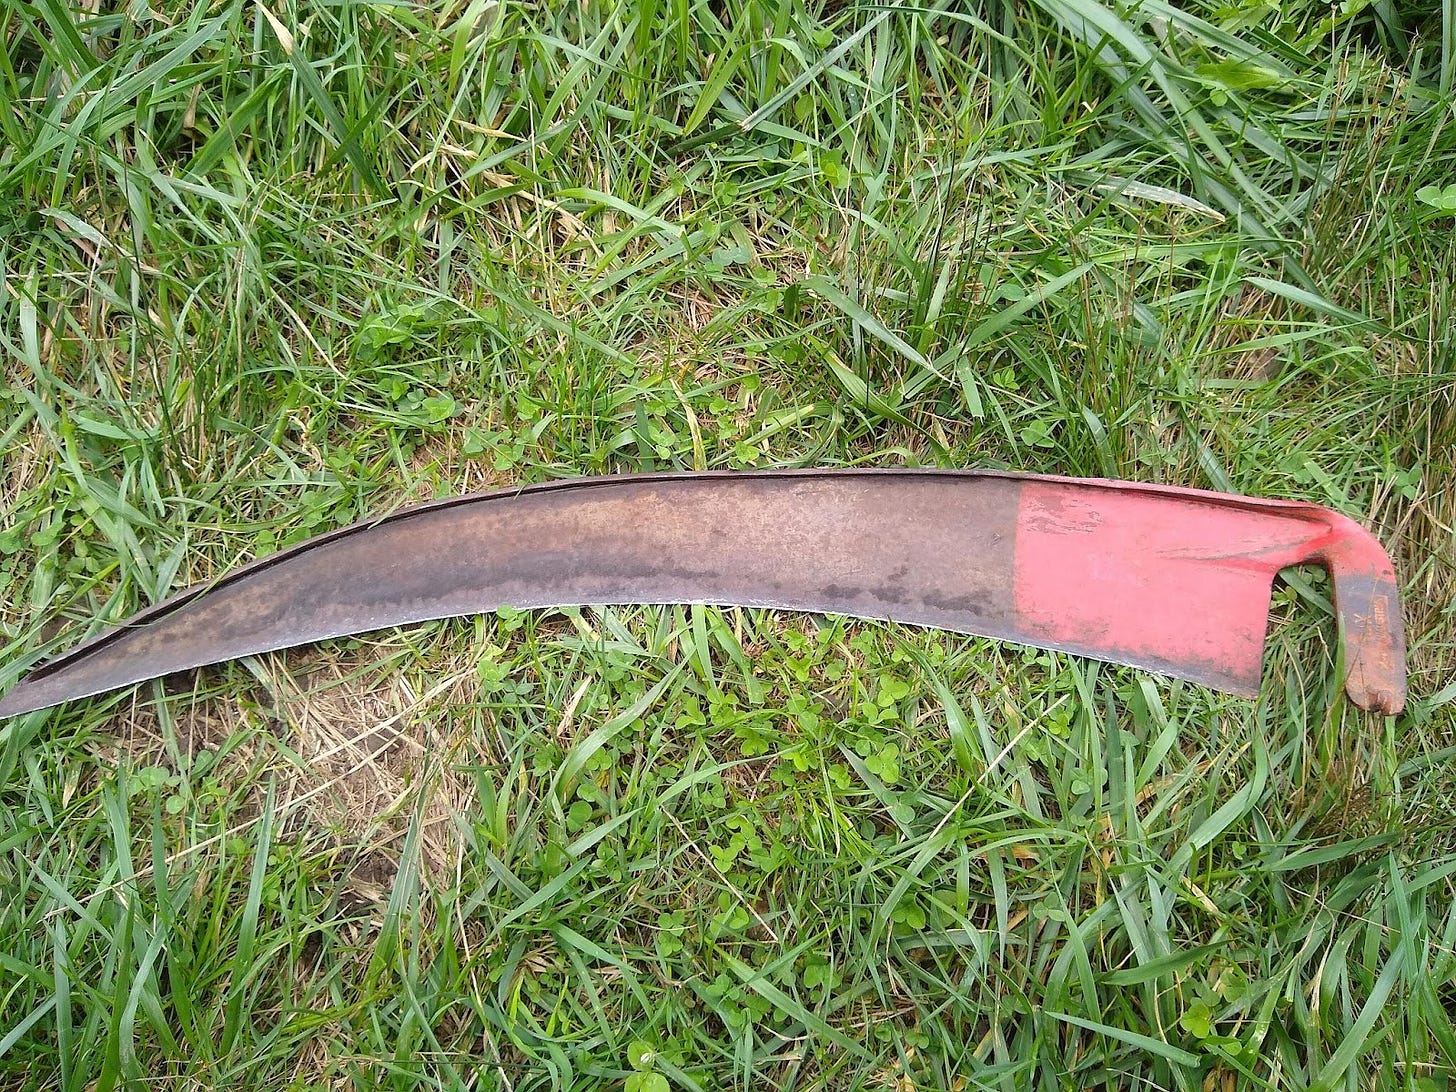
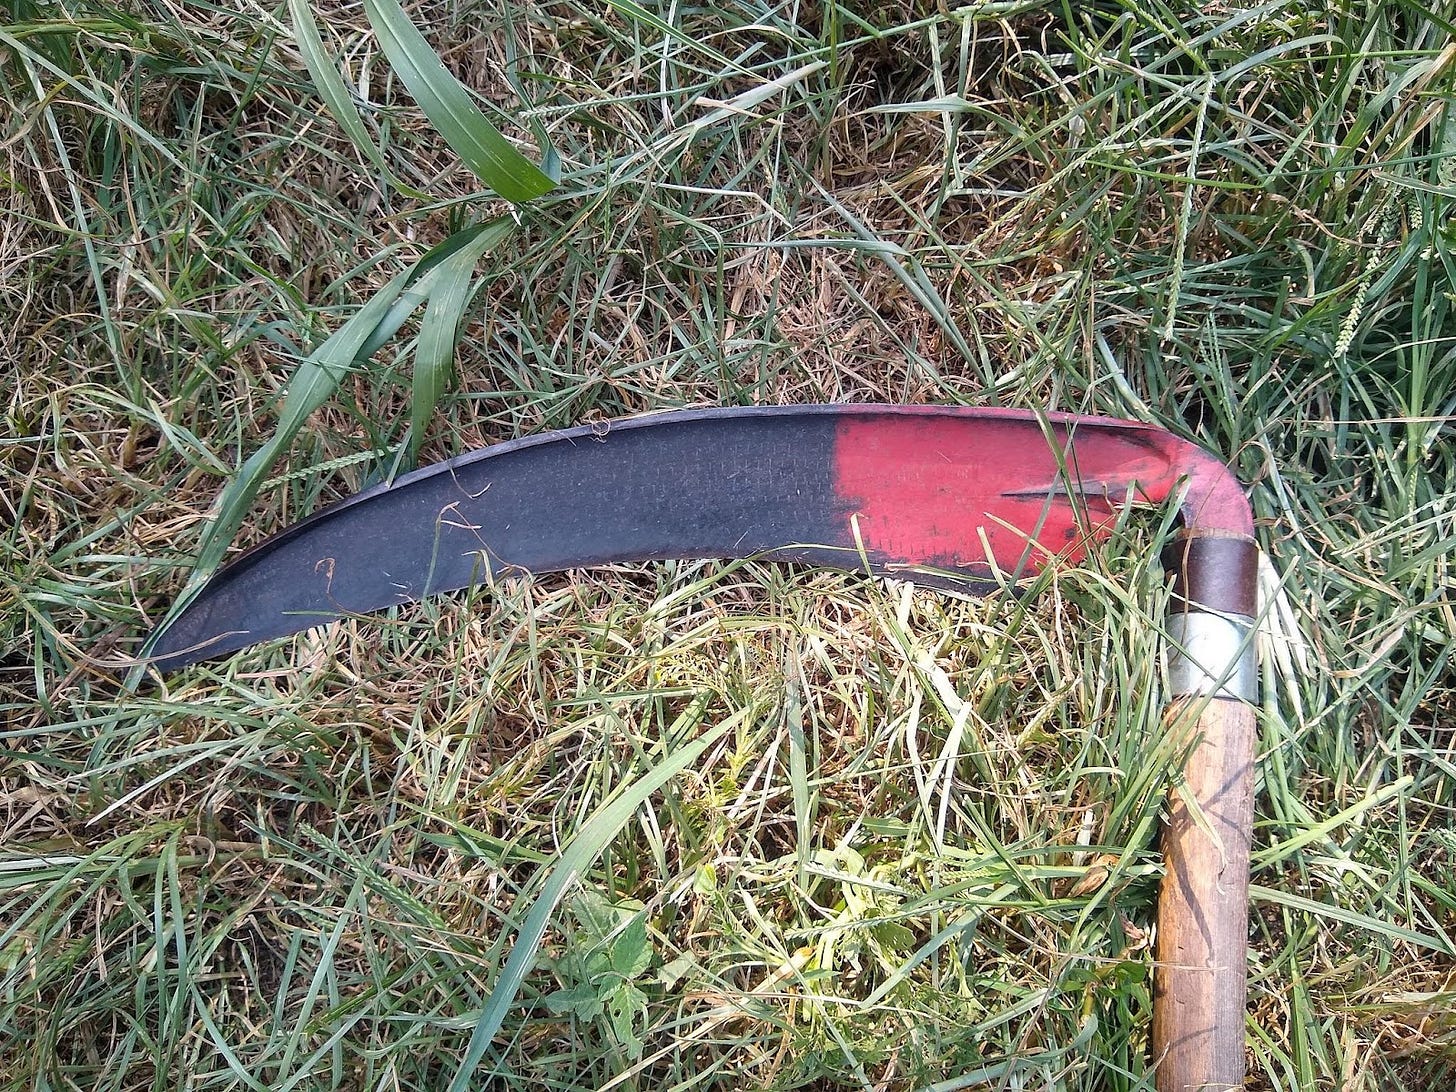
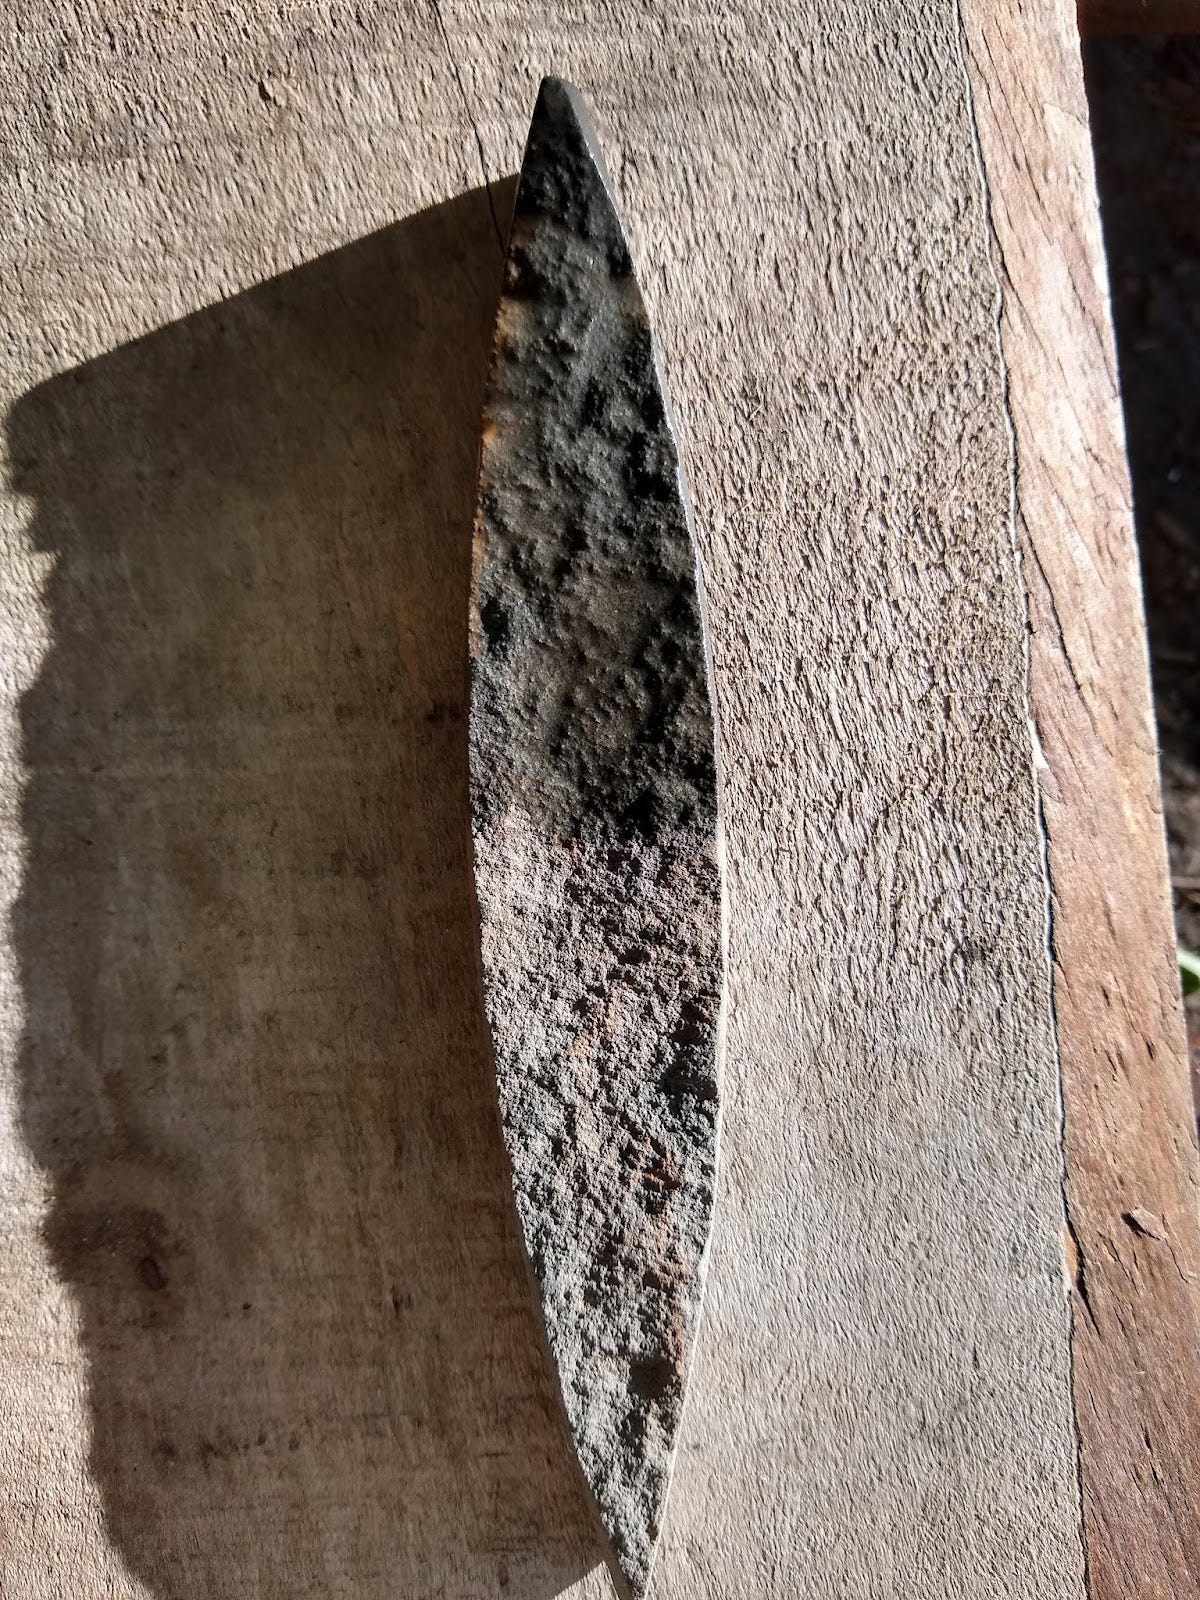
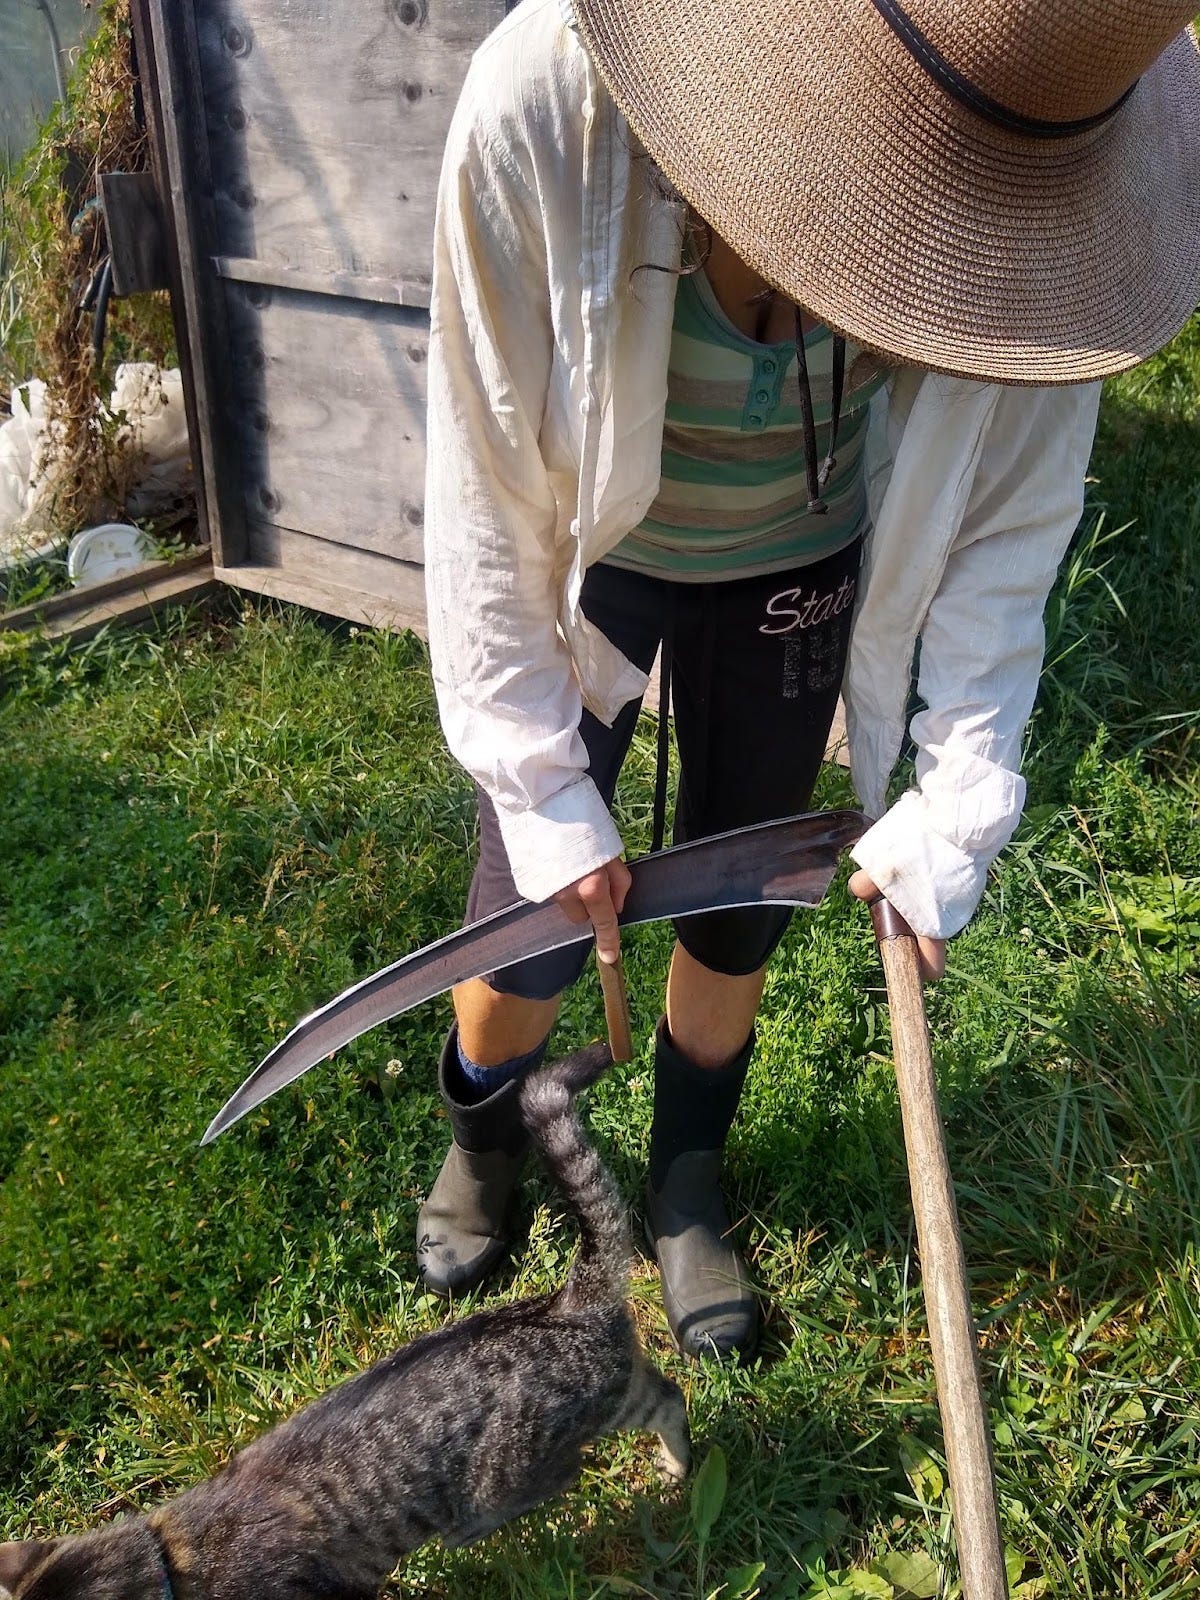
The blade is composed of a long, curved edge and the tang, a strip of metal that fits to the snath, or handle. A good scythe blade is light, its edge hammered thin (but not too thin), and the molecules of steel aligned to become hard. There are light depressions along the entirety of its body where it has been tensioned by a hammer, and it is curved in every plane to make it swift, efficient, and maneuverable compared with the flatter, Anglo-American types. Some scythe blades will have a “stone point” at the tip, a hard, thick point that prevents the thin edge from being damaged by rocks and other perilous obstructions. It may be well worth trying a blade like this if your land is particularly rocky or full of hidden dangers like half-buried fence-wire, rebar, or other debris.
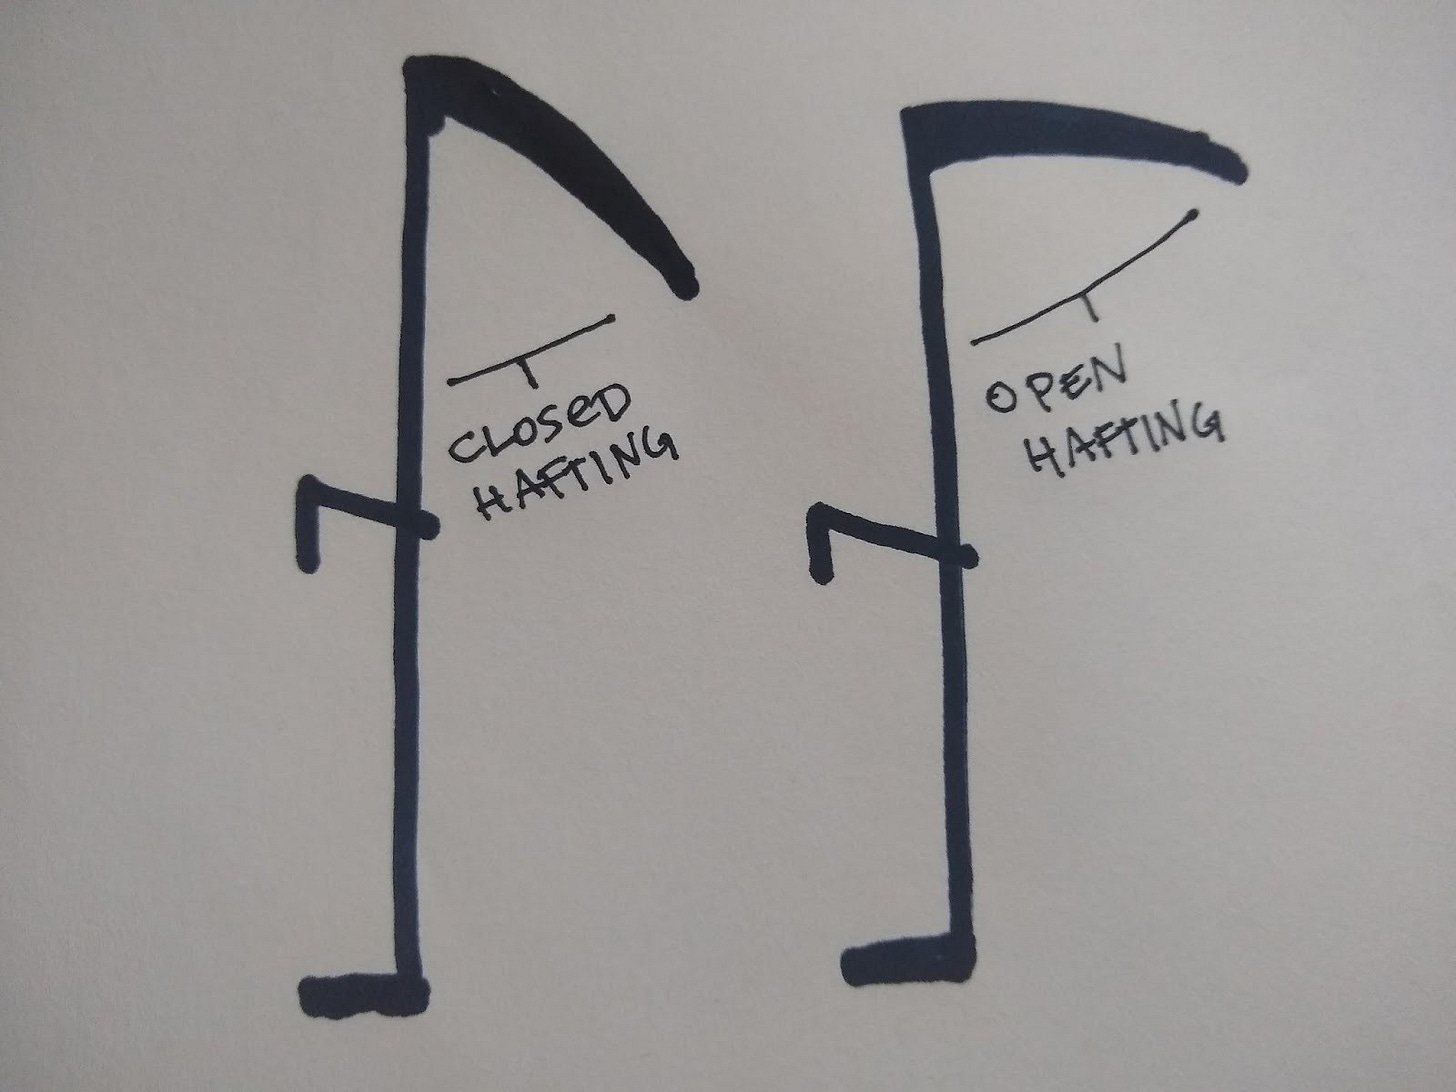
At the opposite end of the tip, but before we make it to the tang, is the beard, or back end of the edge. The lateral gap between this and the tang partly determines the ultimate geometry of the blade. If the tang angle is relatively closed into the beard, it is considered to be a more closed hafting. The more open it is, the more open hafted. Close-hafted blades take a slightly smaller bite of grass, but require less force and are less likely to become cracked or damaged. They stay sharper longer. An open hafting lays down lots of grass with each swing, at the expense of a person’s endurance and bodily health, and leaves the edge more vulnerable to damage. By adjusting the angle at which the tang is clamped to the snath, you can adjust the hafting. I emphatically recommend keeping it quite closed.
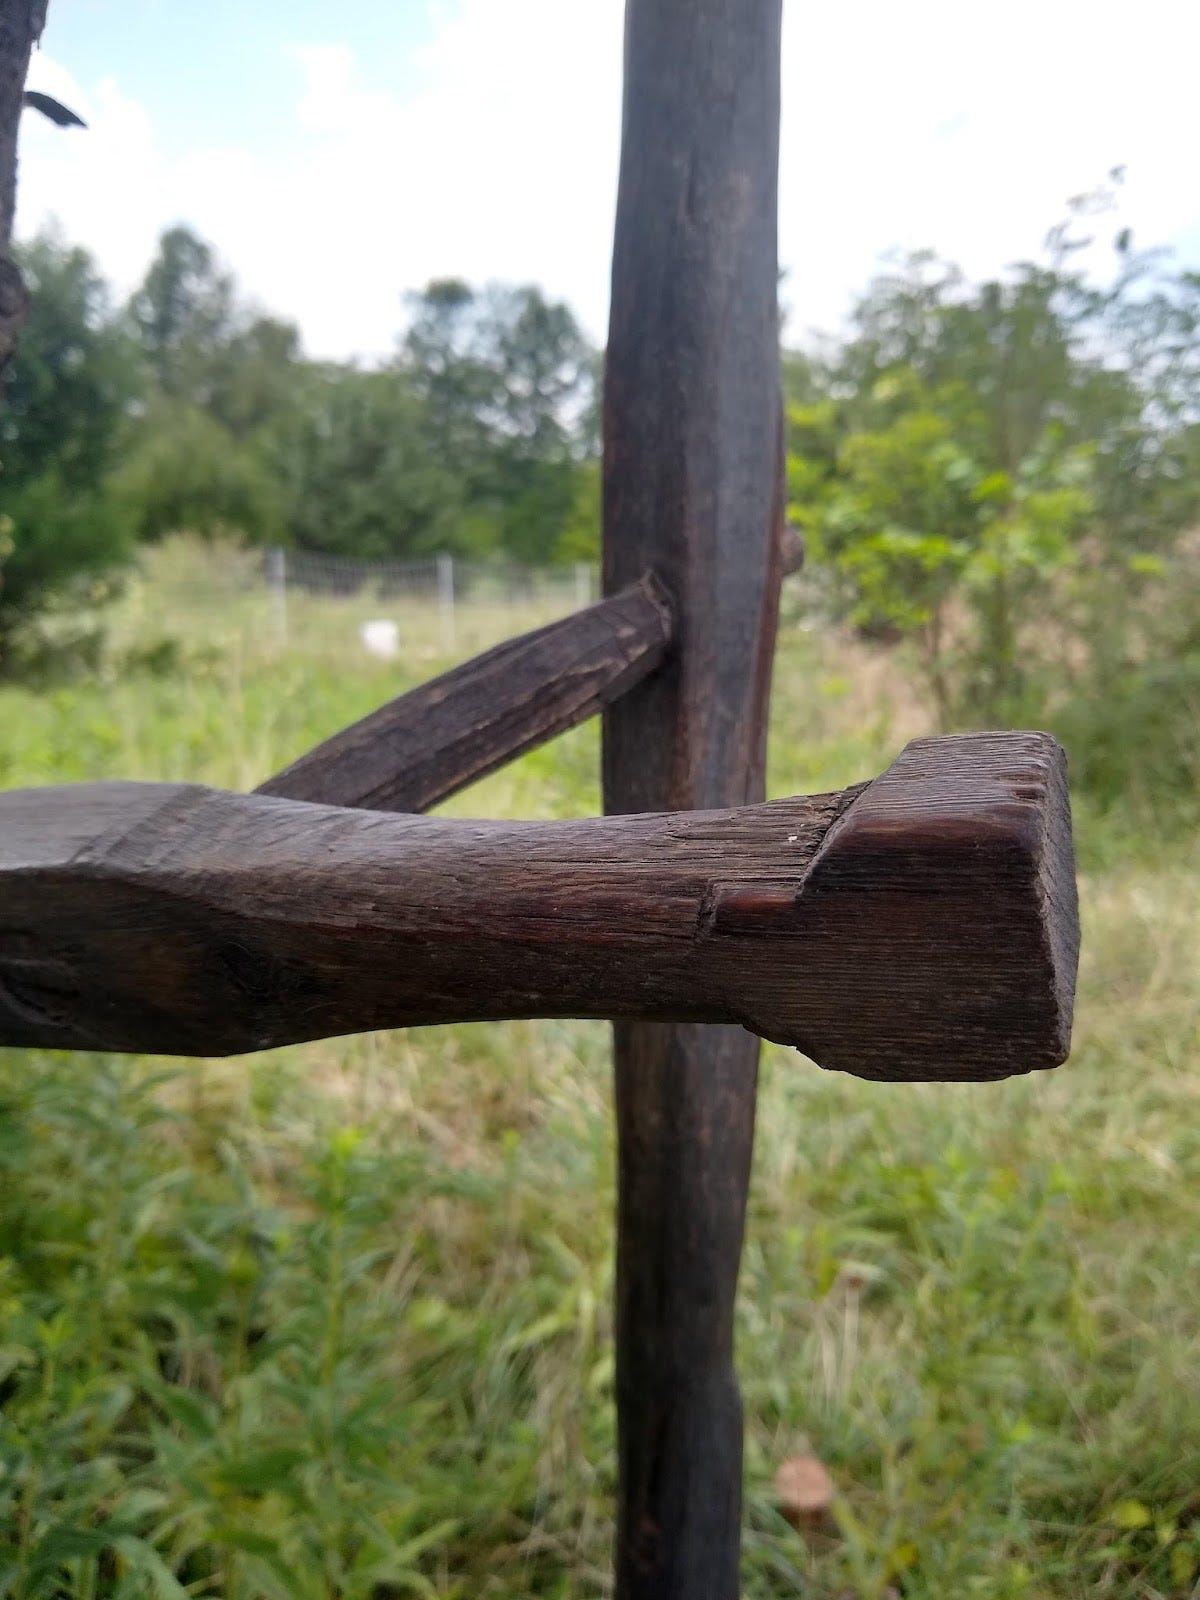
As far as the “vertical” distance between the blade and the tang, the most important factor to remember is that we want the blade to rest parallel with the earth when we hold the snath in a relaxed position. Often times I will use a hardwood shim to match the angle perfectly for my height. Once in a while, I’ll come across a tang that is way out of position. Applying a little heat with a torch and carefully bending the tang into a better position is possible, but hopefully not necessary. The end of the tang has a small knob that fits into a shallow hole in the snath where the two major pieces of the scythe fit together, and this is the place where the most stress on your tool is likely to occur.
The Clamp or Ring
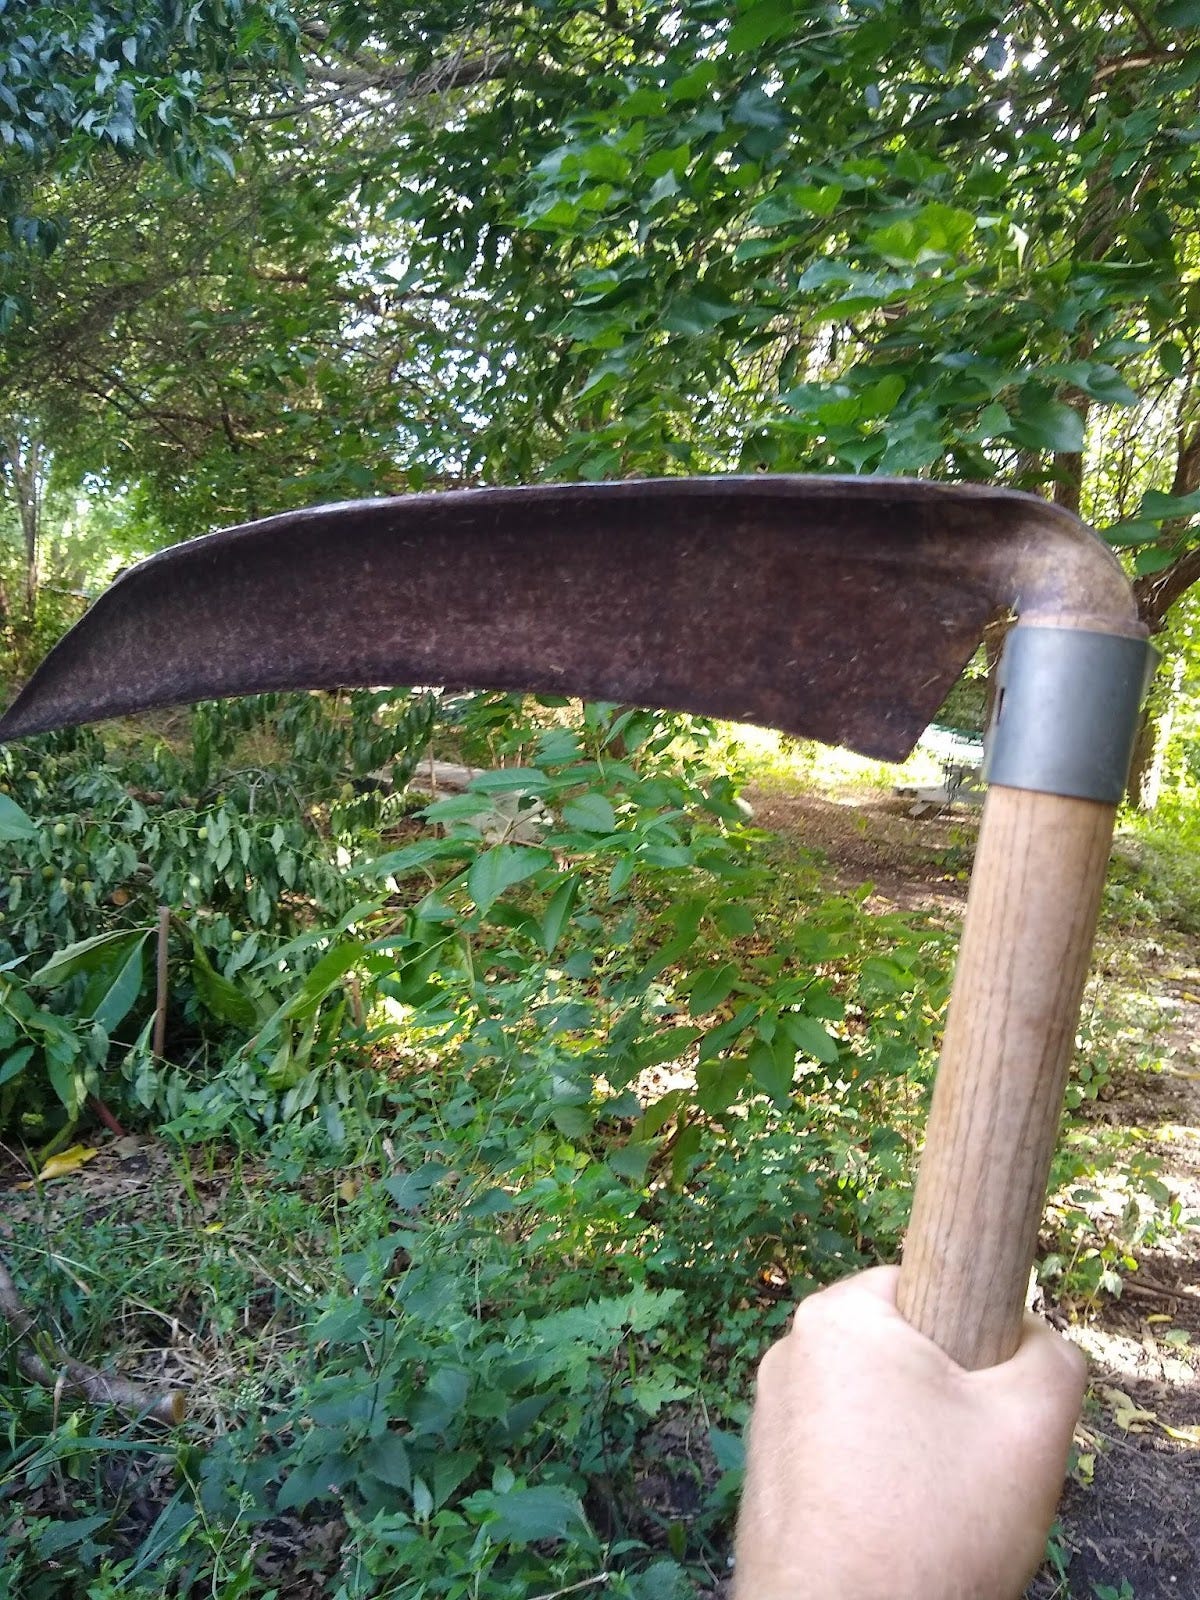
Like everything else on the scythe, this simple piece of gear deserves perhaps more consideration than we might initially give it. The clamp which fixes the blade to the snath must endure consistent, repetitive force. If the blade is not clamped down tightly, the hafting angle may gradually open up, and the knob may even tear out of its hole and break the top of the snath. Some suppliers offer a small metal bit to reinforce the knob hole to reduce the likelihood of it tearing. The clamp is tightened down with a key, and I would recommend checking the tightness prior to each mowing session. There commonly seem to be hexagonal and square screws for these clamps. If at all possible, get the hex ones. They’re much less likely to strip out, and I’ve bent many square keys in the past. If the tang on your blade is long enough and you mow in particularly rough terrain, fitting two clamps, or a scythe clamp/hose clamp combination can prove useful. As you become more intimate with your blade, you may find that you like to have more or less weight in different places across the snath, and a few extra clamps can accomplish this fine-tuning.
The Snath
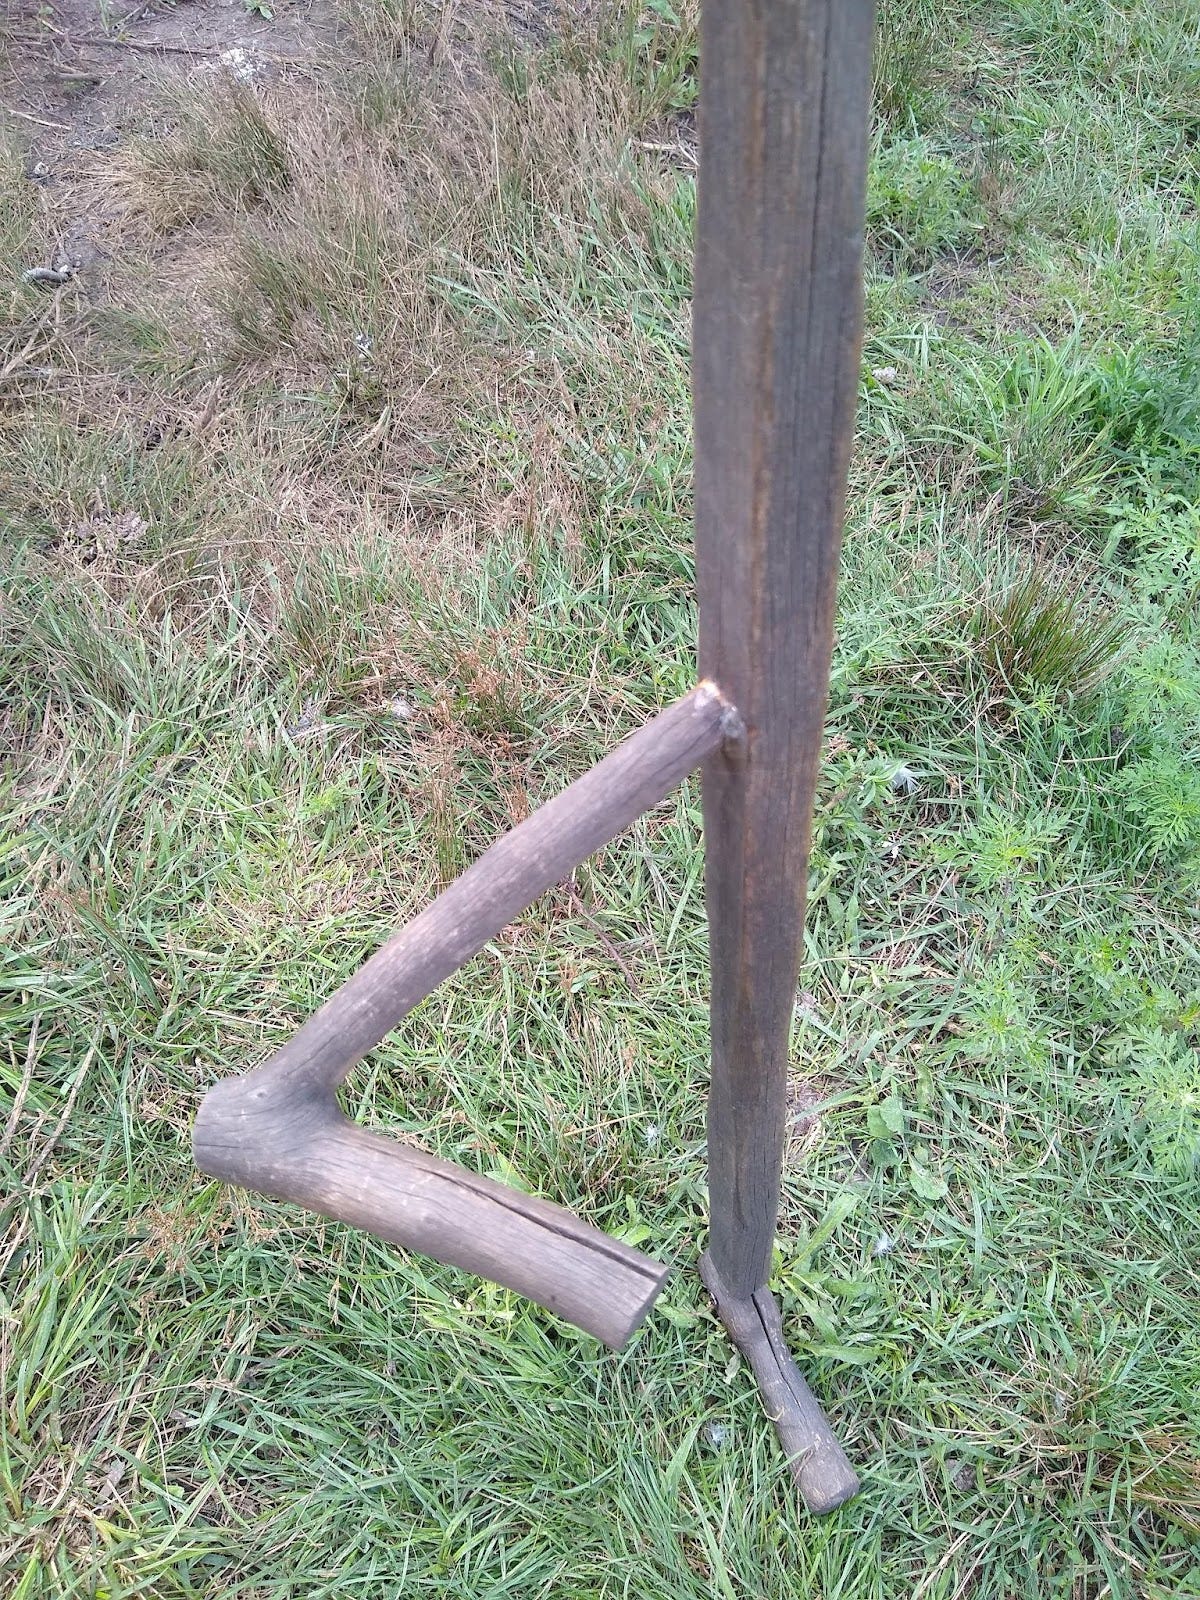
The snath is, in essence, a long rugged stick with attached grips. Being made of wood, it will occasionally break, and it is better to break your grips than your snath, or at least better to break your snath than your blade, particularly if you have some basic woodworking abilities. Much like your blade, the lighter the snath, the longer you can shuffle through a field swinging it, but a lightweight snath is also more fragile. Traditionally, snaths are made with ash, but I have seen oak, black locust, honey locust, hedge, and even willow, and hardware store 2 x 2 pine effectively shaped into snaths. There are also a handful of aluminum snaths out there, which I find awkward to use and less adaptable to certain blades, but very sturdy. Matching a blade to a pre-fab snath can be tricky, but both of the supply sources I recommend have a good “handle” on which blades fit which snaths.
Oftentimes, the snath will have a bend towards the front so that the blade is appropriately parallel with the ground, though in some circumstances this is unnecessary. Longer blades, like field and haying types, usually fit a longer and straighter snath, but not always. It’s important to start out with a blade and snath that match each other well. Later on, as you develop a more intuitive read on the physics of mowing, you can play around with custom snaths and grips.
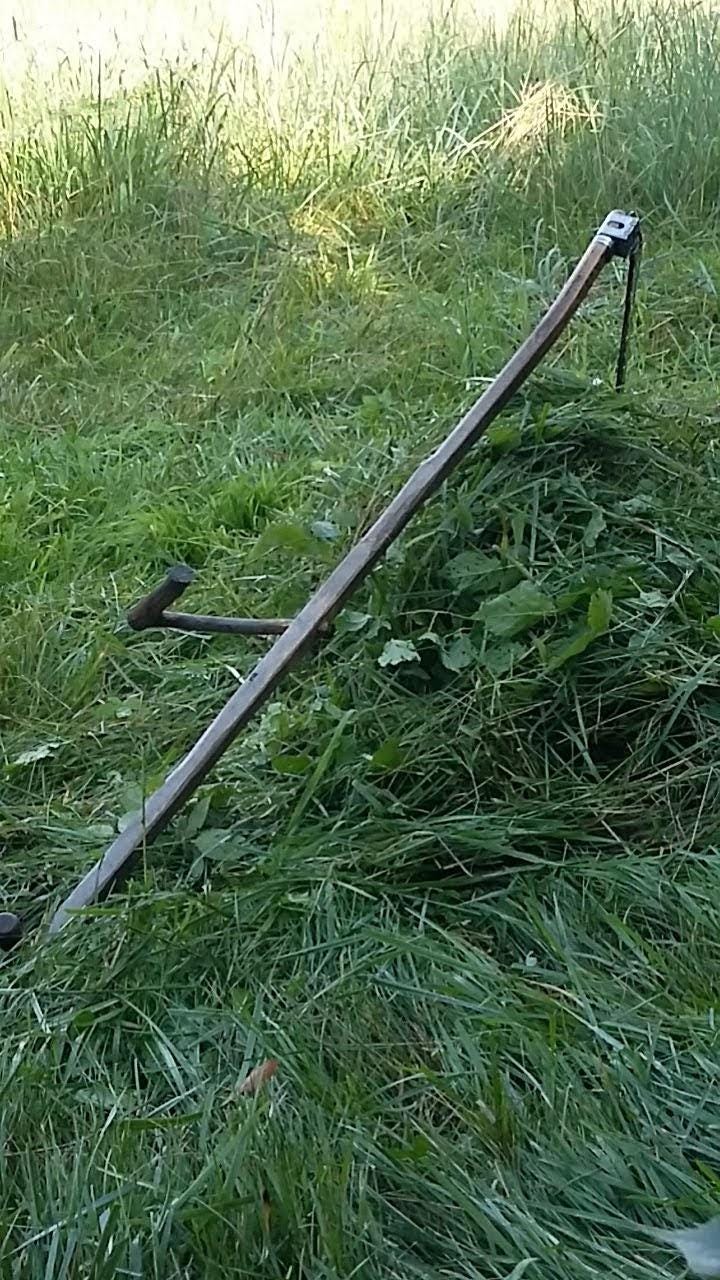
Most “modern” snaths come with a center grip that faces back towards the mower, and a rear grip in a similar orientation. They can be rotated around until you find the most ergonomic fitting. I use damp fabric scraps whenever I’m figuring out my grips so that I can adjust them slightly in the field. Once every piece is in its proper place, the grips can be glued or carefully screwed in place. Fux produces some adjustable snaths. They’re a bit heavier than I prefer, but nonetheless a sound option. Scythe Supply can customize a snath to fit a person’s body, which requires some fun at-home measurements. I’ve had one of these for about 8 years now, and it hasn’t broken yet. It’s probably worth the money if you’re not into woodworking.
Oftentimes, particularly in older depictions, the back grip is missing altogether. I’ve tried mowing this way before, and haven’t really found the knack for it, but some may prefer this alternative set-up. Most manufactured grips are unidirectional in their shape, but a slightly heavier, more versatile option is to make grips that move in both directions or even omnidirectional, circular grips. I fit my snaths with custom grips, often using weaker wood, my theory being that I’d rather replace the grip than any other part of the scythe.
Types of Blades
Different types of work require different types of blades. If you are stewarding a small and relatively homogenous piece of land, you may only need one kind of blade. If you are like me and use scythes in the field, the brambles, and the woods, you may find that no single blade is versatile for all the work you need done. Sometimes, blades are relatively interchangeable with your snath, but not always. Hay/field blades and, to a certain extent, grass blades can be the equivalent of a hot rod in the possession of a 16-year-old for the beginning mower… there’s a good chance of totaling them. I would generally steer newer folks to the heavier, slower, less fragile “ditch” or “bush” blades or a sturdy, not too long, grass blade.
Grass Blades: These are the standard in efficient mowing, but are not to be used for heavy brush, thick-stemmed forbs, or saplings. You can cover a lot of ground with a grass blade, and the edge must be well-maintained for a good mowing experience. Great for grass, obviously, but also for mowing cover crops, small grains, and some prairie and pasture work. These seem to range in size from 60-75 cm (about 24-30 inches).
Field / Hay Blades: Longer, thinner, and a bit trickier than grass blades, these are made to do one thing: lay down wide swaths of tender grass on relatively mild terrain. And they’re excellent at this work. The longer nature of these blades makes it easy to lodge the tip in the ground, which is never good. They usually require a longer, flatter snath. These are blades to work your way up to. Some can be as long as three feet! There’s even some “competition” style extra long, extra shiny ones, made for racing. Cool, but I’m not sure anyone really needs it.
Ditch blades: A ditch blade is versatile in many ways, and pretty difficult to break. They come in a medium range of lengths and can handle grass, brambles, weeds, and some saplings. These are the only blades I ever loan out to people because they’re tough. The downside of a ditch blade is its weight and thickness. It can tire a person out after an hour, and the thick edge is challenging to peen or hammer into shape.
Bush blades: These are fun, short little blades that can knock down heavy brush. Their slight size makes them agile in the wooded landscape, and they can be used to do serious damage to woody plants and brambles. Unfortunately, they are too small to cover significant ground in an open-field setting.
Garden blades: A garden blade is thin and sharp like a grass blade, but stout and agile like a bush blade. These work great up against fences, in an orchard or vineyard, and yes, in a garden. I find them particularly handy for trimming in tight spaces around sensitive objects like irrigation lines, power cords, and crops. Again, they do not cover much ground if you must mow fairly wide swaths of vegetation, and they’re not designed for heavier brush.
Sharpening and related tools
“The only thing that a dull scythe downs is the mower” – From Whetstone Holders: An ode to labour, skill, creativity, individuality, and Eros, by Inja Smerde
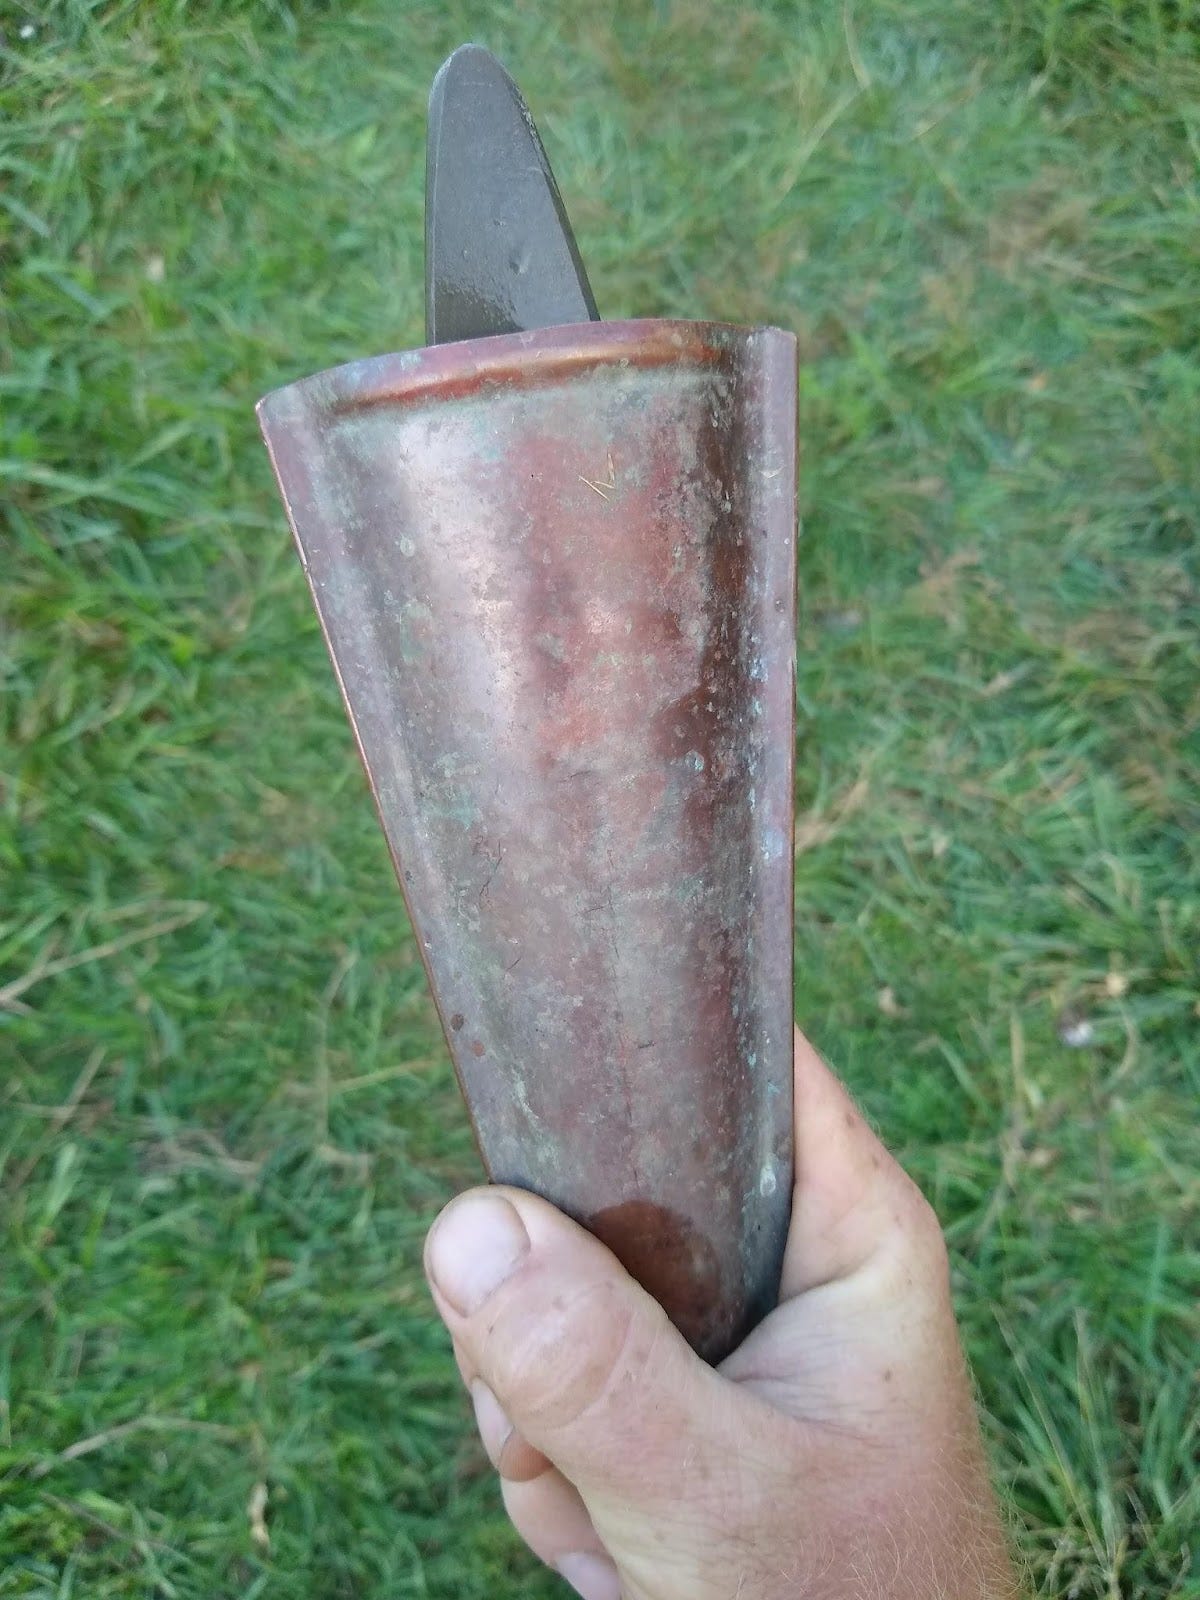
None of these blades are worth a damn if they are dull. They must be frequently honed and occasionally peened. Honing is accomplished with a whetstone… and there are more opinions out there on the right whetstone than there probably need to be. I’m a Whetstone centrist: I get a nice medium-grit one, and that’s about all I need. This is how you know I’m not a sharpening snob. That said, the ovular shape of scythe-specific whetstones is key to their effective use. Rectangular types do not make the proper, contoured movements across the edge easily. The harder stones remove more material, and hence, the blade needs to be peened more often, whereas the softer, finer grit stones sometimes don’t feel like they do much more than a light touch-up. The whetstone must be kept in water to work properly, and the suppliers out there would love to sell you a whetstone holder to clip onto your beltline. As a person shaped like a frog standing up who typically wears soccer shorts, these inevitably pull my pants down or spill all over me, so I’ve gone the cheaper route of using a water-filled tin can that I keep in the shade with my drinking water. Every ten or twenty minutes, when my blade feels dull, I hone it.
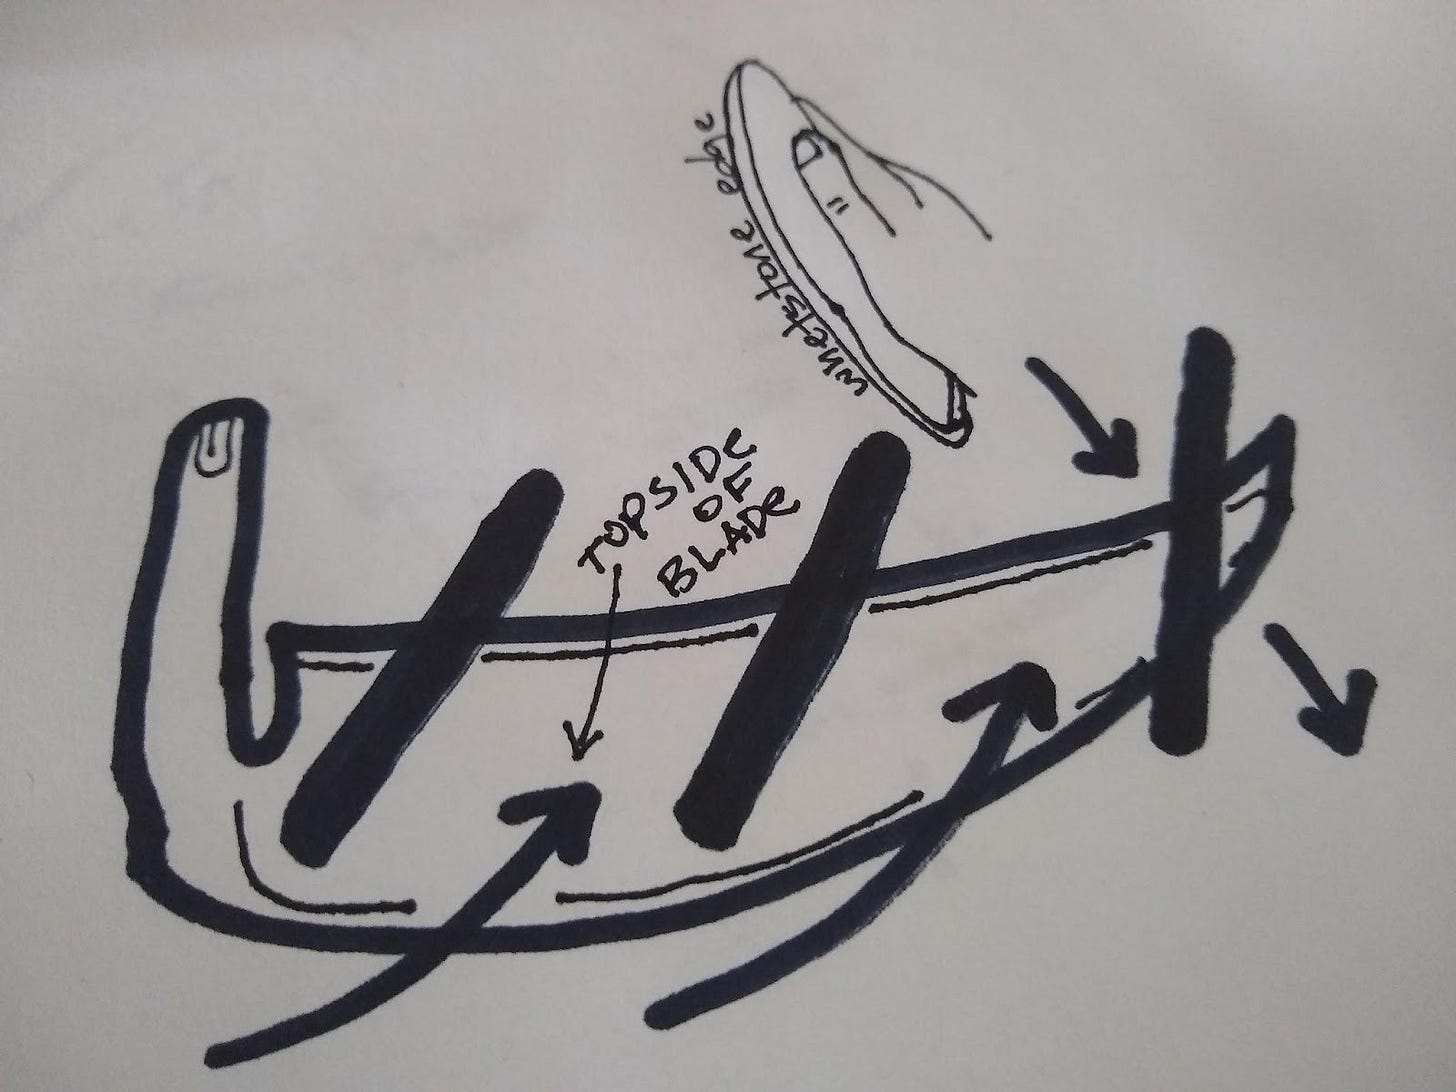
The process of honing varies a bit from mower to mower. I have sliced off a bit of skin trying to hone quickly, or with the blade unsteadily positioned, and have found some safer ways to do this necessary maintenance. Bracing the blade below the torso, I hone away from my body, with my hand above the edge. I only hone the “top” of the blade, making short, downward strokes along the length of the edge, and then slide the stone horizontally across the back edge to remove the burr of steel, if necessary. The blade can also be honed with the hand approaching the edge, but careful movements and a calm approach are required for doing this safely.
As a general rule of thumb, I hone for one minute for every ten minutes of mowing. It’s an opportunity to stop, reevaluate the task at hand, and take a breath. If the blade feels dull, I hone. I can inspect the edge for dents or cracks. I can feel some breeze. And then I mow some more. But inevitably, as I hone, the thin edge of the blade is gradually dulled and honed away. At this point, we must peen our blade.
Peening is the thinning of the edge with precision force, usually by striking with an appropriately shaped hammer and anvil. By peening, we are drawing the edge of the blade out, and thinning it.
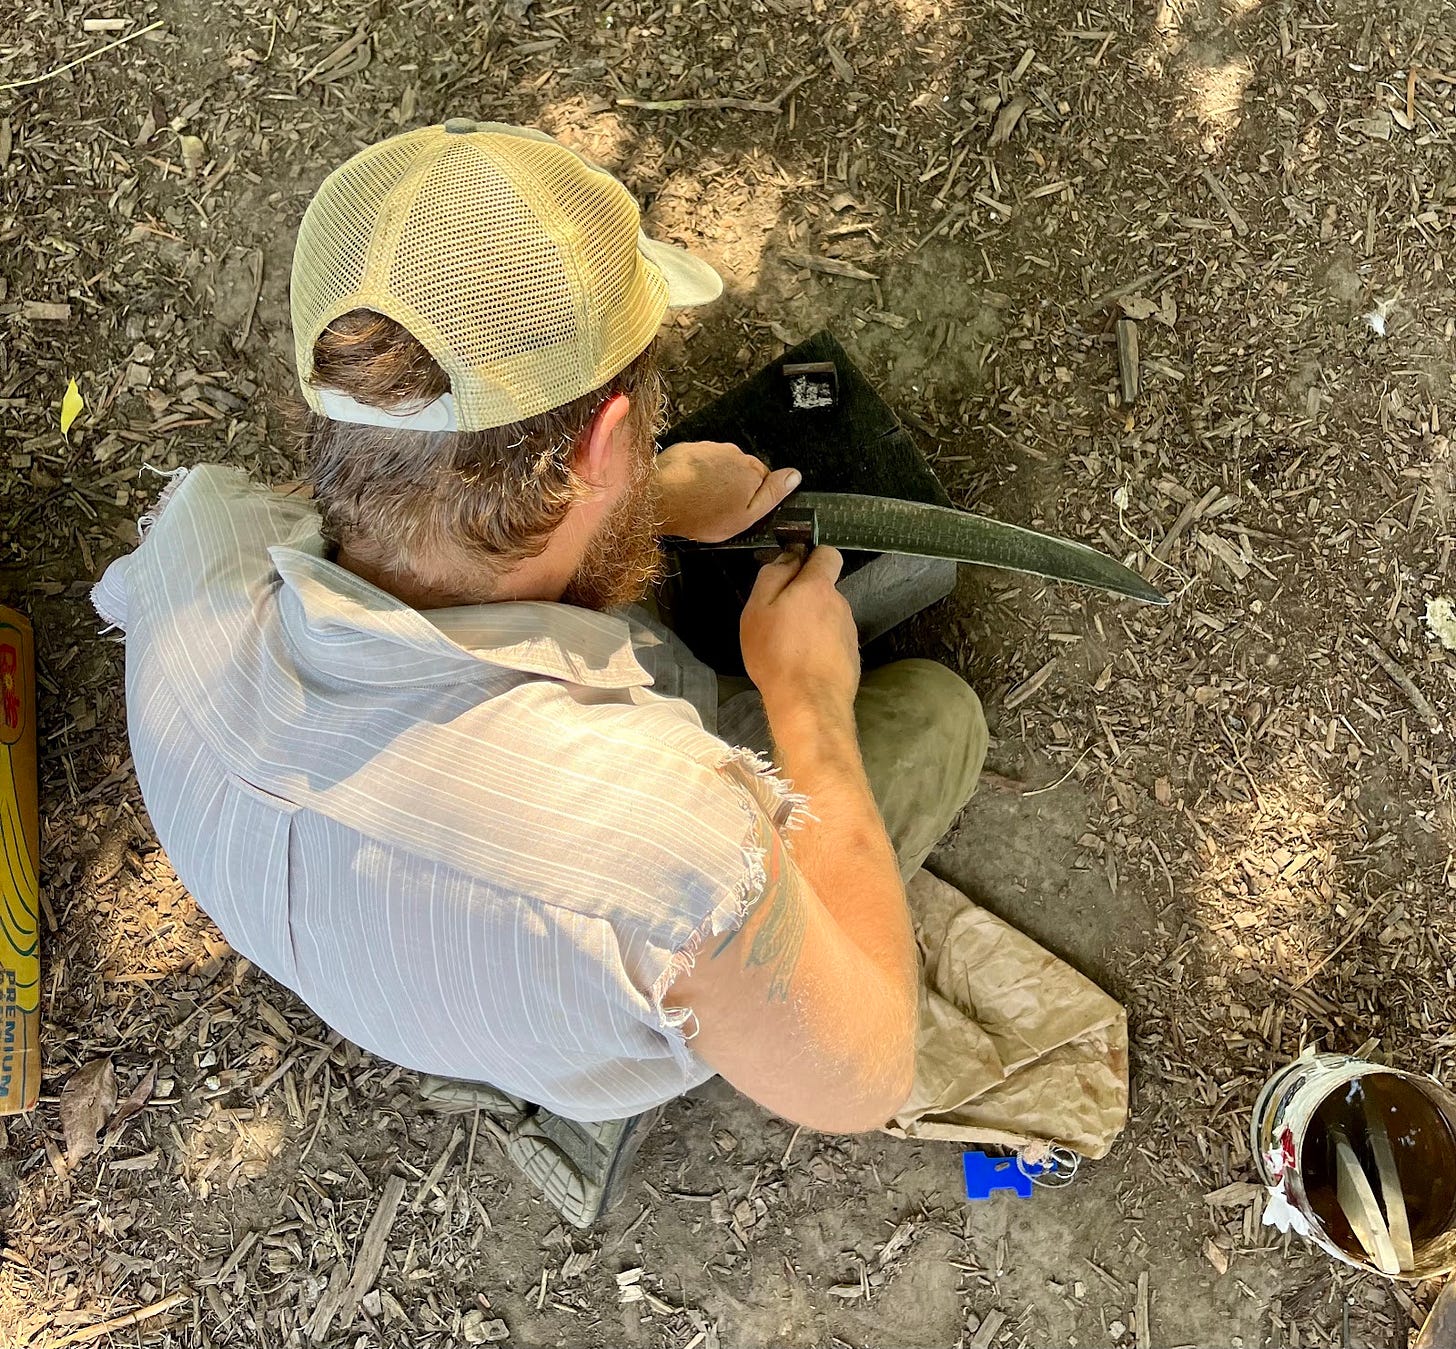
Peening is perhaps the most intimidating part of scything for me. Luckily, there are jigs for this work. A basic peening anvil jig takes a lot of the challenge out of this work, and while there are some purists who would suggest a jig peened edge is inferior to a free-hand peened edge, the important thing is that you’re not afraid to work the edge when needed, so you can get back out in the field and steward land! There is a universe of peening instructional videos on YouTube, if you want to go down that rabbit hole. Just like I recommend starting off with a durable blade, I recommend starting off with a peening jig, so you don’t warp or break your scythe blade in the process of learning how to peen it.
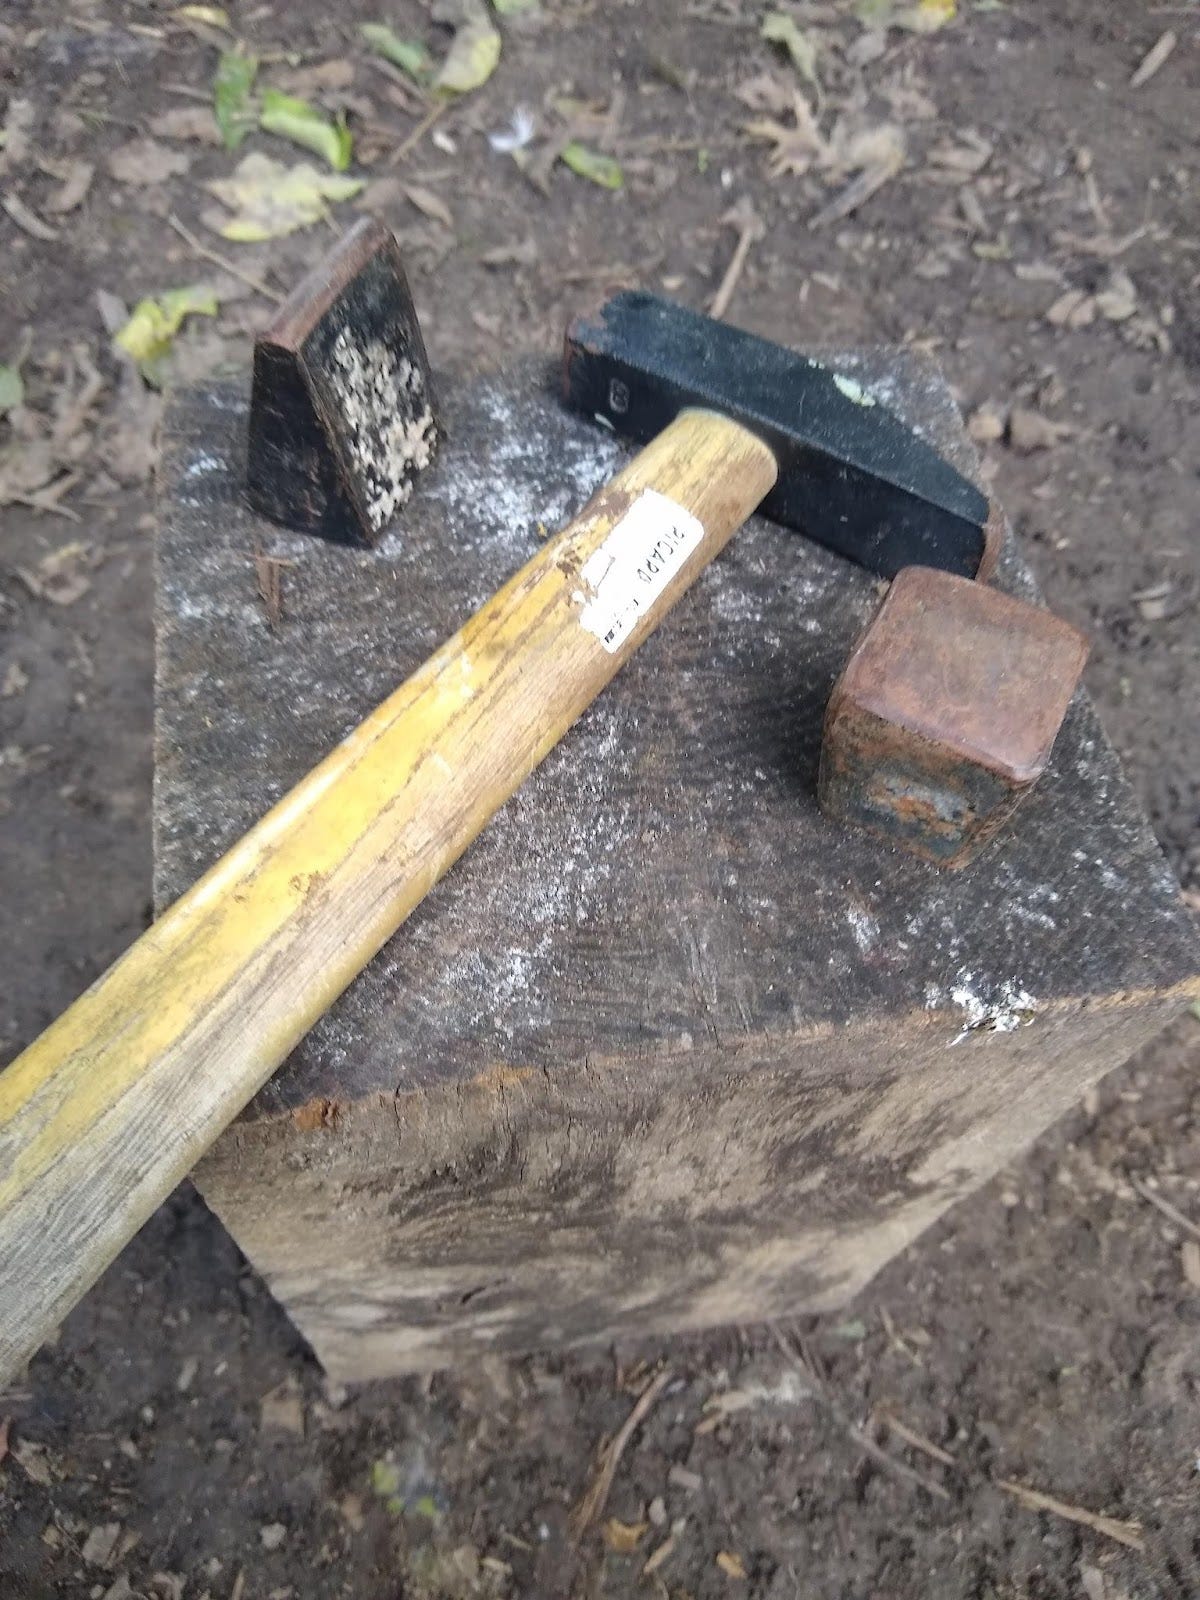
A simple peening jig is composed of an anvil that mounts into a log, and two caps: one for coarse work, and one for fine work. Running the blade face up, sandwiched between the cap and the anvil, you gradually inch the edge through and tap the cap, using a small hammer, with determination but not brute force, to draw the edge thinner. Apply slightly more force at dents or dings. If you discover cracks along the edge, file them smooth and peen lightly. It is okay for the blade edge to develop a slightly serrated appearance over time. If cracks are short, they’ll gradually fill in after use and repeated peenings, but if you attempt to draw the gap in the metal all the way out to the rest of the edge, there is a risk of drawing it too thin and making the crack worse. Some cracks are deep, if you happen to knock a brick or a t-post; they may be the beginning of the end for your blade. It happens sometimes, and I’m sorry. Ear protection, and even eye protection, is recommended when hammering thin steel.
Once you’ve gotten confident peening on a jig, you can graduate to the hammer and anvil, if you choose. These are scythe-specific peening hammers and anvils. They’re great for getting the edge to your preferred thickness or for working with old, “dynamically shaped” (beat to hell) blades. Extra thick blades that are not “supposed to” be peened, like some bush blades, kamas, and sickles can be convinced otherwise. A scythe peening hammer has a narrow, wedge-shaped side and a flatter, wider side. The primary two anvils used for free-hand peening are nearly the same: one flat and one wedge-shaped, and the blade is typically held face down to the anvil, as opposed to the peening jig where the blade is held face up. Using a narrow hammer on a narrow anvil will shape the edge more drastically. It is very easy to over-peen a blade this way, and uneven hammering can produce a rippling shape across the edge. Moving through the four possible combinations of hammer and anvil, we can adjust how effectively the edge is shaped. It’s probably best to take it easy and make only slight changes to the edge at first. The more “effective” combinations can be used in areas where the edge is further out of shape, whereas the subtlest combination, that is, flat-to-flat, is great for hardening the steel (compressing the drawn-out molecules) along the thinned, finished edge.
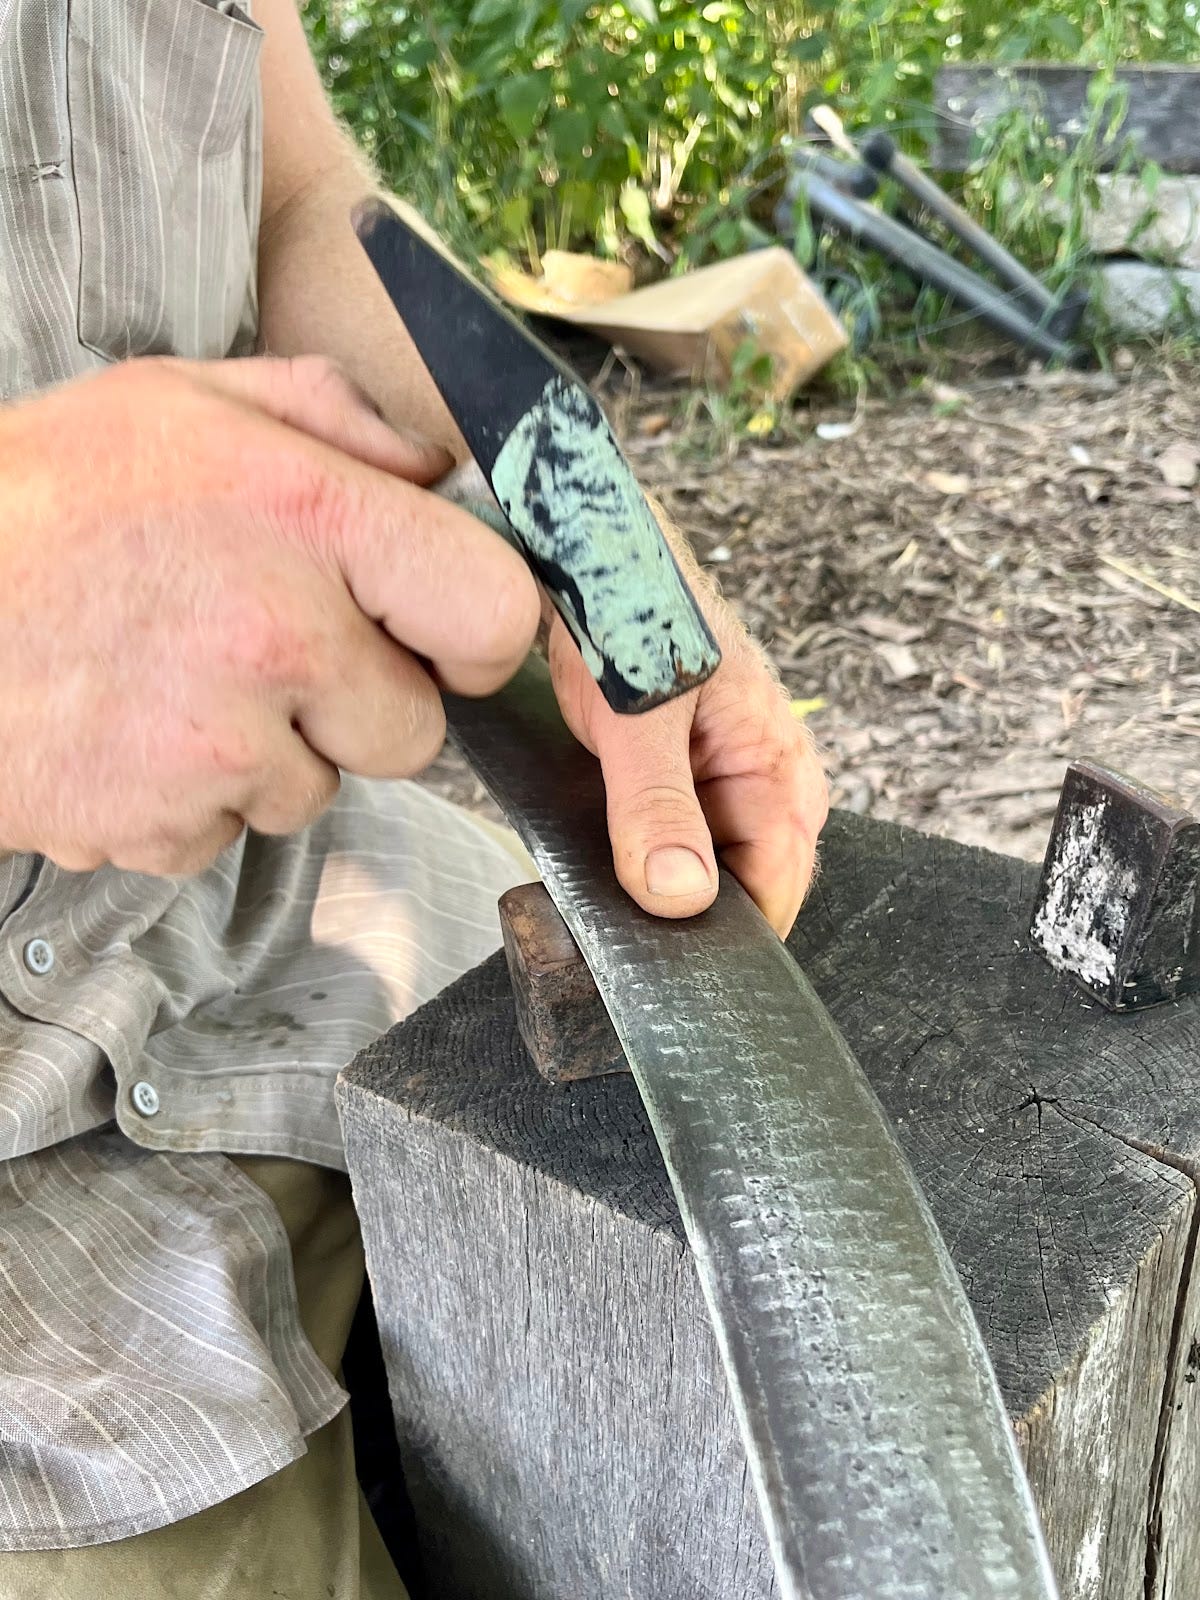
Your peening set-up will typically be mounted to an ergonomically sized stump or block, though there are some anvils designed to be staked into the ground. The frequency with which you peen is determined partly by preference, partly by repair needs. I have heard various figures thrown out: traditional knowledge maintains that blades were peened every afternoon after a 4-hour stint of mowing. I probably peen after every 10 or 20 hours myself, but I’m a busy guy. Maybe I’d be less busy if my blade was sharper.
Other tools
A sharp blade alone will not meet our needs as land stewards without ways to effectively handle and transport the material we cut. While the work of raking, tedding, picking up, and carting hay was historically undervalued labor, I will not repeat that mistake here.
The Rake
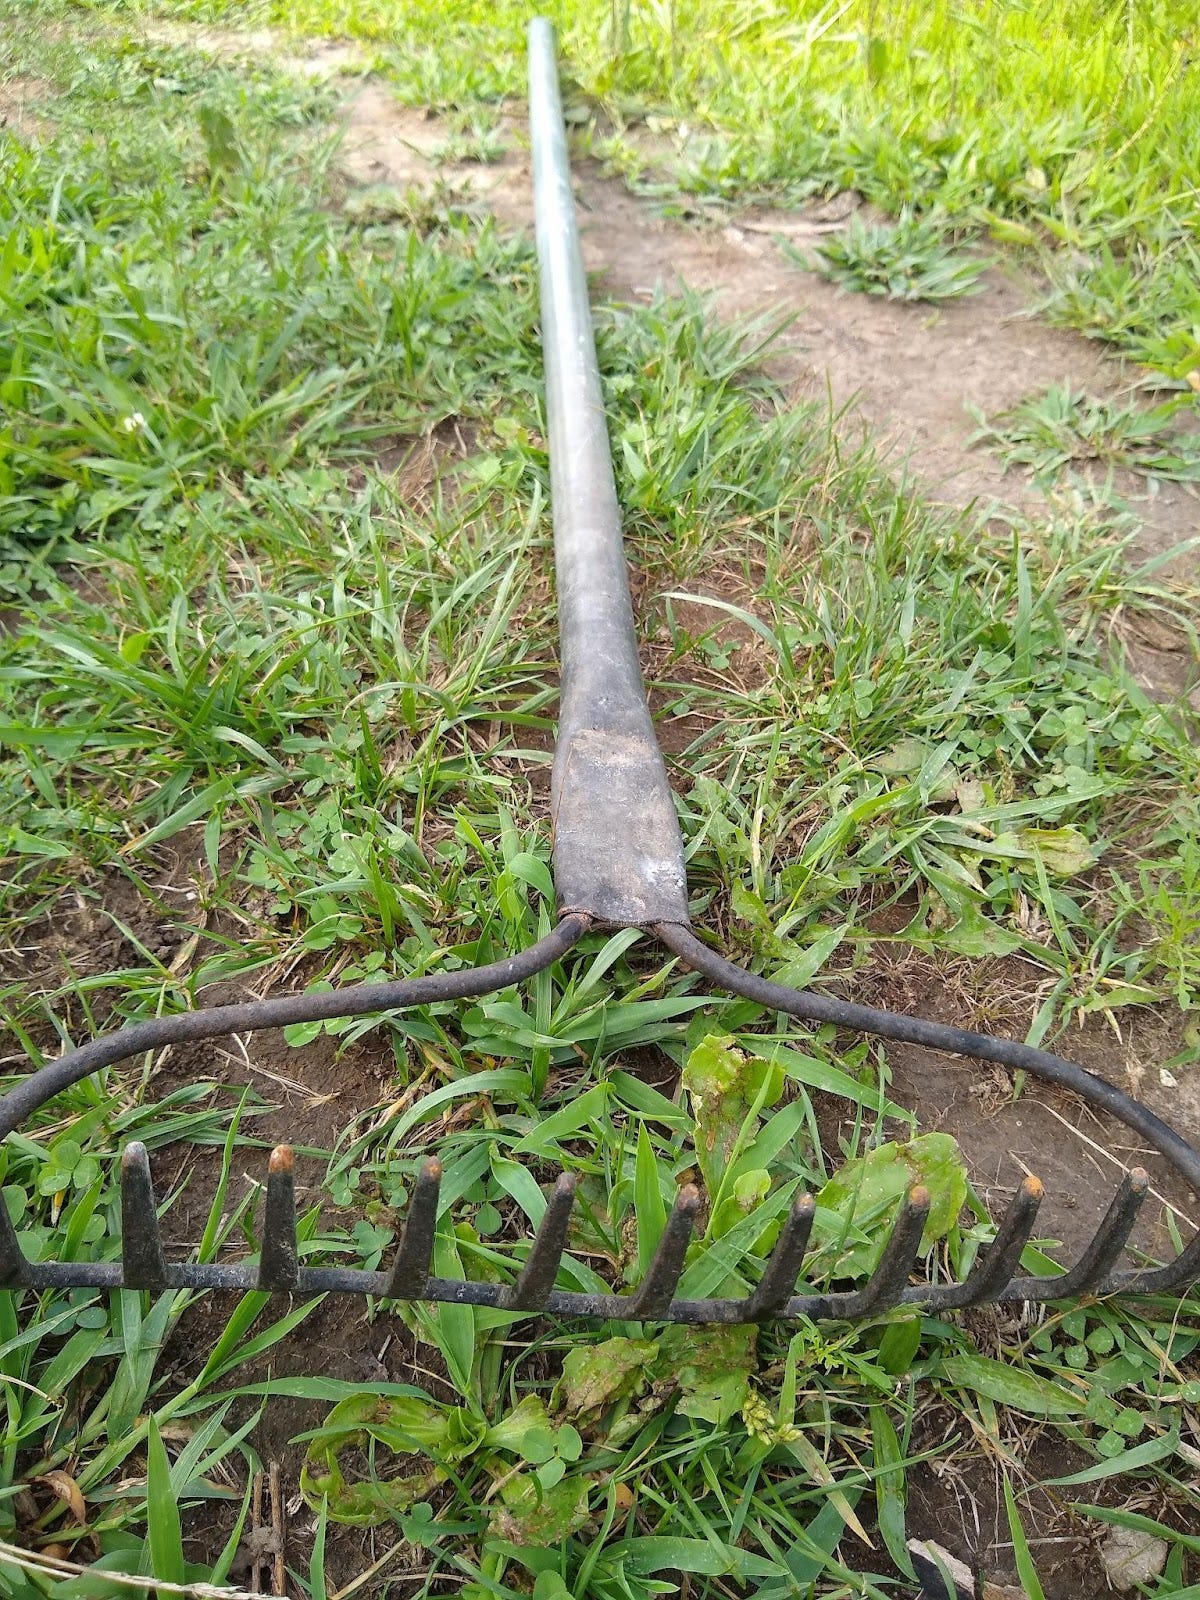
A precise mower with a consistent rhythm is able to lay grass cuttings down in neat windrows. This becomes more challenging in heavy or tangled vegetation, uneven terrain, or when mowing at a harried or variable pace. If the movement of the mower tends more towards hacking rather than slicing or sweeping, stems and leaves will be laid all over the field. A hay rake is key to collecting these far-flung mowings. There are expensive, somewhat delicate, purpose-built hay rakes available from some distributors, and they are possible for the skilled craftsperson to make with wood. For our circumstances, I have found that I prefer a simple hard garden rake, rehandled with a sturdy, steel pipe, although this is obviously a heavier option. Wooden hay rakes, while light and well-designed for their purpose, can be fragile, losing teeth until they turn back into fancy sticks. My steel rake, however, holds up to the challenge of scratching against our rough fields, and can also pull old thatch and even aid in controlled prairie burns. Please note that a leaf rake cannot do this job well at all.
The Pitchfork
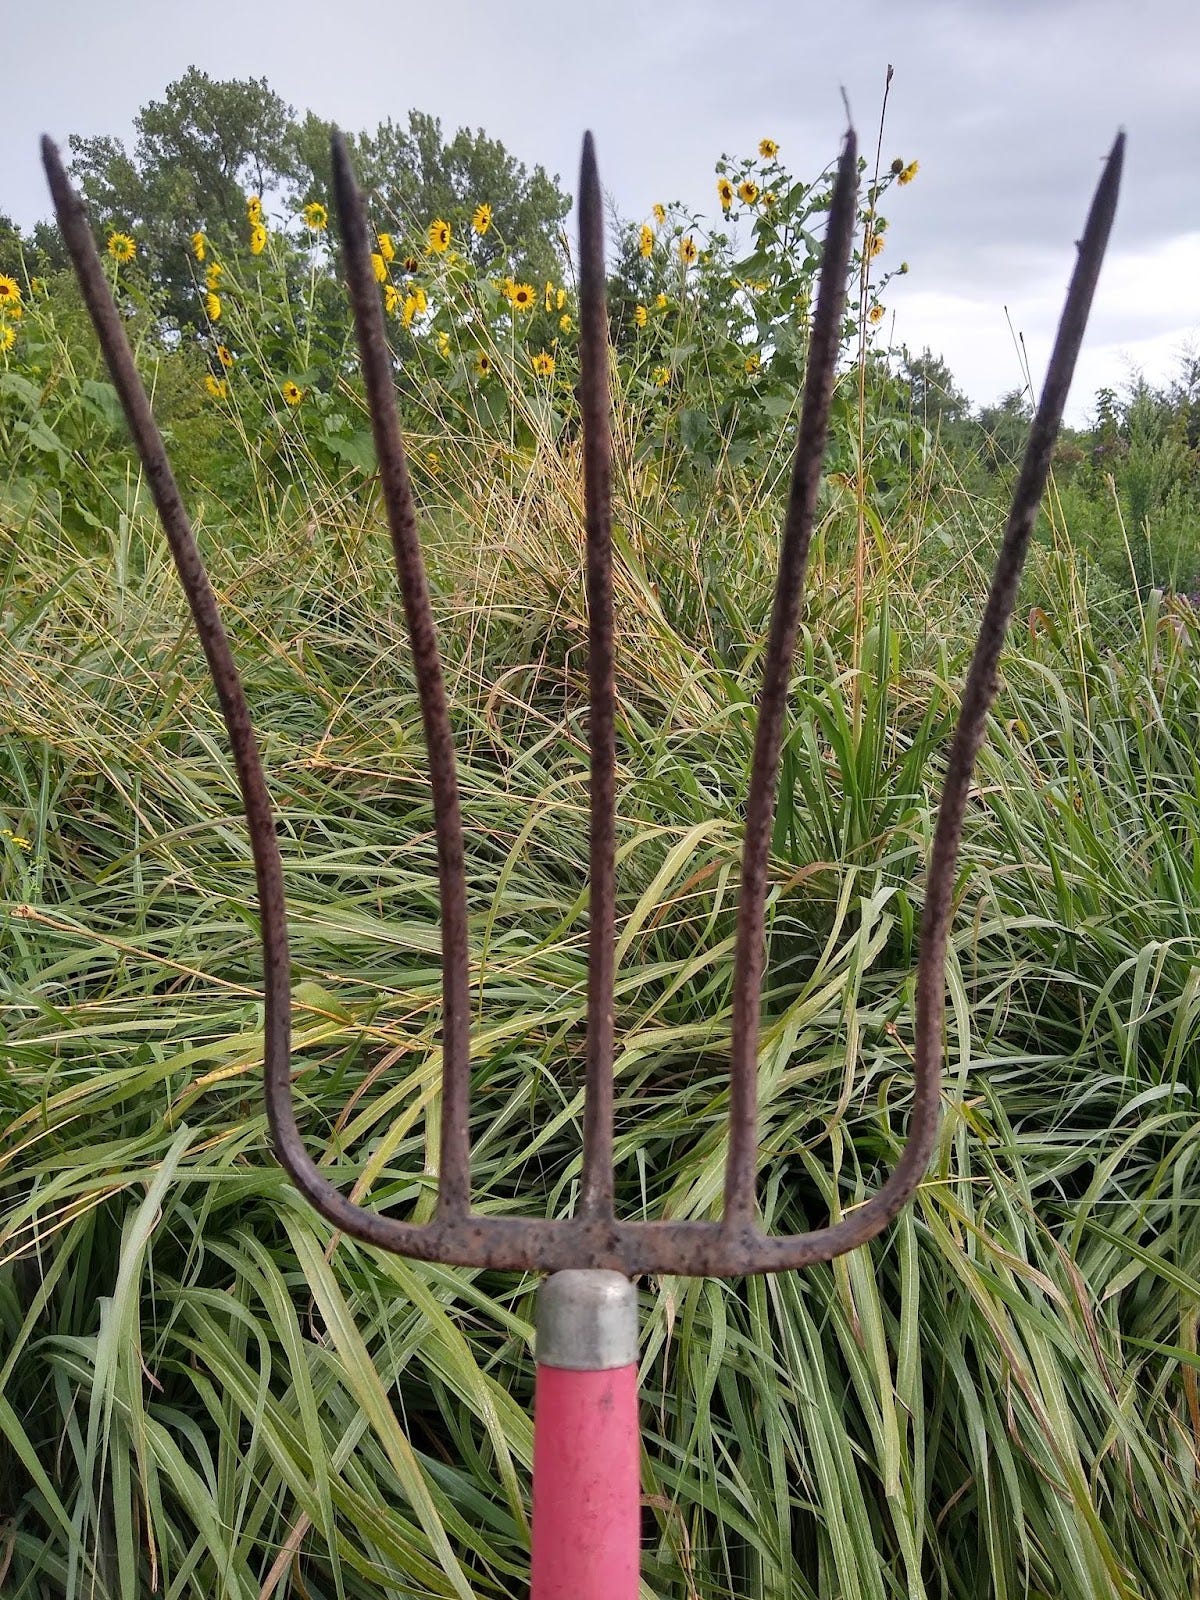
A good pitchfork can be hard to find. They come with as few as two and as many as six tines. The ideal fork has a long handle for leverage and holding piles of hay well out of your face during transport, has thin, sharp tines that aren’t badly bent, and most importantly, is not actually a digging fork.
We use a pitchfork to pick up hay and place it in a cart for transport or directly around trees or in the garden, and a pitchfork is also used for tedding. If your hay is destined for livestock feed, it needs to be thoroughly tedded, or gently fluffed and flipped in the windrow for even drying. If you aren’t trying to maintain the highest nutrition of your hay or mulch, some tedding will help dry it out, making it easier and more pleasant to transport. If you have a pitchfork that you are fond of, and you want to keep it that way, only use it for grass, to keep the tines straight. It’s often easier to pick up windrow cuttings in the direction opposite from which they were mown, due to how the grass lays upon itself after having been cut. And hay that has been left in a pile for about 24 hours is easier to pick up and move than if it didn’t have time to sit. A fun and efficient way to scoop a big pile of hay involves running down the windrow with the fork along the ground. Try it out, but be safe.
The Cart:
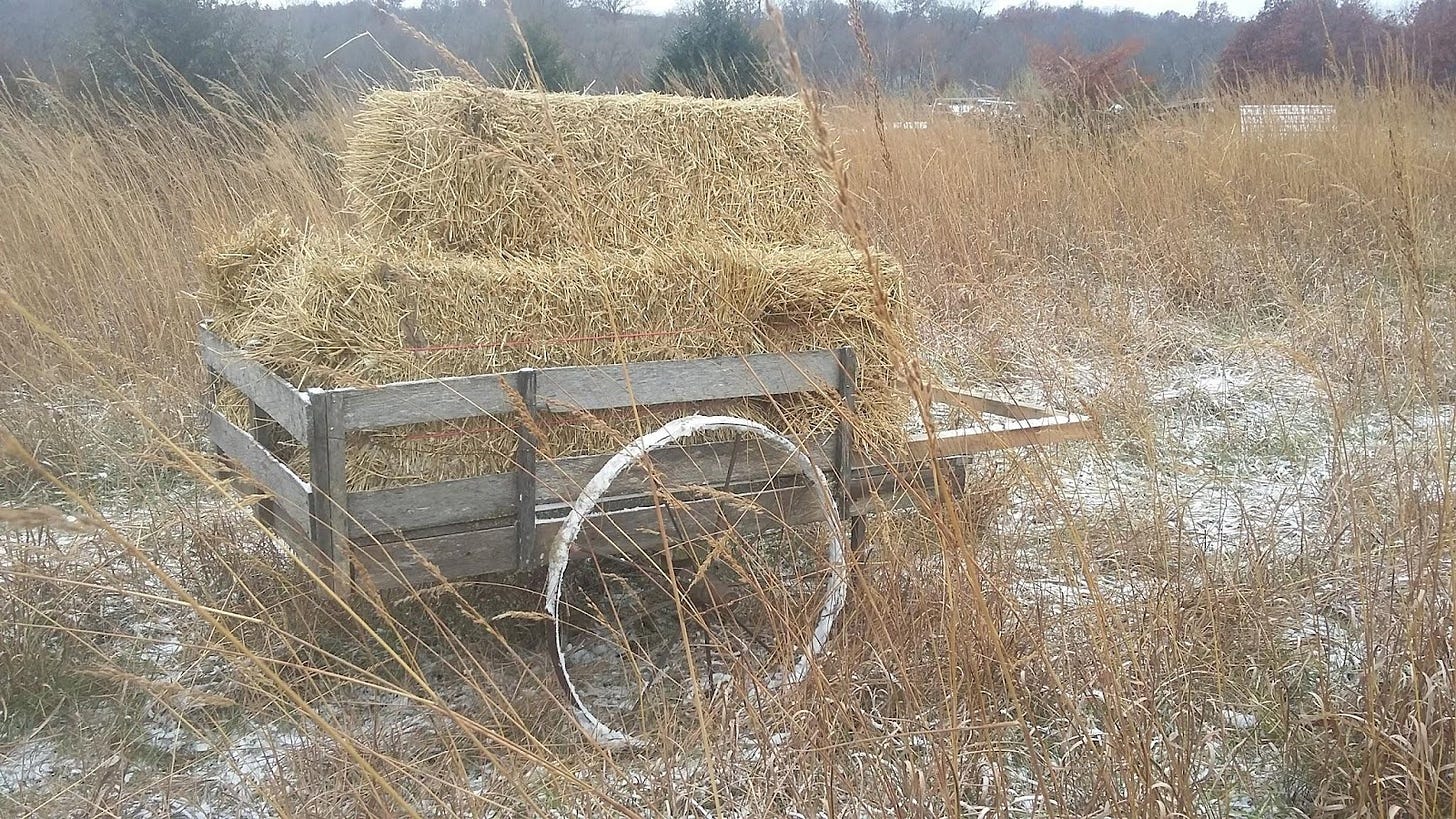
You’ve gotta have a cart. Manufactured garden carts and wheelbarrows work fine for smaller amounts of hay, but piling a great big cart full of the stuff and pinning it in place with a pitchfork is more efficient, functional, and aesthetic. It is important that a home-built cart have some protection alongside the wheels so that loose hay isn’t sucked into the wheel hubs.
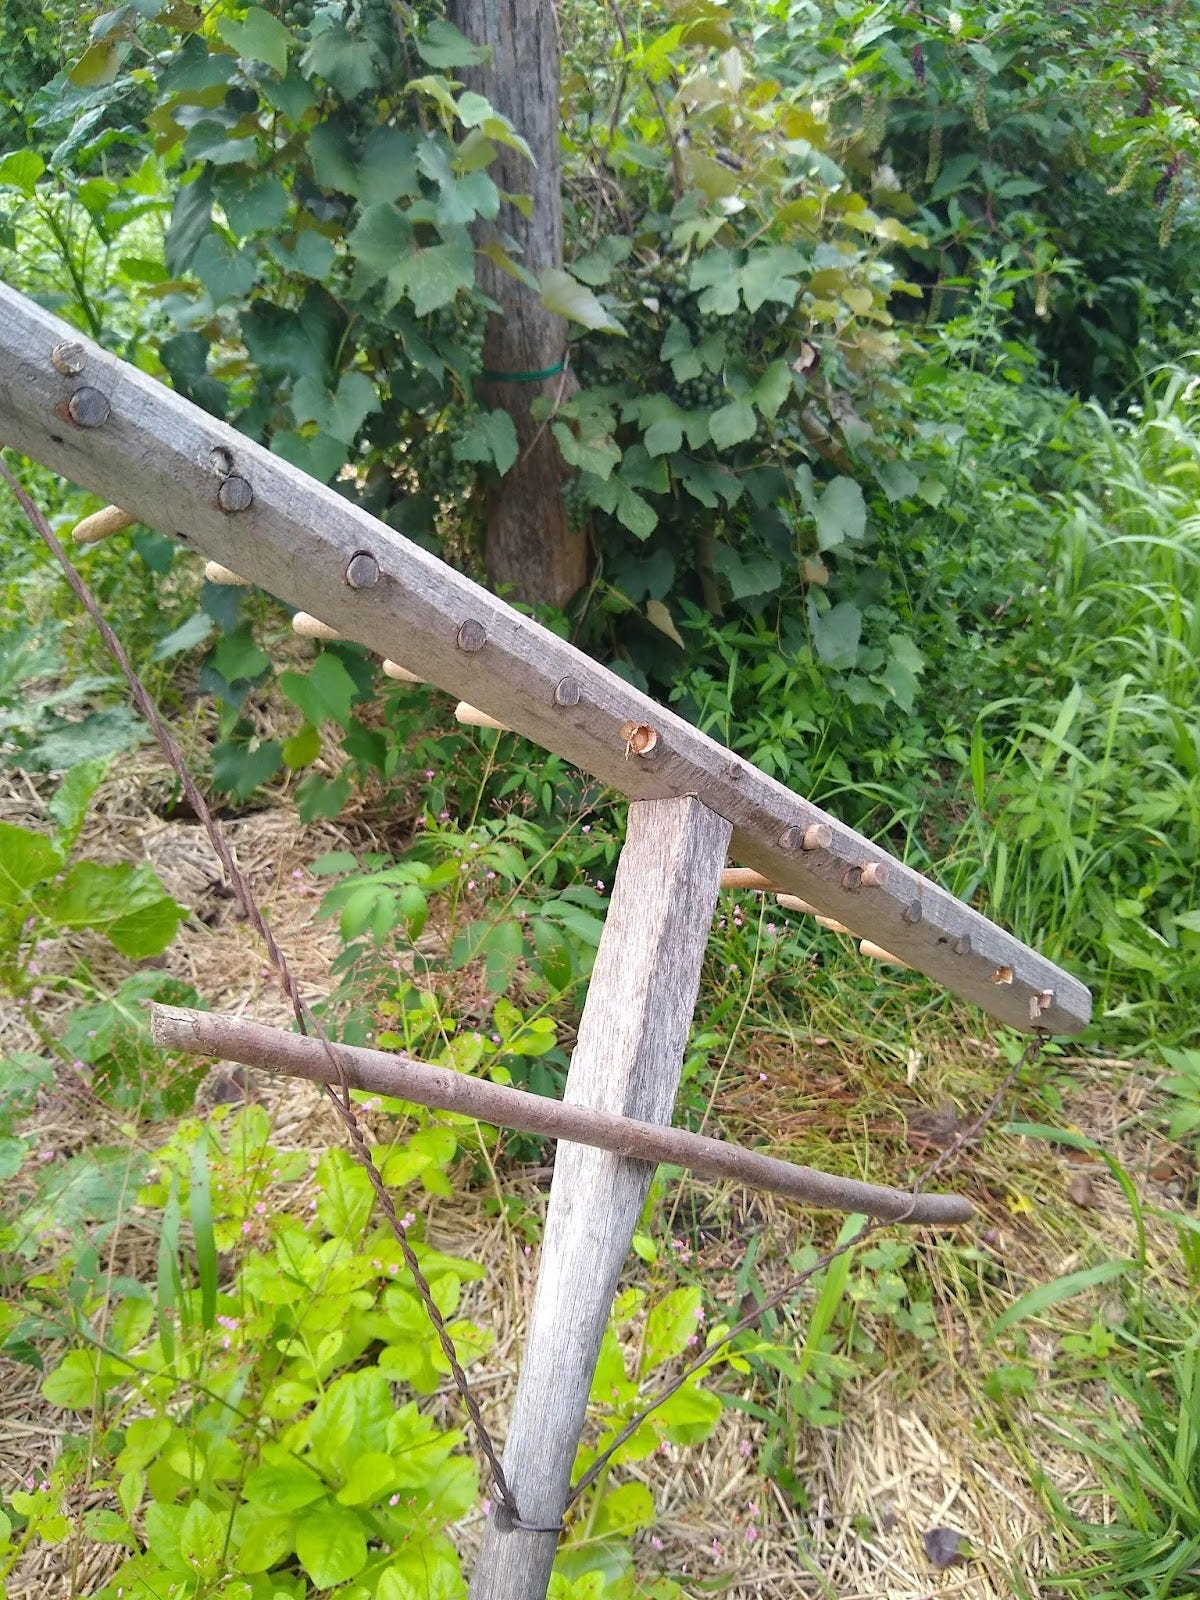
The use of a detachable hay cradle can prove the difference between being able to carry a small load of cuttings in your cart versus increasing your capacity to be able to haul a much larger load of hay. A person of even limited woodworking skills can put together a rectangle frame of boards built to set within the walls of a rectangular cart, perhaps attached to the cart by lashing or slats. Angled holes about as wide as a thumb are drilled into the wood frame maybe 10” apart and then small diameter sticks or bamboo poles or other such dowels of a certain length are inserted into the drilled holes and glued into place, creating a relatively light-weight cradle that attaches to the bed of the cart. A person can weave a few lines of twine or attach wire or wooden horizontal bracing as well if desired, depending on how fancy they want to make it.
Proper clothing:
Speaking of aesthetics, let’s talk fashion. If you are swinging a big, sharp blade, you should wear shoes. I know everyone wants to connect more with their environment and touch grass or whatever, but I implore you. Covering the legs will keep you more comfortable and working longer in high grass and brambles, even if it's hot out, though a linen dress is admittedly nice for shorter, less aggressive vegetation. Top everything off with a big hat to protect you from the sun, and a period-specific flaxen blouse that doubles as a fabric scrap dispenser for loose handles, and you’ll be a regular “hype beast” of the field. Tres chic!
Mowing can be rough on the hands, so a pair of work gloves or even fingerless cycling gloves are nice for those who do not have or want calluses.
Techniques for mowing
Alright, let’s put the blade to grass! There are a few basic principles of how we move our body and use this tool that I’ll outline here, but this list is not a substitute for a mentor to physically mirror and receive feedback from or a bit of practice and patience.
-Technique > Strength: Force can never make up for dull edges, difficult mowing conditions, or poor form. Ultimately, scythe mowing resembles tai chi more than repeatedly doing a hockey slapshot. A mower who uses more force than form in their mowing will be overexerted well before the relaxed, patient, methodical mower and is more likely to ding up their blade. It can be recommended to “lead” with a person’s non-dominant hand to promote an adequately gentle approach, and the general rule is that one does not want to apply more force in their swing than would have a blade bounce off an errant obstruction (rock, brick, thick stem) rather than damage the blade. This is a fine line to walk, and as long as you are certain that no such obstructions exist in the mowing area, you can cautiously apply a bit more force and increased speed when swinging the scythe.
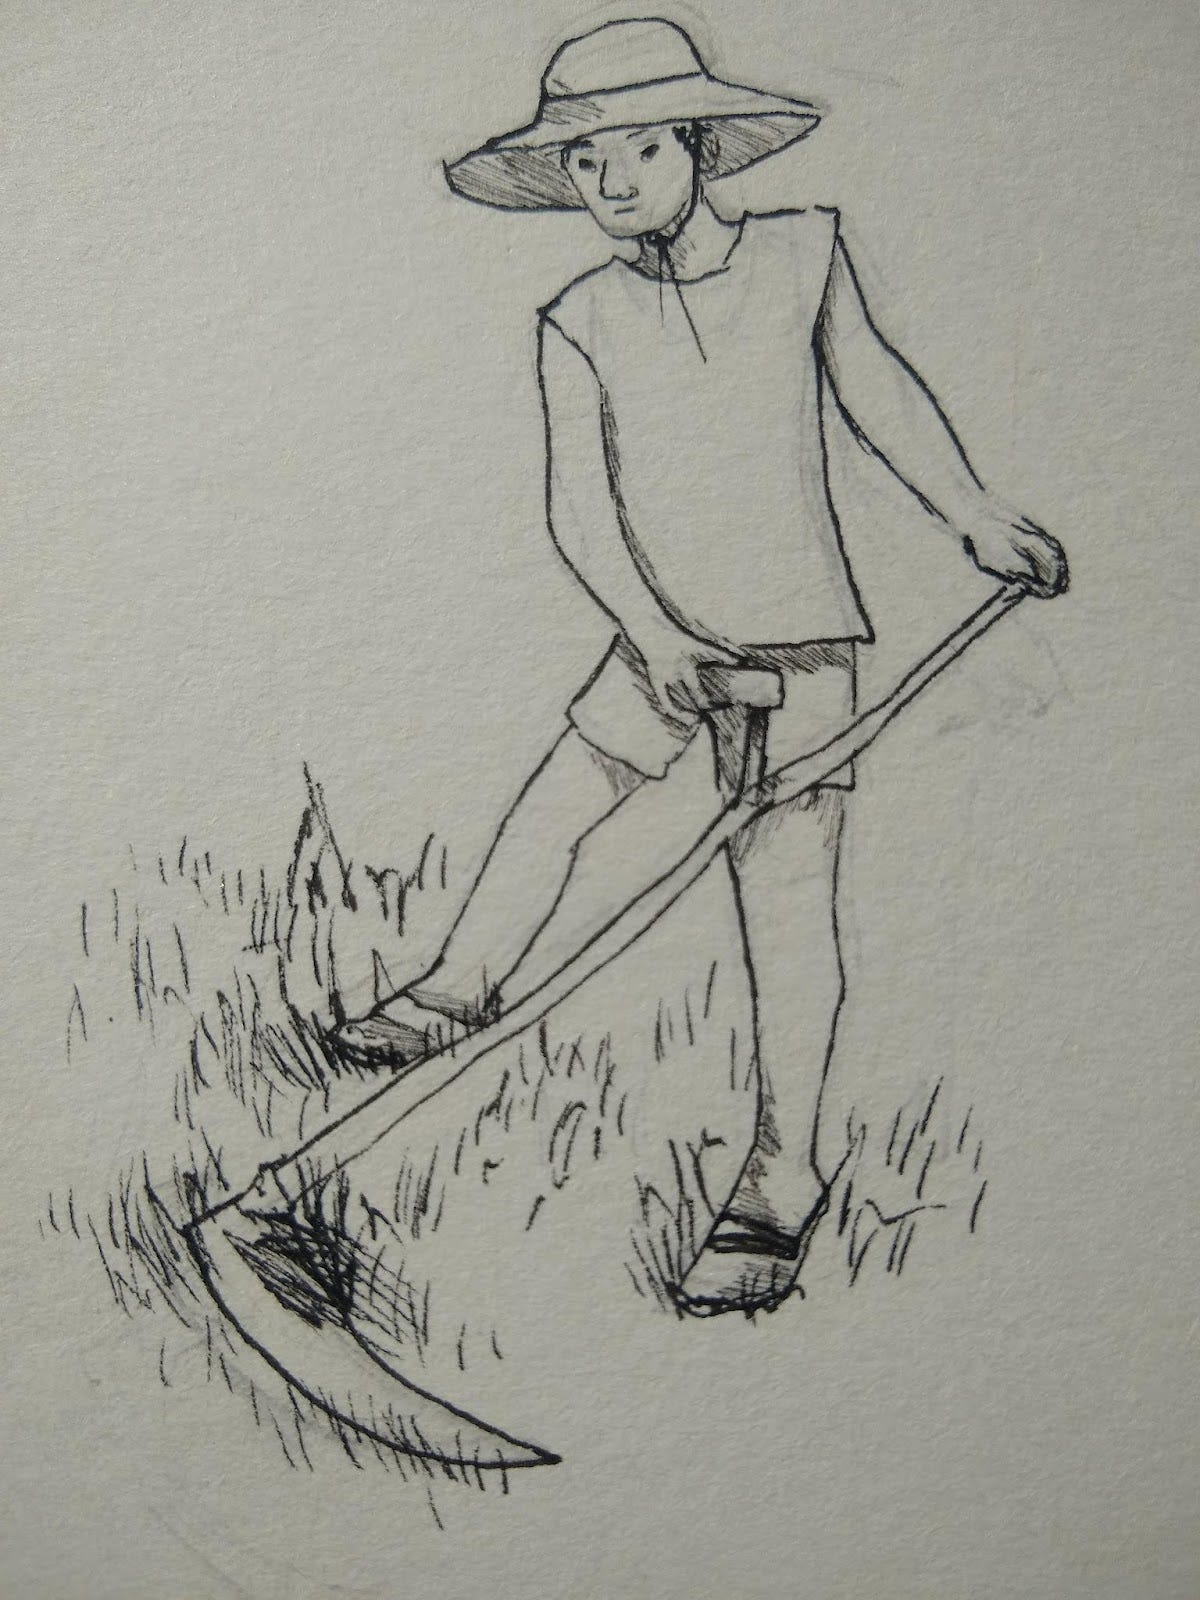
-Keep the blade low and parallel with the ground: This should really be the first “rule”. And yes, there are occasions in which you can break the rule. But in general, we want the blade edge to lay flat, or tilt slightly up, on the landscape and glide along the ground. An edge or point that cuts or sticks into the soil can be dulled or damaged easily, and any movement of the blade in which it interacts with air instead of grass would be an inefficient use of your body. “High-sticking” is a no-no, and ideally the scythe will be swung in a level way so that it cuts evenly down the entire length of the blade rather than only cutting with a section of the blade. After slicing a swath of grass, glide the blade back in place for your next slice without lifting it up. Lifting the blade makes it heavier, and causes mowing to be tiring over time. And running it back over the cut area can help to stand up any blades of grass that were bent over with the prior swing rather than sliced through.
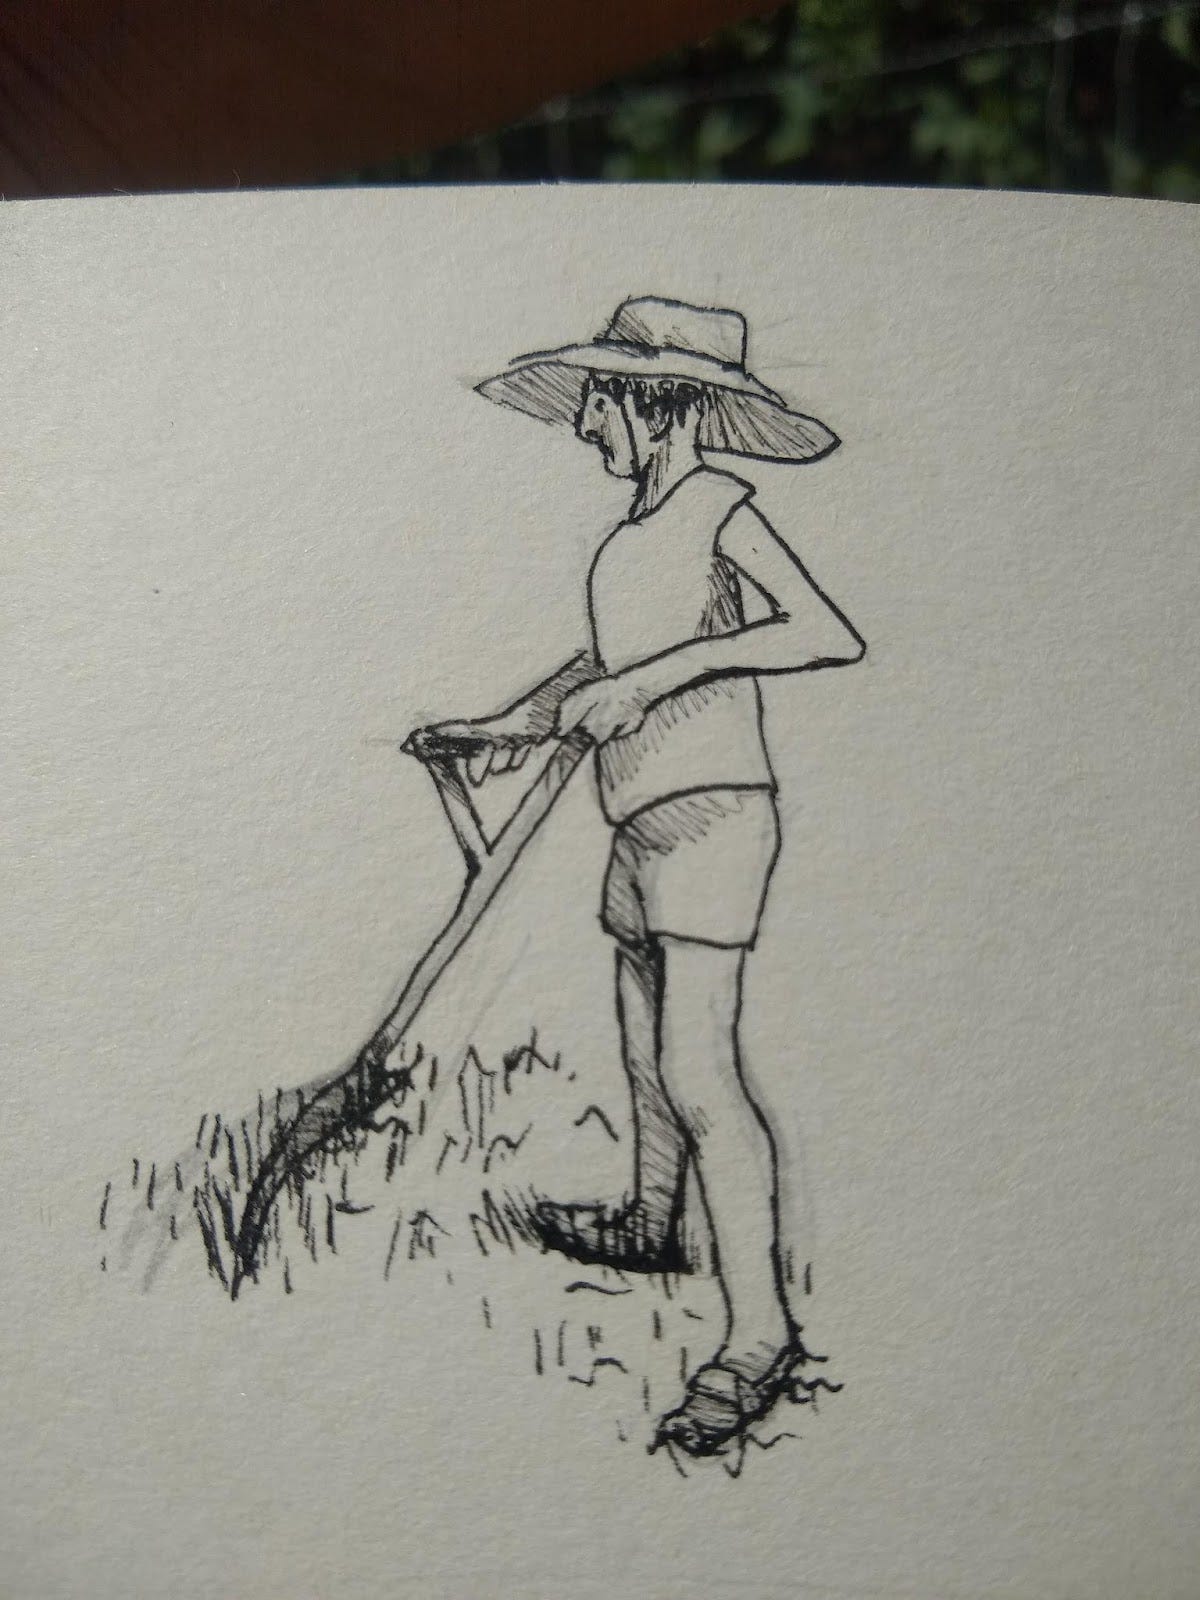
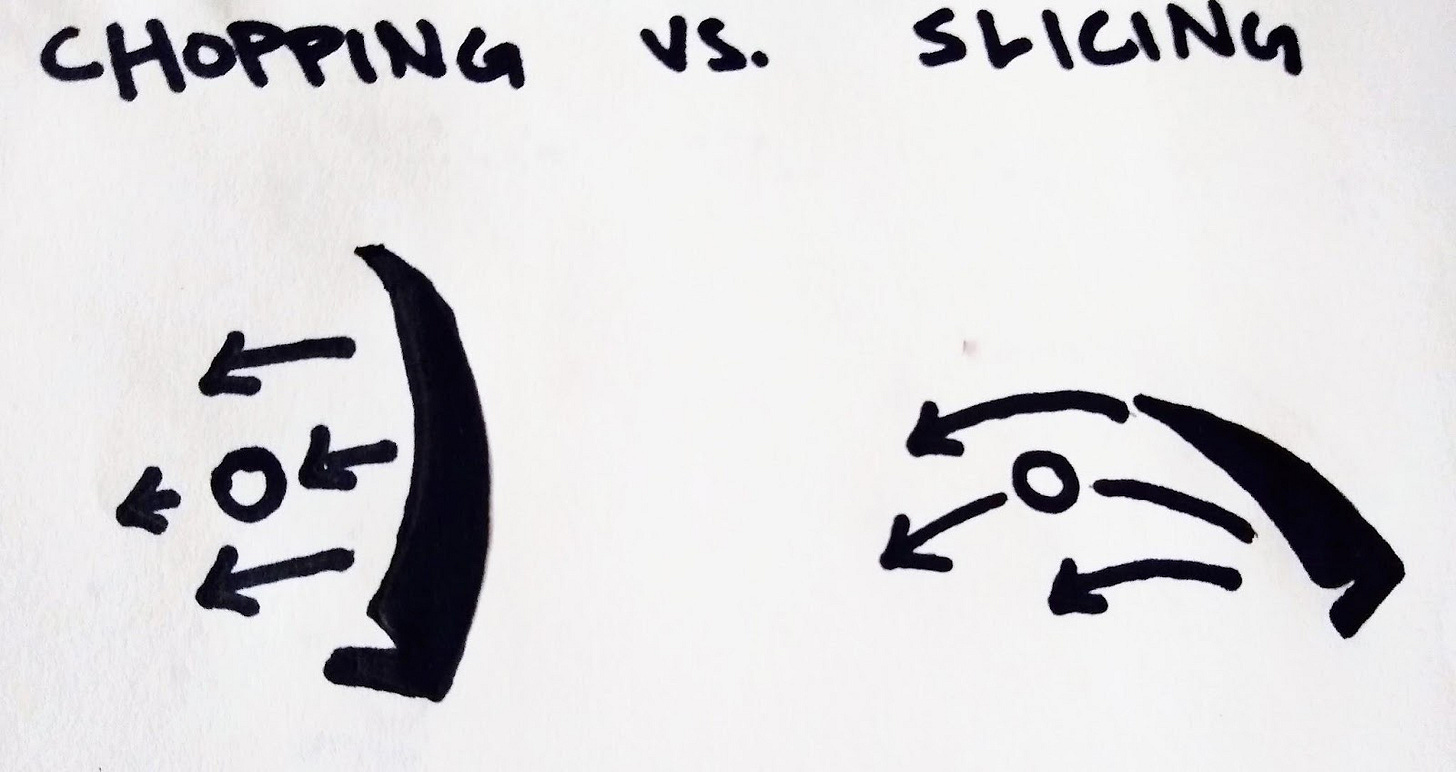
-Adopt a proper stance: Begin with your arms loose and at your sides, your knees slightly bent, and your legs fairly wide. Relax your body as best you can (stretch beforehand if you want to be better than me) and breathe deeply. The wider stance is “standard” for mowing open, unobstructed, moderate to light growth and will allow the mower to cut a broader swath. If the mower is working in thick, tangled vegetation or areas where there are ample obstructions, they might choose to take a narrower stance. In addition to bringing the legs closer together, a mower in this position might need to narrow their arms and shoulders and develop a more angled-up geometry for their scythe. This change in body stance can lead to more of a chopping cut than a sweeping slice. In certain circumstances, in thick brush and weeds, or when attempting to mow small, precise spots like individual plants, chopping (not hacking) can be appropriate, but it will quickly tire the mower out and may leave the edge of the blade more vulnerable to damage in comparison with our broad, semi-circled slicing. A chopping motion is one in which the blade moves sideways, still parallel to the ground. The scythe may be raised slightly higher. A hacking motion can either look like someone raising the blade aloft and chopping downward at the ground (High-sticking it) or starting off at ground level and launching into the air (Golf clubbing). Either way and pardon my French, you gotta cut that shit out.
-Start slow: If I can, I like to begin my morning mowing in a spot where the grass is already short and watch my blade a few times to get the hang of it. I will slowly, gradually enter the area to be mown, inch by inch, or maybe inches by inches. Over time, I can intuit what pace and rhythm make sense for the task at hand and gradually build momentum. But unless I’m in a fairly neat stand of tender grasses that I’m absolutely sure is clear of stumps, stones, clods of dirt, or overgrown T-posts and barbed wire, I limit the intensity of my mowing. At least twice in my time using this tool have I moved with overconfidence and irreparably destroyed blades. It’s a little soul-shattering. The mower who wants to move aggressively or violently across the landscape will have better luck with a machine.
-Move with ease: With a scythe, your body is the machine, and your cardiovascular system the engine. They are arguably more important components to the mowing apparatus than the scythe itself. Treat them with care. The standard movement is not a march forward, it is a torsional, hip-driven, fluid movement. Some people find it comfortable to have the force of the swing originate more with the arms and others will prefer to instead use more strength from the legs and hips to propel the scythe through its arc. It is a combination of movements that can be modified and the proper balance of force will depend on the terrain to be covered, the size and heft of the blade and snath, and the body type of the person doing the mowing. Shift your weight around, relative to the blade, leaning and extending through the movement. Then step forward, one foot at a time for the next swath. It is like a graceful shuffle. Flex your arms easefully, instead of jerking. It’s more yoga than cross-fit. See if you can regulate your breathing somewhat, or at least make note of if you are holding your breath or gasping. Smooth, deep breaths should parallel your movement.
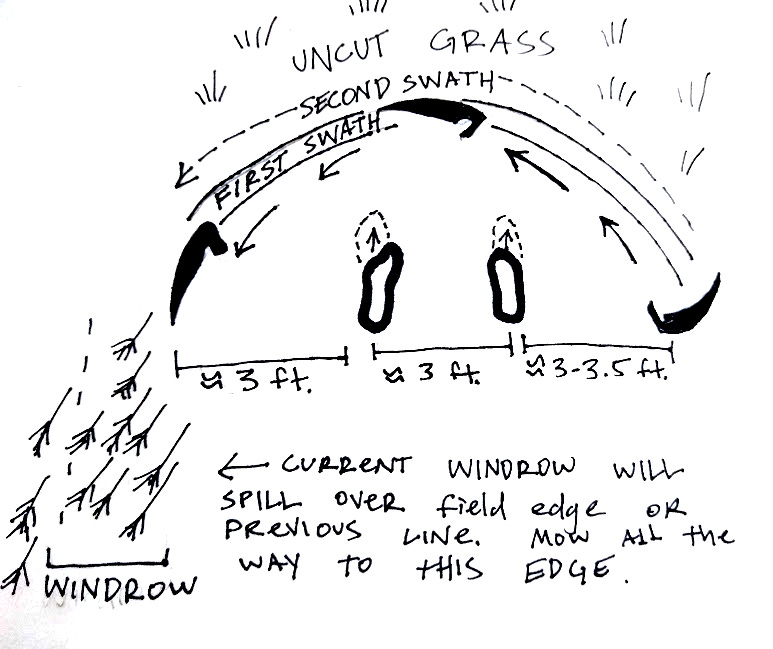
-Take small bites: In open, unobstructed surroundings, the scythe sweeps in a wide arching semi-circle. It may only mow a few inches ahead of the mower per cut, but it may cover a swath of 4-6 feet. The movement of a scythe is much different than the way we progress using a machine mower, and most of our work occurs side-to-side in a semi-circle pattern.
In some very task-specific circumstances, like spot mowing one or two problematic plants within a sward, it may be appropriate to chop, rather than slice, though this is by and large not an efficient use of the scythe.
-Mow in the proper conditions: Unlike with a lawnmower, wet grass cuts more easily when it is wet. Actually, this has more to do with how much more water is in the stems and leaves, which often correlates with the early morning. In the heat of the day, as the dew burns off and plants evaporate moisture, the stems and leaves become dry and taught. Think of poking a deflated balloon versus an inflated one… plump, moisture-filled grasses have more tension on their surface, and the cell walls burst more easily when they make contact with the blade edge. Dry grass is more likely to deflect off of the blade and push away uncut. Even in the hot and dry depths of summer, grass will have more moisture in the stems and leaves after a night, when the plants have an opportunity to recover from sun and heat.
Grasses that have been laid down by wind, trampling, or other reasons can be difficult to mow. Sometimes these areas are best left to recover to an upright position before mowing. Otherwise, approaching them by swinging the blade “with the grain”, that is, in the same direction as the tips of the blown-over grass are pointing and taking small, careful bites, can be helpful.
Thatch, the dead stalks of old grass, can make for challenging mowing. If you haven’t sold your brush hog yet, it may be time to dust is off, as a rotary blade does do a good job of chopping this thatch up as a nice layer of fresh organic matter. But there are plenty of non-machine ways to handle thatch. A ditch blade is well-suited to the work, but it will be tiring nonetheless. In my experience, thatch cuts more easily if it’s coated in ice, after a freezing rain in late fall or early winter. A sturdy rake can be used to pull thatch in the dormant season, so long as care is taken to be gentle to the soil surface. The most effective way to handle thatch in some circumstances may be a controlled burn. We were able to get controlled burn plans for several fields here by working with our local NRCS office, which carries specific guidelines for timing and conditions for safe and effective burns. I have a bit of an anti-authoritarian streak, but please, if you are considering moving forward with a controlled burn, seek the expertise of professionals through your local NRCS and/or fire department.
-Gain momentum, maintain concentration: While digging the zen-like flow of cutting grass, hearing the bristling slice of a hundred severed stems, zoning into the rhythm, and feeling the landscape scythe-swipe by scythe-swipe, if it’s going well, you may be tempted to open it up a bit. Widen your cut, and increase your speed and momentum. Do so with respectful consideration of your surroundings. It can be easy to become entranced by the work, or lost in thought. As a person who occasionally broods about things like money, interpersonal dynamics, climate catastrophe, societal collapse, and general low-level doom, I sometimes find it necessary to limit these kinds of thoughts and inner stories while mowing, otherwise I’ll lose focus. As much as I enjoy listening to music, or even the Poor Prole’s Almanac during other rote tasks, de-stimulating myself when I’m wielding this powerful tool is helpful for narrowing my focus and maintaining concentration. For stimulation, a morning in the field can provide birdsong, land-body connection, and perhaps a meditation on the labor and efforts of our forebears. However you choose to do it, focus is a key element. Know when to dial it back and when to put it into gear.
-Take a break: Is your blade dull? Are you thirsty? Tired? Stiff neck? Blisters forming? Gotta pee? Take care of your body and your business. Tired, distracted mowing with a dull edge doesn’t make sense, no matter how “close to finished” you may be. Hydrate, don’t die-drate. And keep it sharp: As we said before, an edge should be honed with a whetstone one minute for every ten minutes in the field, or some people as a rule of thumb will stop and hone after every hundred strokes. Sometimes that might be excessive, but usually not. Take the opportunity to recalibrate. If you’re mowing in open sun, find a spot in the shade of a tree to set your water, snacks, whetstones, and whatnot. If you don’t have a tree, plant one, and feed it plenty of grass mulch.
-Quit: At some point, you’ve got to stop. Heat stroke is real, and becoming more common. Repetitive motion-based injuries are a real threat as well. And it is not always easy to maintain a relaxed and healthy posture when scything under certain conditions. I have mowed for as long as four hours all at once and regretted it. Listen to your own body, and if it’s been hot and sweaty work, maybe replace your electrolytes with a little switchel, or “haymaker’s punch”. The grass will still exist tomorrow, or the next day, or the day after that.
Task-specific mowing
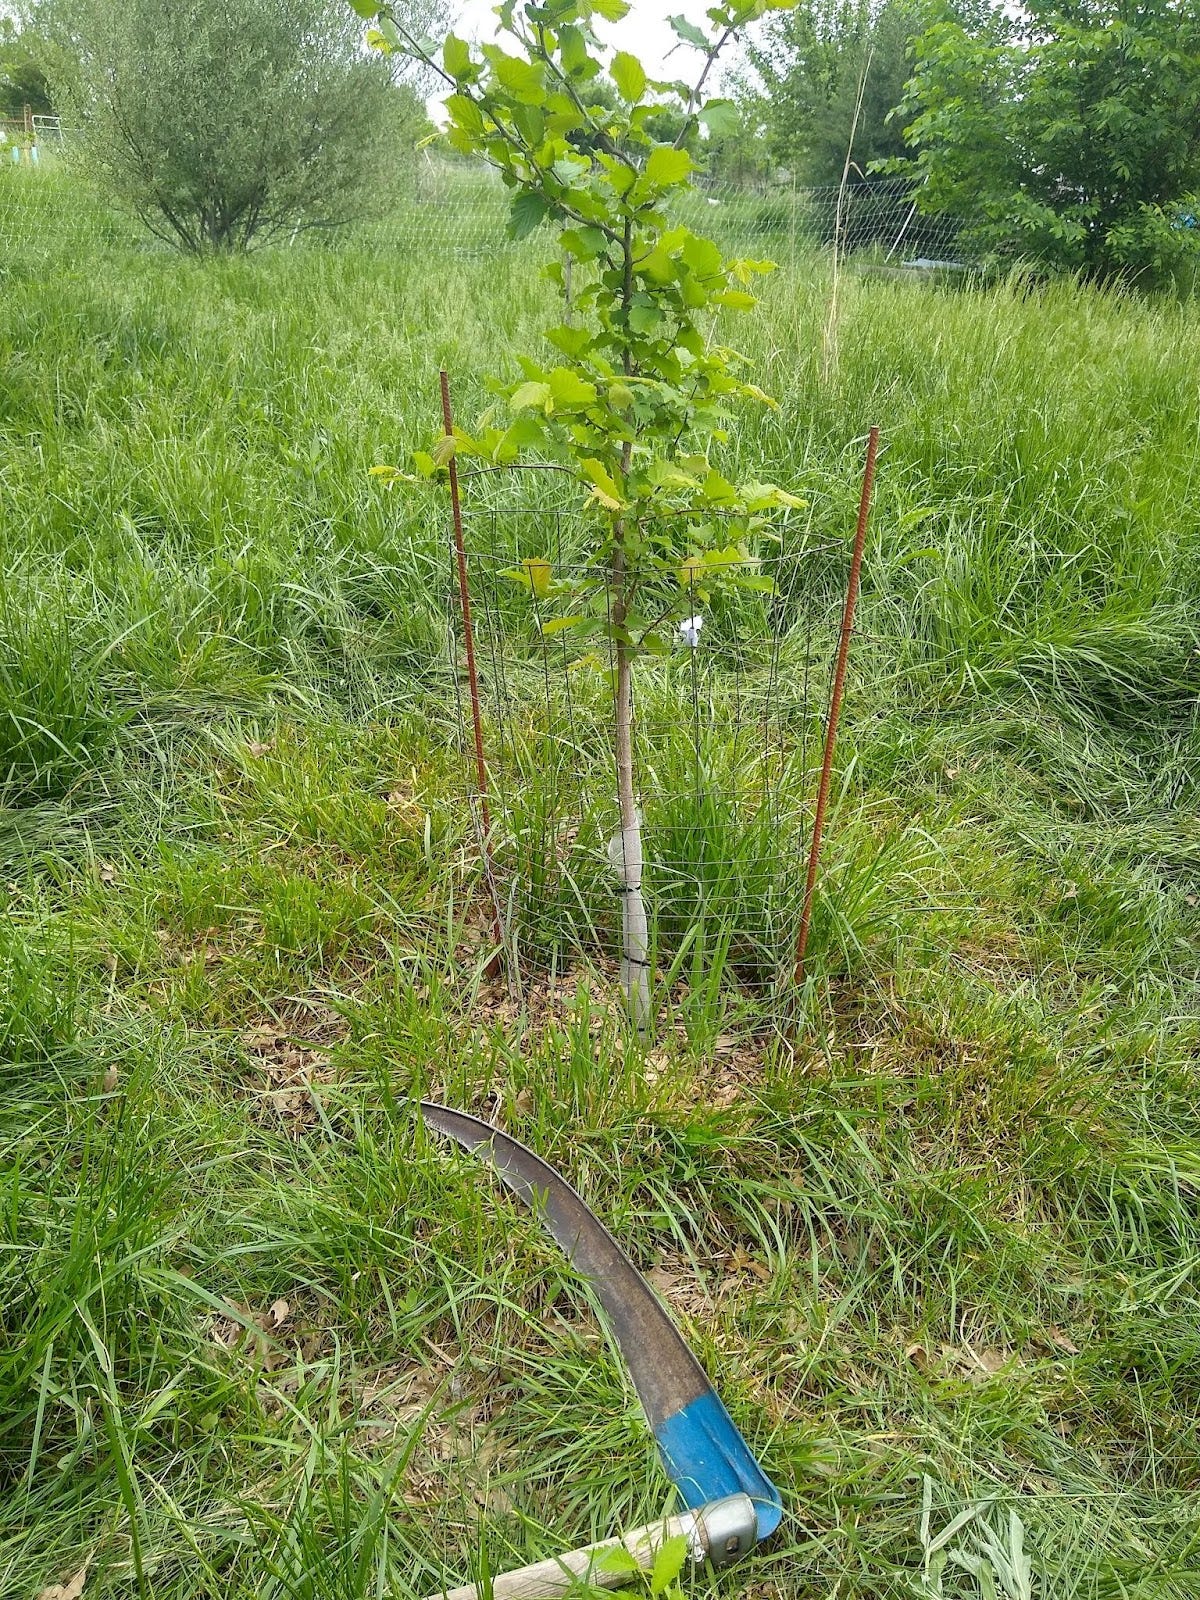
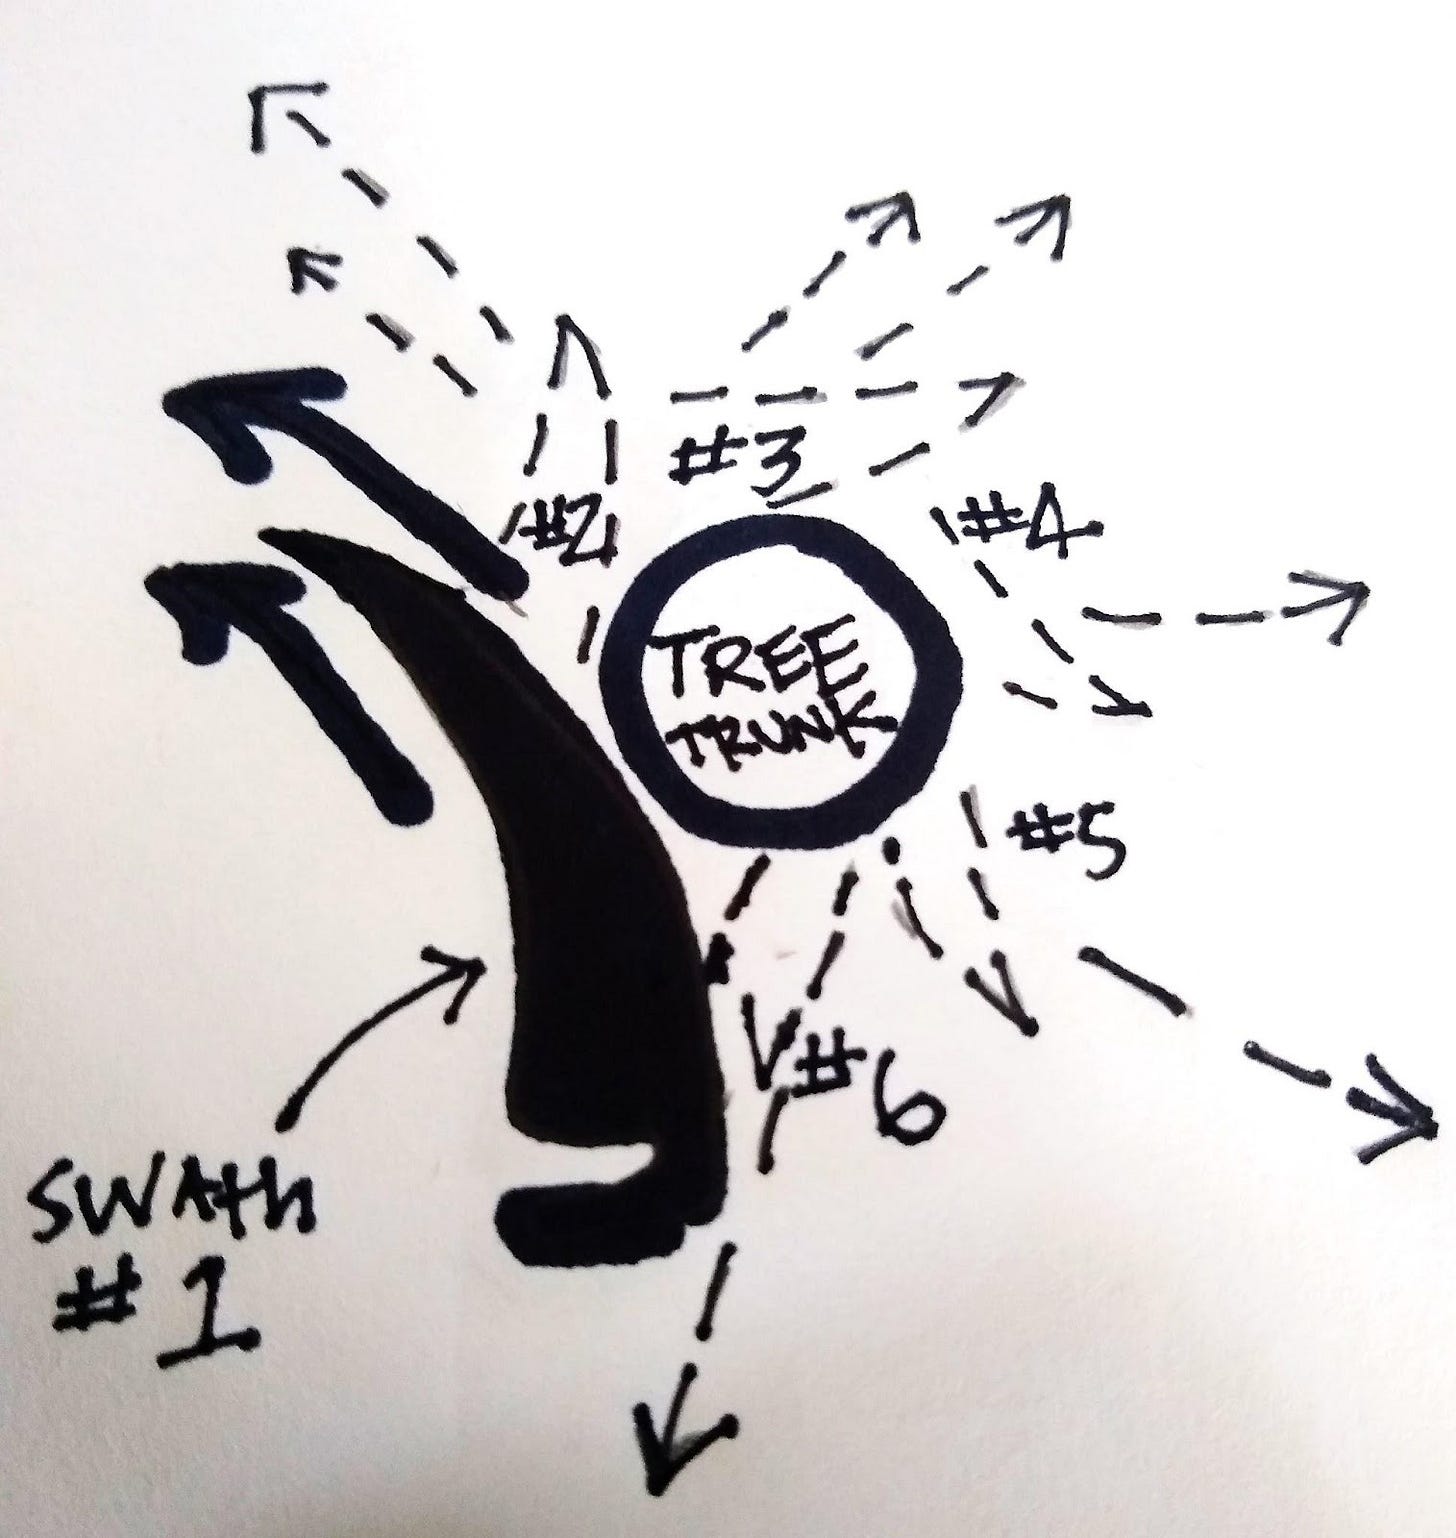
-Mowing around trees and small obstructions: The sweep of the blade is least powerful in its first few inches of movement before it gains momentum. To avoid damaging the blade, or an obstruction, we want the momentum of the scythe swipe to pick up well past the object. In an orchard setting, this may look like encircling a tree with your scythe and consistently moving clockwise (if right-handed) slicing away from the tree. The same holds true for a rock, a post, a patch of native wildflowers, or a nest of turkey eggs. Actually, if you come across a nest of any kind, give it a real wide berth, they’re hidden in the tall grass for a reason.
-Mowing along fencing
Fencing, particularly wire fencing, can pose a challenge to the scythe mower. In some cases, wooden boards tacked along the bottom of fencing can provide some insurance for both the tool and the infrastructure, and may help to limit grasses growing into the wire and spreading into cultivated areas. While comfrey may not be the panacea that permaculture enthusiasts often claim, it does provide an easy-to-mow buffer along permanent fencing that can shade out tricky-to-cut grasses. Otherwise, approach fence mowing similarly to mowing around trees, using slow, short strokes with a sharp blade. Softly line your scythe up against the fence with the point facing away from the wire and rely on the sharpness of the edge to do more work than your force. Raking cut grass back along the bottom of the fence as mulch may help to slow problematic growth here. A kama or sickle can be used for detailed work. Admittedly, a string trimmer or weed whacker can perform this particular task more quickly, albeit at a higher environmental (microplastics) and resource cost, and at much louder decibels of sound.
-Mowing paths
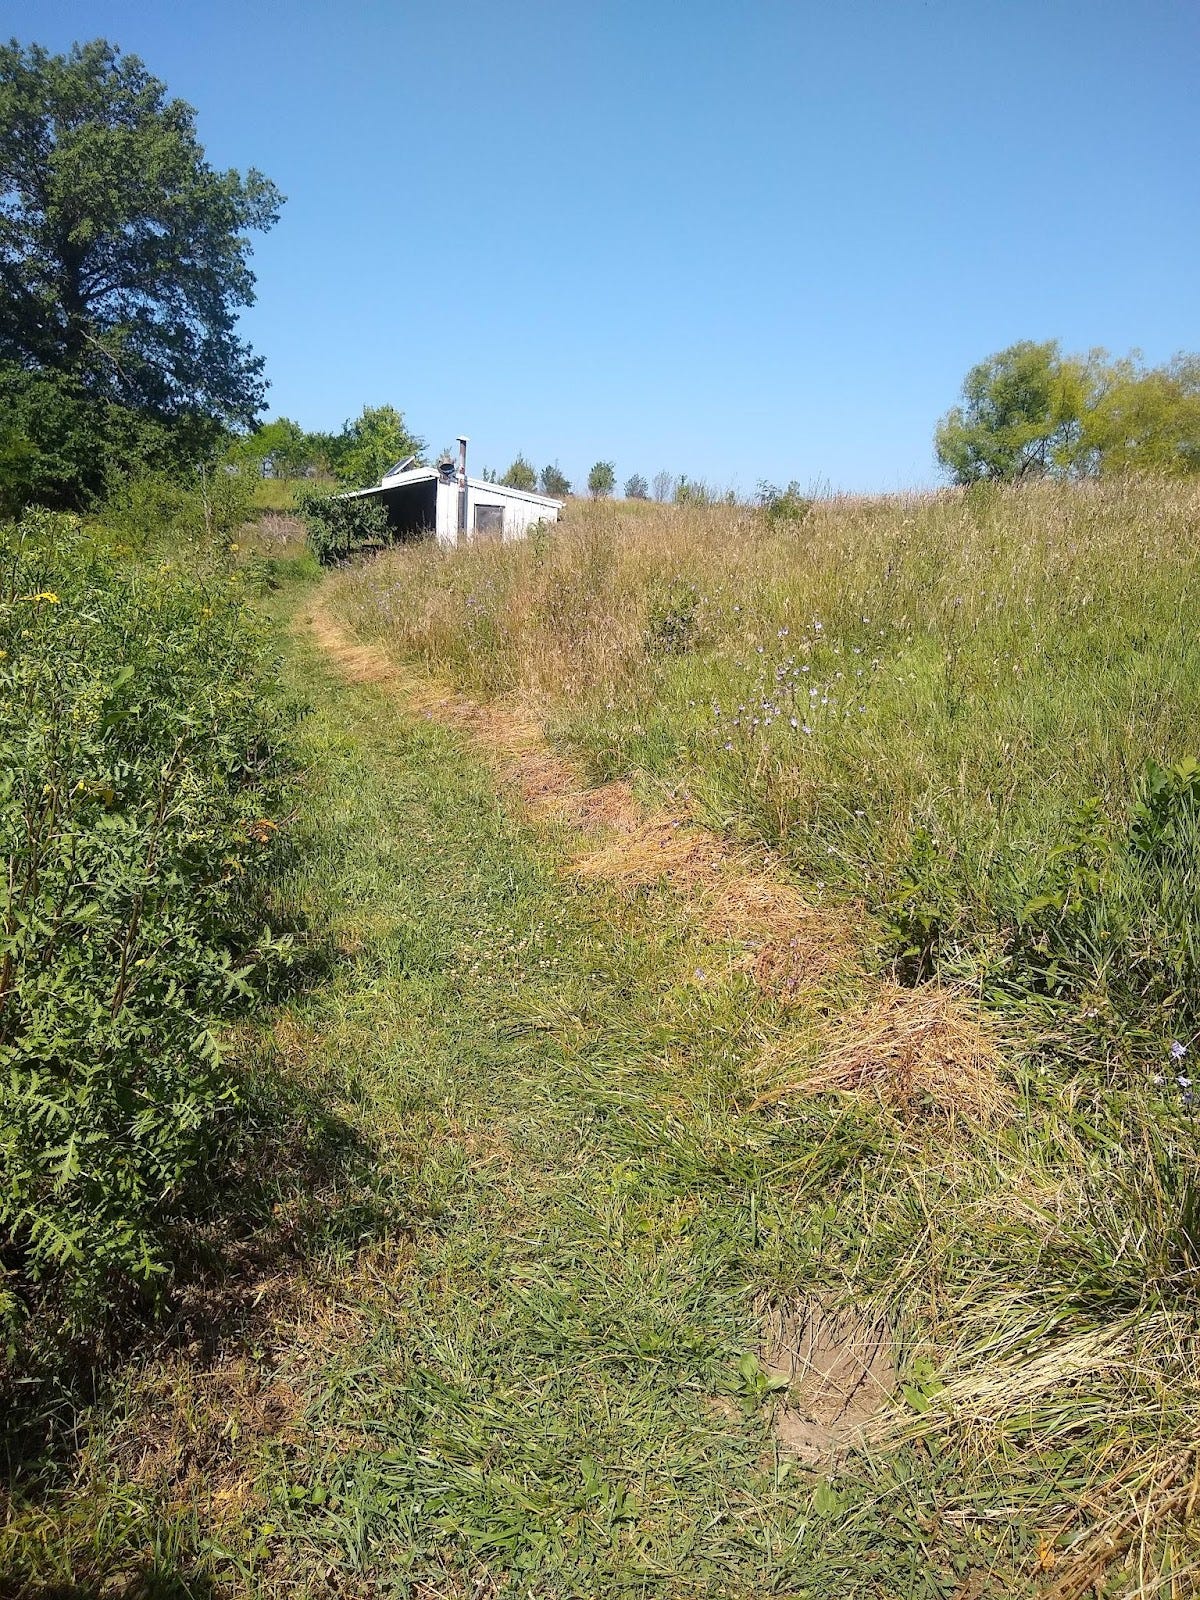
Pathways, whether they be for portable electric fencing or human travel are an excellent job for the scythe and a great task for beginning to get comfortable with its use. Fairly wide lanes can be mowed by laying down vegetation in two passes, leaving cut grass off to the side in either direction. A single pass is usually wide enough for people, medium-sized carts, and livestock. Mowing the “two pass” type lanes and pathways allows the mower to work both up and downhill, with and against the lay of the grass, offering an informative comparison of approaches in real-time. If a person is wishing to remove grass cuttings from the path rather than leaving them lying at the edges, it can prove useful to alter the angle at which the mower travels down the path. By stepping in a more sideways motion down the path, rather than a typical forward motion, the mower can create a windrow of cuttings that rest within the lane of cut grass that has already been mown. Doing so makes the clippings a breeze to pick up, as opposed to the arduous task of raking or forking cuttings that lay tangled in the tall grass adjacent to the path as would happen with a mower traveling in a purely forward direction.
-Seeding and mulching bare spots with the scythe
As a pasture-based livestock farm, we sometimes end up with bare patches after an area has hosted animals. The best policy is to improve our management to minimize the occurrence of damaged spots on the land, and nonetheless, it will happen from time to time. If grasses are allowed to mature surrounding a denuded area, the scythe mower can take the opposite approach as mowing around obstructions and move counter-clockwise (if right-handed) around the bare spots, knocking ripe seeds and stemmy growth onto the area, to increase the possibility of reestablishing vegetation in the bare spot.
-Mowing in wooded areas
Scythe mowing in the woods can help in countering invasive woody growth, providing paths for silvopasture fencing, or giving preference to selected tree seedlings in the absence of natural disturbances, all with the agility and lightness that cannot be provided with a machine. A short bush blade, along with loppers, a pruning saw, or even an ax are good for forested work. An experienced scythe-person can even trim smaller diameter stems and branches with a swift upward slice, but it takes time to know what your blade can handle.
On that note, much of the land we steward here has some remaining stumps out there in the fields. They are quickly hidden by tall grass and forbs and can be detrimental to our tool edges. I like to always keep around a bow saw, ax, or hatchet head mounted on a longer handle to cut stumps well below the soil surface as I encounter them. If there’s a chance that you’re mowing an area that has hosted trees or brush in the last half century, I recommend doing the same.
Hanging it up
Once you’ve finished mowing for the day, wipe the blade clean of moisture with a tuft of grass and hang it safely, out of the elements and where it won’t be stepped on. I have had at least one blade swing at my face at full force after accidentally stepping on the handle, proving that Looney Tunes physics do sometimes occur in real life. The snath should be oiled from time to time, and the set screws on the ring occasionally be checked and tightened.
The skill it takes to use a scythe doesn’t develop instantly, even if you’ve managed to make it through this document. I often find myself describing its use as intuitive, but it’s important to remember that intuition isn’t some magical gift that only a few folks have; it’s merely the difficult-to-articulate body memory of work we’ve performed over and over again. It’s like riding a bike.
The scythe has many supporters in this day and age. Some of them are traditional skills purists or even demagogues. But most of us just see the value in slowing down and readjusting our impact to a more perceptible, and perhaps sustainable pace. And there are still people all over the globe using this tool because it is what’s available to them. I hope this document has given you the encouragement to try your hand at mowing with a scythe, along with enough information to know what to expect. And this is only an introductory primer. I must recommend The Big Book of The Scythe, by Peter Vido, for those wanting to advance their understanding of this tool after they’ve felt comfortable and familiar with the basic principles presented here. It’s a thorough read, written by one of the true scholars of the tool, but admittedly not an easeful introduction to the technology.
I learned the use of the scythe from a few local experts in my own community, and there isn’t any substitution for sharing skills in real life. I am very privileged to have had access to such wisdom in person, and I recognize the challenge of finding your own local blade wizard. This is a major reason why I think the work of bringing this tool back from the brink of triviality is so important. I hope this document can help to create more hubs for knowledge sharing. If it spawns even a dozen new enthusiasts in North America, and those people go on to learn, build intuition, and share with others, it’ll have been worth the effort. Small and slow labor often is.
If you enjoyed this piece, go check out part 1 here and tune into the Poor Proles Almanac episode on Scything with Benjamin Brownlow, Episode 177 here.




Thorough essay, good work. Great you mentioned taking a break and knowing when to call it a day. The times I’ve damaged tools and damaged myself have all been when I’m tired, distracted and overworked. To do lists aren’t meant to ever be finished I think (the world might break or something bad like that) so knowing when to call it a day is a good skill.
This is something I wrote about my scything experience a while back (sorry to self promote haha):
https://open.substack.com/pub/leonsteber/p/kiss-my-grass?
Have you read Paul Kingsnorth’s essay about the scythe?
Sensacional!!! Além do seu conhecimento, o dom em ensinar, com detalhes fundamentais, os totalmente leigos e interessados em aprender. Muitissimo obrigada!!! Um ótimo sucesso e felicidades a você!