Prepping for Pastures: A Beginner's Guide to Sustainable Grazing
Learn everything about grazing in order to know you won't be able to use it
Generally, when I talk to folks about things ecosystem restoration and agroecology, integrating trees appropriately isn’t a hard sell. Even adding some berries seems to not be a significant challenge for most folks. However, when we get to the discussion of incorporating animals into the process, it seems like the reality of how complicated ecosystems truly are gets a little too real. There is a fear of responsibility when it comes to, say, a chicken that doesn’t exist with trees or bushes. Folks can get nervous because it’s something you can’t kinda hide like having a chestnut tree planted in your backyard— people will hear a chicken or duck.
That said, there are significant benefits to managing edible landscaping with animals. With the right management techniques, having some animals on your property can be less work than having some fruit trees. The key is proper management— and I’ll use chickens as an example. If you talk with many folks with chickens, they’ll tell you about how they’re not too much work, but you have to watch for parasites and will recommend a good book for chicken health, and what to watch for when it comes to their feet, mites, and so on. Those people generally keep their chickens in a coop that doesn’t move, and those chickens spend their time in the same run, all day, and live almost solely off of feed, with the occasional treats mixed in, stuck in their own filth until it gets changed again. Just like our fruit trees, we have to try and balance the benefits of restoring these species to the landscape in a way that’s as reflective of their wild condition as possible, within the context of their domesticity. Every animal we keep for food, whether eggs, dairy, or as a meat, is a natural grazer, so let’s talk grazing management.
I know, you might not even have a dog, nevermind a goat. And that’s fine. But maybe you’re thinking about it. It’s on that list of, “maybe in a few years, when I’ve got time and space” that seems to also be in just a few years. I get it, it’s scary if it’s not something you grew up with. The first step in becoming more comfortable with the idea of having livestock is understanding how and why livestock do what they do, and what you can do as a person with livestock to help improve the landscape, not detract from it.
If we think back to our soils episodes, we talked a lot about the ultimate success of any ecological system is dependent on plants being able to absorb sunlight into energy that can be stored in the plants themselves and the soil. We talked a bit about different grazing systems pretty quickly and highlighted how by mimicking nature, doing intensive grazing, we are able to maximize plant growth, which ultimately maximizes the ability of the land to host animals.
But first, we should take a quick step back to talk about some basic terms that will help us continue this dialogue. Two terms that sound interchangeable, but are very important to know distinctly for our purposes is stocking rate and stock density. Stocking rate is how many animals can graze in a particular area for an extended period of time, say, 10 cows on 10 acres would be 1 cow per acre, while stock density is the amount of animals present at a particular time in a specific area, usually an area that’s fenced off called a paddock. Typically, animals are in paddocks for short periods of time, and as we discussed in the second soil episode that the usage of paddocks can significantly impact the land’s ability to sustain more animals.
Before you start building out your grazing area, there’s some pretty basic questions you might want to ask yourself. Realistically, what kinda of livestock are you going to graze? That is, are you looking to raise goats— and if so, for meat, dairy, or both? Maybe goats and chickens? Why do you want them? How much of the year do you want to utilize the pasture system? Is this just while the weather is good, or are you looking to have your animals graze year round, even in the snow? Because that’s an option, believe it or not. What are the resources you have available to work with? How big is your land and your budget? What is the realistic potential productivity of your pasture system? Are you ready to give up your vacations or at least have friends who can manage the livestock when you’re away? If you live in the desert, 10 acres of land won’t provide as much support as 10 acres in Oregon.
What is your commitment level to the management of the system? That is, how much research are you willing to do, how much upfront planting and seeding are you prepared for, and how much time do you have to transport animals around paddocks? Everyone loves fresh milk, they don’t love getting up at 5AM to milk the goat.
Not keeping a rotation going or not keeping up with weed control one year can plague your grazing system for years to come. There are systems that you can put into place that yield very high quality and quantities of forage, but if you do not have the time to manage the system that intensely, you can't expect those returns. There is no use investing resources into fencing, water, lime, seed, and equipment if you are not able to dedicate the time into animal movement or pasture management.
It fundamentally comes down to time— are you willing to commit the time, both in the sense of daily or weekly rotations, as well as the long-term time of developing pasture over years or tree canopy development over decades.
So, that’s all the scary stuff out of the way. These are some of the questions to keep in mind, but also, like— just remember, it’s really not that complicated. The hardest part is figuring out the system you want, the amount of animals you want, and getting whatever pasture system you want to use in place. This is where I think people get fumbled up— they decide, I want goats because they’re cute and they like goat cheese— and they know they might get cold feet so they hurry up and get some with a little pen set up, and then they try to figure out how to build up the pasture to sustain the goats, but the pasture can’t overcome the goat grazing and it becomes a muddy mess, and you, your goats, and your neighbors are miserable from the smell of shit, bugs, and the constant muck.
We’re gonna talk about what it means to build up a sustainable grazing system, and because the system is designed in alignment with how nature functions, there will be minimal input from you, while your animals will be happy and healthy. Sound good?
At this point, we’re also not really going to do a deep dive on different species. At some point in the future, we will do some episodes dedicated to different options of sheep, goats, chickens, turkeys, ducks, and guinea fowl, although we won’t touch cows or horses since we have zero experience. So, if you’re considering getting some livestock, but don’t know which is the best fit for you and your situation, we’ll get you covered.
Let’s talk about Grass, baby
So, one of my favorite things about talking about grazing management is that 90% of it is about the plant life on the soil. Like we said before, we are limited in productivity by the energy from the sun, and it’s our jobs as stewards of the soil to maximize this energy as it bounces from plant to soil and animal back to plant and so on. In economic terms, we refer to this process of following the capture and transfer of energy as the velocity of money— we’re talking about the same concept but in terms of the sun’s energy.
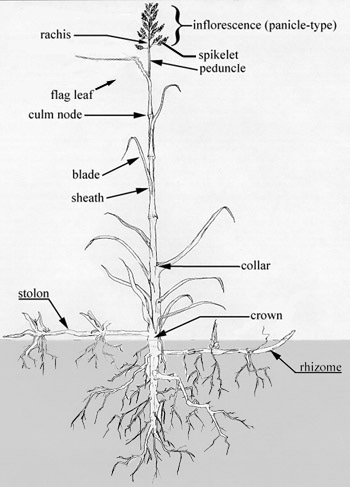
So let’s talk about how grass works, specifically in how it grows, what makes some species cool season and warm season grass, and how this translates into maximizing productivity. Grass growth begins with a tiller, also called a shoot. The tiller consists of parts which will develop into the leaves, stem, roots, nodes, seedhead, and dormant buds. From the tiller, nearly every part of the grass can be recreated, including new tillers. The Dormant buds have the potential to produce new tillers and growing points. We call the location on the plant from which it grows the growing point. The growing point of grasses is at the base of the internode sheath and the blade.
I’m assuming everyone has laid in grass at some point, right? So if you’ve ever picked grass, you’ll notice that there’s the blade of grass that comes up from what looks like a split open piece of grass— that split piece of grass is that internode sheath. That’s where new grass comes up, including the tiller. Grasses vary in their location of the growing point. Some grass species maintain their growing point at or near ground level and therefore are resistant to close, continuous grazing. Tall Fescue and Kentucky Bluegrass have a growing point near ground level, for example, so they can be grazed much shorter than other grasses.
Other grasses elevate their growing point as the internode— those areas where the grass blade comes up from— elongate. Reed Canarygrass and Smooth Bromegrass have elevated growing points.


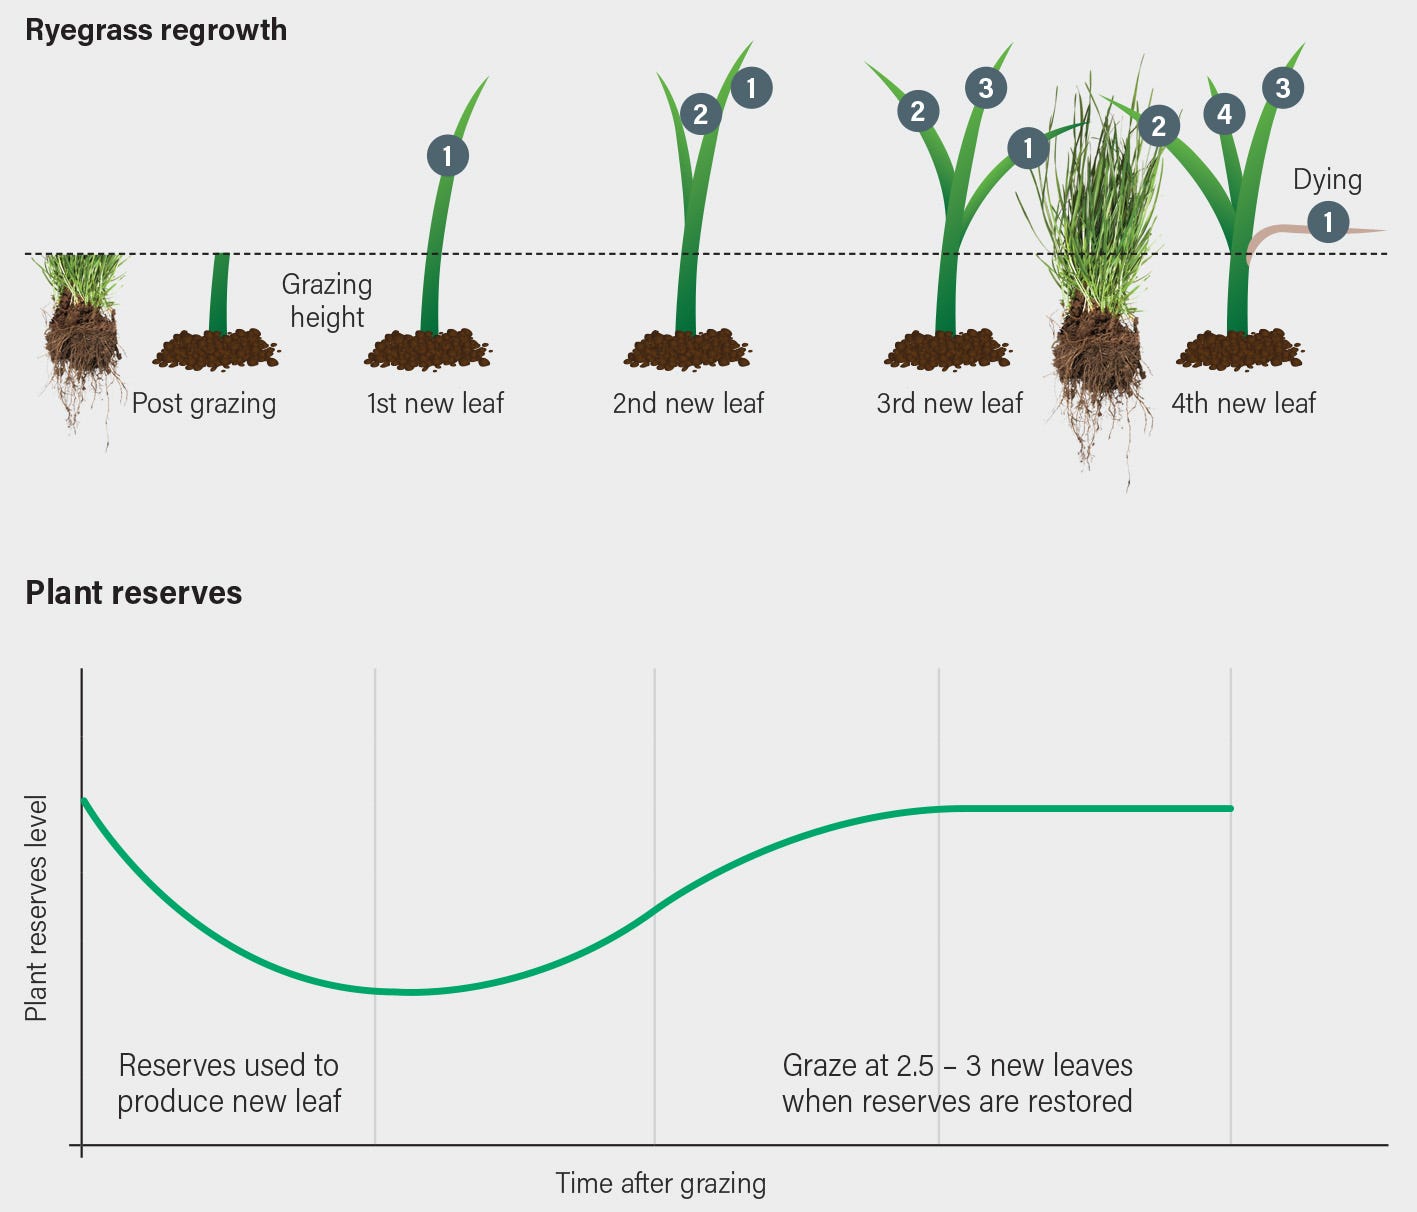
In this case, if the growing point is removed by grazing, any new growth must come from dormant buds. The energy for this process must come from energy stored in the roots. If some leaf area has been maintained on the plant, the initiation of the new growing point can take place without depleting energy stores. Think of the blade of grass as almost like a low branch on a tree— it’s not going to be a huge deal to take the branch down, but if you cut the trunk, it will take significantly more energy to keep the tree alive and growing.
After germination, the grass tiller goes through four developmental phases: emergence, vegetative phase, transition, and reproduction. Grasses have what we call a hypogeal emergence. With this type of emergence, the seed remains below the soil surface as the plant emerges, where it is protected from frost and some insects. In the vegetative stage, there is unlimited production from the growing point which is at ground level and therefore cannot be removed by grazing. There is no stem production. More tillers can arise from basal buds. Our goal is to keep the pasture in a vegetative state as much as we possibly can.
The transition and reproductive stages are referred to as jointing stages, the point at which the grass leaf starts to elongate to form a stem. In the transition stage, the growing point is elevated and can potentially be removed by grazing in some species. Once the grass is in the reproductive stage, growth has been completed. The stem is elongated and bears a seedhead. Any new growth must come from dormant buds. So, allowing the grass blade to grow until maturity is equal to allowing the grass to be overgrazed, in terms of how much work it causes the grass to grow. However, if you allow it to go to seed, you may be also adding new seed to your pasture, which, depending on its thickness, may be something you need.
Further, the plant must expend energy to go through the reproductive stage itself, never mind from restarting growth from a dormant bud. It will not grow as aggressively after that, and nutritional quality is poorer than when it's vegetative. So for most of us, our goal is to keep the pasture in a vegetative state as much as we possibly can.
So that means we want to keep grass kinda short— and unlike when we look at our mowed front yards, short for us means taller than 5 or so inches, and depending on species, generally under a foot.1 One of our goals must be to maintain leaf area to allow the plant to continue to manufacture energy at all times, which means it must have some length to absorb sunlight. If we allow pastures to become over-grazed, there are numerous negative effects: First and foremost, overgrazing limits the plant's ability to manufacture energy. This reduces growth rates, and reduces that velocity of the sun’s energy through the ecosystem. Furthermore, if we limit the plant's ability to grow and develop, we have also reduced its ability to generate excess energy. When the plant cannot store adequate energy, it will be slower to regrow after being grazed. It will also be less likely to survive the winter or be slower to start growing in the spring. Effective grazing management will maintain at least some leaf area on the pasture plants after grazing to jump-start regrowth. 2
It is highly recommended to include legumes, such as clover and alfalfa, in your pasture mix. Legumes have the ability to ‘fix’ nitrogen from the atmosphere through a type of bacteria that colonizes the roots of the legume. With time, some of this nitrogen will become available to the grasses. Often, annual peas are used for fixing nitrogen, and as they die and begin to decompose, the nitrogen becomes accessible to the other plants. The other way this nitrogen returns to the soil is through ruminant animals eating the nitrogen-fixers and returning it to the soil in the form of manure.
One thing we won’t talk about here, but is always worth keeping in mind, is how we can incorporate native grasses and forbs in these pasture ecosystems. The benefits of native grasses and forbs is that they are much more tolerant of weather and climactic changes, but it’s worth keeping in mind that many of our grazing animals are not native to North America, either, so many non-native grasses are a good fit for the animals, but not necessarily the landscape. It’s a complicated piece of the equation, especially given the costs associated with native plants, but one worth exploring. This will be the subject of another article, since I think adding it to the complexity we’re already covering here will be a bit overwhelming. I do think it’s worth keeping in the back of our mind as we discuss options for grazing, though.
Perennial plants comprise most of the pasture land in the United States. I know you probably know what perennial plants are, but if not, these are plants which regrow each year and seldom need to be reestablished if managed properly. This makes them economical to use for grazing. Understanding the strengths and weaknesses of perennial grass and legume species is important to grazing management. Using diverse mixture of grasses and legumes usually makes for a more productive and resilient pasture than using any one species alone. Cool-season perennial grasses and legumes make up the predominant forage species in the mid-Atlantic and northeastern regions.
C3 & C4 Grasses
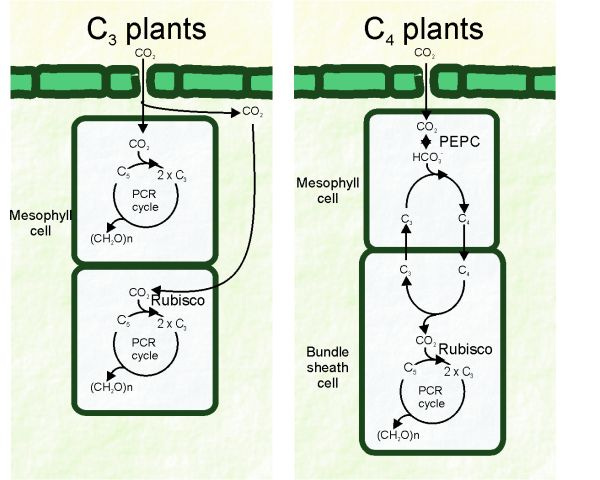
So what makes cool-season and warm-season species? It sounds gimmicky, I know, but there is a science to them, and if you understand why, it actually answers a lot of questions about many low-growing plants you might have. Although animals eat all year round, there is no "all season" plant to use as forage. Knowing that some plants are C3 (cool season, temperate) and some plants are referred to as C4 (warm season, tropical) is a basic key to having quality forage all year long. But understanding the physiology (internal chemical changes) of both can further improve the management of forages. The next paragraph is a little dense, but once you’ve got it, it’s incredibly useful information.
C3 and C4 plants both use the process of photosynthesis to convert light energy and atmospheric CO2 into plant food energy (carbohydrates). C3 and C4 plants differ in the leaf anatomies and enzymes used to carry out photosynthesis. These differences are important with respect to their optimal growing conditions, nitrogen and water-use efficiency, forage quality, and seasonal production profile. C3 plants are called temperate or cool-season plants. I won’t get into the science, but C3 plants fix CO2 more efficiently in cooler environments. C3 plants have an optimum temperature range of 65-75 degrees F. Growth begins when the soil temperature is 40-45 degrees F. C3 plants become less efficient as the temperature increases, but they provide a higher percentage of crude protein than C4 plants.
Cool temperatures of early spring also effect the activity of soil organisms which release nitrogen from organic reserves. Thus, C3 plants respond to nitrogen fertilizer during this season— that is, the spring and fall. Cool-season grasses are productive in the spring and fall because of the cooler temperatures during the day and night, shorter photoperiods, and higher soil moisture. During the summer, growth is reduced and dormancy is induced by high temperatures and low precipitation. However, in fall, when temperatures drop and moisture is more available, growth resumes. C3 plants can be annual or perennial. Annual C3 plants include wheat, rye, and oats. Perennial C3 plants include orchardgrass, fescues, and perennial ryegrass.
What’s interesting here is that all of these examples, with the exception of fescue are also native to Eurasia, which tends to have a more moderated temperature range compared to North America. Paired with the grazing pressure from a longer & more intensive history of grazing which likely drove some of the evolutionary traits of native grasses in Europe & the Middle East, it’s interesting to see how these evolutionary patterns have played out.
C4 plants are often called tropical or warm season plants. C4 plants are more efficient at gathering carbon dioxide and utilizing nitrogen from the atmosphere and recycled N in the soil. They also use less water to make dry matter. They grow best at 90-95 degrees F. They begin to grow when the soil temperature is 60-65 degrees F. Forage of C4 species is generally lower in protein than C3 plants but the protein is more efficiently used by animals. This efficiency may result because C3 plants contain a lot of non-protein nitrogen (NPN), which pass into the gut or are absorbed directly into the portal vein leading to the liver and not incorporated into microbial proteins by rumen microflora.
Warm-season grasses are specifically triggered by daylengths so latitudes should be considered in selecting warm-season grass species. They are most productive during the warmer summer months. Often, cool-season and warm-season species are used in combinations to provide forage throughout much of the year.
C4 plants can be annual or perennial. Annual C4 plants include corn, sudangrass, and pearl millet. Perennial C4 plants include big bluestem, indiangrass, bermudagrass, switchgrass, and old world bluestems.
Warm-season (C4) grasses normally contain less protein than is found in cool-season (C3) grasses. However, the protein in C4 grasses is used more efficiently by ruminant livestock. A higher percentage of the protein in C4 grasses is retained in the carcass and less is released back into the soil.
For cool-season perennials, they generally begin growing in March. Their peak growth occurs in April and May. Growth slows or stops in the summer, and then we get another smaller burst of growth from August-October, with growth trailing off in November. I want to cover quickly the most common perennial grasses, and their benefits and challenges, and I’ll talk a bit about which ones I personally have. The first is Kentucky Bluegrass (which is not native to North America, despite its name), a sod-forming species that can tolerate very low grazing. Goats and sheep tend to be low grazers, so this is an ideal grass for them. Kentucky Bluegrass tends to be present in very old, long-established pastures. It’s not very tolerant of heat and drought, and can fill-in the understory among taller-growing pasture species.
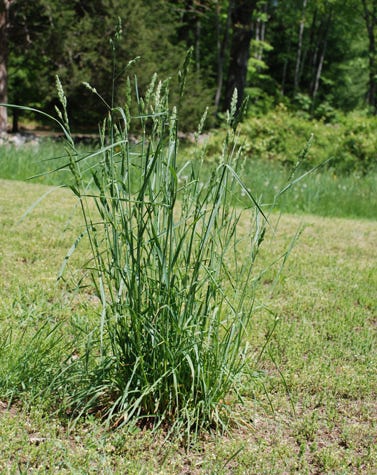
Orchardgrass (native to Eurasia), another common grass, is a bunch grass that has good palatability and reasonable summer growth potential. It mixes well with legumes and spreads only by seed, meaning if you have a bare spot, it’s not going to spread rhizomes to cover it up.
Reed Canarygrass (native to North America) is a dense, sod-forming grass that is indigenous to wet areas. Grows naturally along creeks, ponds, and in ditches. Slow to establish, but once established, is very persistent. Tends to grow aggressively. Needs to be grazed or otherwise harvested to keep it suppressed if other species are to be grown with it & has very good tolerance to heat, drought, and poorly drained soils.
Tall Fescue (native to North America) is a bunch grass, but can form a very heavy sod via rhizomes. Also spreads by seed. Very tough, resilient species that has good heat and drought tolerance.
Timothy (native to most of Northern Europe) is another bunch grass that works well as part of a diverse mix. It is very palatable and can tolerate heavy, wet soil. Timothy does not produce well during summer and does not tolerate heat and drought.
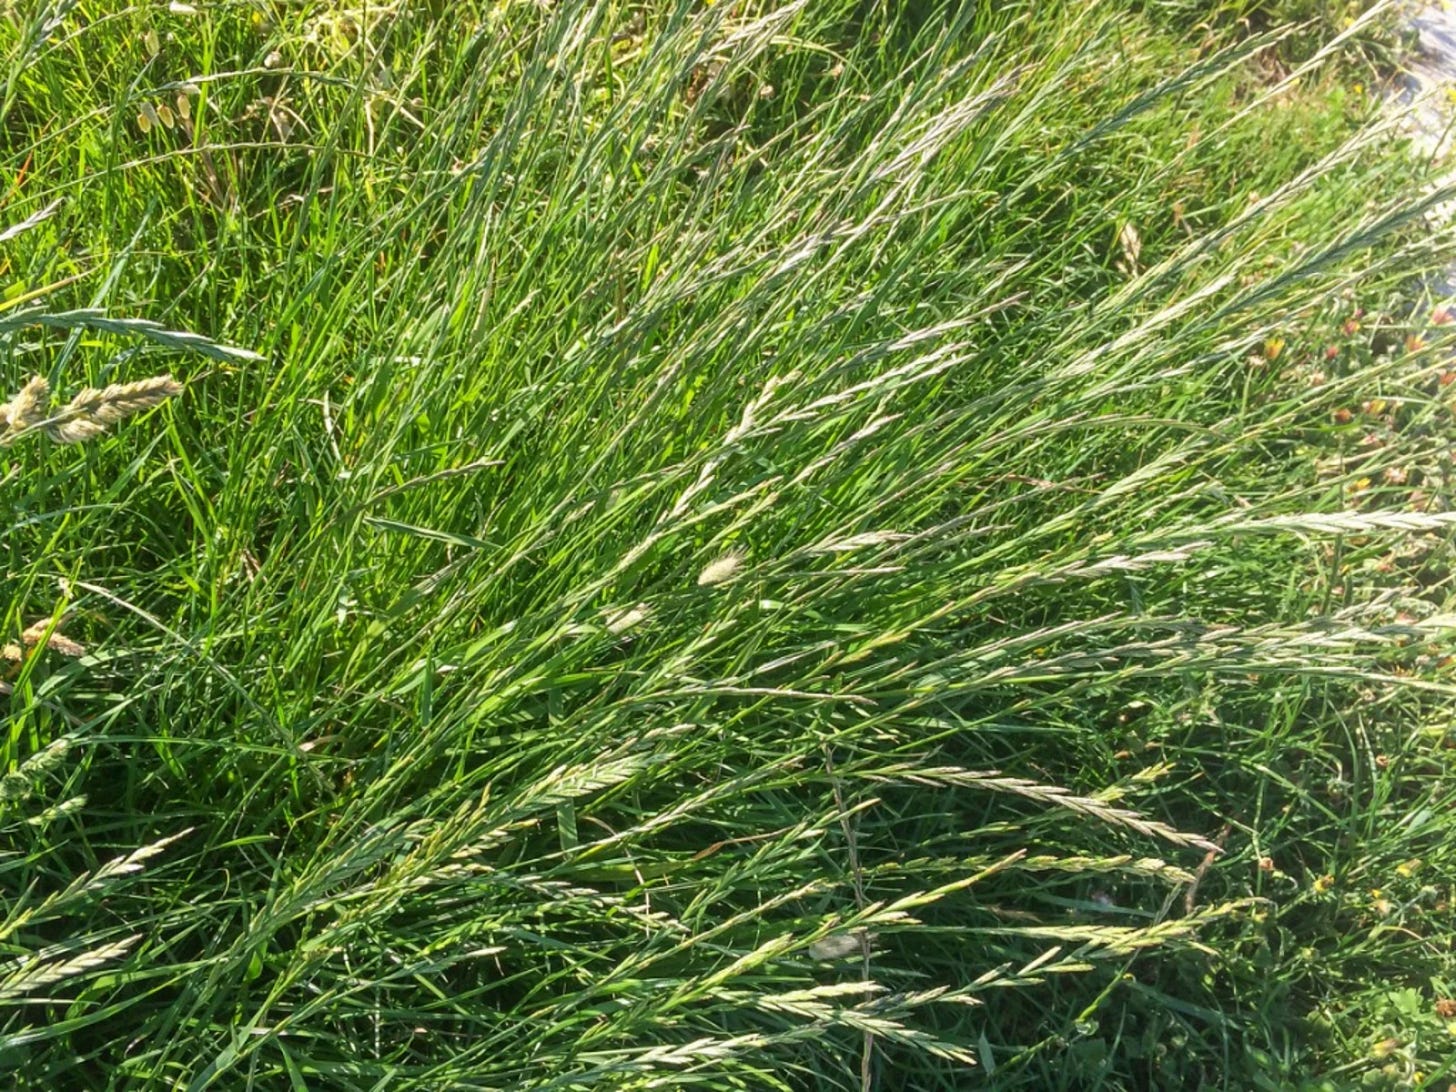
Perennial Ryegrass (native to Eurasia & Africa) is another bunch grass that establishes rapidly but only spreads by seed. Very highly palatable species. Perennial ryegrass has higher levels of digestibility and energy (sugars) than other grasses, therefore is favored in grazing programs for higher producing animals. Mixes well with legumes.
Nitrogen-fixing
Now, let’s switch gears and talk about the nitrogen fixers you’ll want to pair with your grasses. We’ll start with the one that dominates feed supplements, Alfalfa.
Alfalfa (native to southern Europe) is a tap-rooted— meaning it has one main root which goes straight down— perennial legume that has good tolerance of heat and drought. Does best on well-drained soil and does not tolerate poorly-drained soils. Can help bridge the summer slump in cool-season grass production.
Red Clover (native to Eurasia & Africa) is a Short-lived perennial legume. Tolerant of heat and drought. Needs to be re-established by seed periodically to maintain stands. Can tolerate heavy soils but prefers better drainage. This is one of my choices for clover as well because it often self-seeds, even though as a perennial it only lasts 3-5 years.
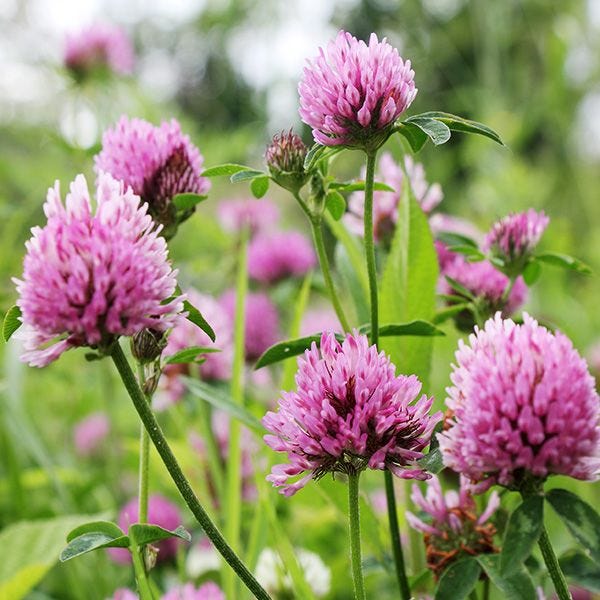
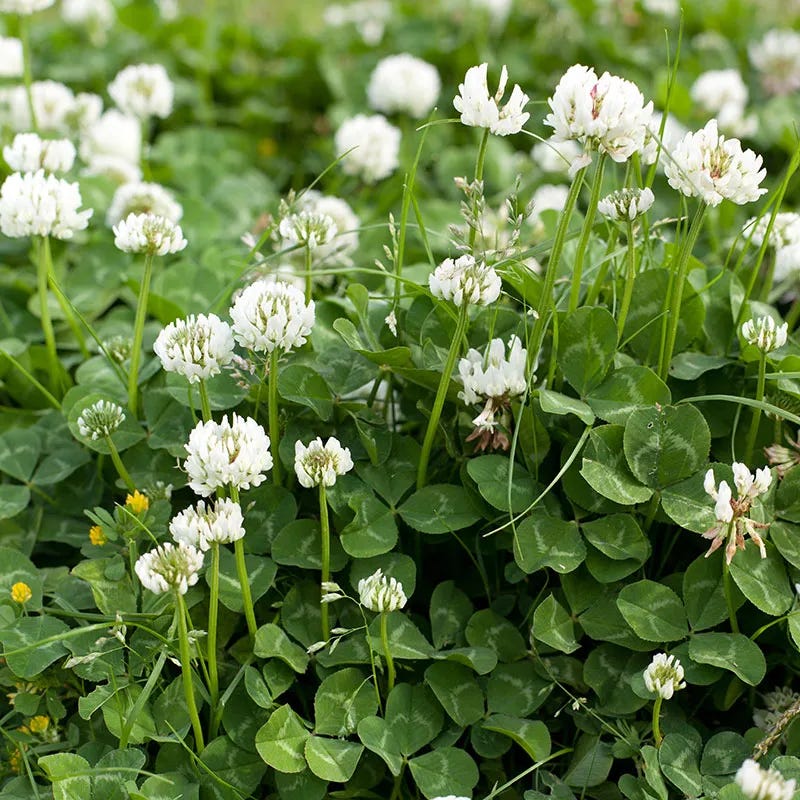
White Clover (native to Eurasia & Africa) is a longer-term perennial legume. It can spread via stolons and rhizomes. Ladino white clover varieties are taller growing and yield more than common Dutch white clover which is often found in pastures and yards. Not as drought tolerant as red clover and alfalfa, does best on more well-drained soils.
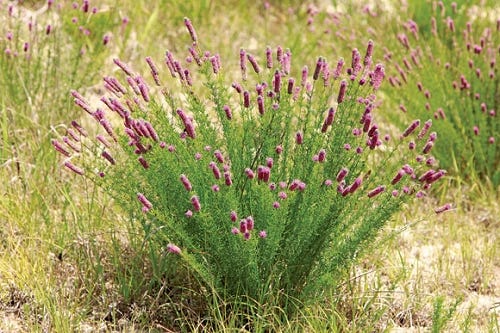
If you want clover but want a native, there is Purple Prairie Clover & White Prairie Clover (native to central North America). Not much research has been done on its grazing potential, but they are gorgeous and support a lot of native pollinators, including the Rusty Patch Bumblebee, which is a federally endangered species.3 That said, SOME research has been done, and it's shown to have similar qualities for grazing livestock as non-native clovers.4 This should make switching to a native perennial clovers an obvious consideration; the only challenge is that high-volume seed purchase doesn't exist, and purchasing a few pounds of seed is often double the cost of non-native clover varieties.
There’s a bunch more out there— this is only scratching the surface, really. The point I want to make, though, is that you’ll want to think about a few things when it comes to establishing your grazing fields— you want to make sure you have some perennial grasses that are both cool season and warm season growers so that you have growth going throughout the year, and you want to get some nitrogen fixers incorporated that can be foraged. Further, by knowing your soil type, which we should after the soils episode, we should know what demands our soils have of the cover crops that you plant— is your site sandy, clay, high pH, low pH, do you have a lot of rain and is your water table high or low?
The reason why I keep circling back to native plants here is because they have co-evolved already with the material conditions of the soil on this continent; they have developed certain traits precisely because of the soil mineral content, not in spite of it. Non-native plants can sometimes offer benefits because of unique traits, but ultimately these should be used when non-natives might not be an option because of unique conditions. However, our agricultural system has developed these non-natives because our conventional grazing practices were established in Europe, which is where a majority of these grasses learned to co-evolve with grazing patterns even before we were able to apply artificial selection to our grazing plants. It’s a complicated narrative, but one worth trying to understand as we contextualize native versus non-native grazing practices.
Once you figure out the matrix for meeting these requirements, you’ll likely find a handful of species that will work on your site. Of course, there’s more than just these, but this is a good starting point for perennials. Additionally, new work is needed around native grasses and forbs, and with that research we can find ways to both better support native diversity, native pollinators, and native birds while also providing good feed for livestock.
Which brings me to the application of annuals. Although most pasture acreage in the United States is perennial grasses and legumes, there are also many annual plant species that can work well as grazing crops. However, because they need to be re-established each year, the expense of establishment can make use of annuals cost-prohibitive or unrealistic if we’re thinking about locally sourcing and creating sustainable local systems.
That being said, there are times when an annual may fit into a grazing program: during pasture renovation, to break weed cycles, to provide a good seedbed for the new perennial forage seeding by building biomass in your soil, and for dual use as a cover crop / grazing forage. I’m not going to cover specifics, because I’m not trying to read a wikipedia page for you, but get you thinking more big picture if this is something you’re interested in and don’t know where to start. A challenge I find with a lot of folks looking to get into sustainable food and building food communities is that they don’t know what they don’t know, and that’s what this whole project has been about— not necessarily putting together all of the complex details, but highlighting all of the information from a 10,000 foot level.
Ultimately, there’s a lot of room for us to learn to utilize annuals and perennials to build more than just pasture but actual rangelands and prairies that reflect biodiversity and not a handful of plants. Granted, with effective grazing techniques, diversity tends to spring up regardless, but really we are at an early stage of understanding how to tie grazing practices in with a healthy native ecology.
Putting it all together
Before you establish your forage crop, you need to: 1) Consider when you want to plant your seed (spring, summer, winter), and 2) Prepare your fields in advance of that date, which involves getting your soil tested. As I always tend to be doing, this means reverse planning. If you want to get goats next fall, that means you need to get your perennial orchard seed down next spring, which means you need to get your annuals in late summer early fall of this year to build biomass if that’s something you need, which means you need to prep your fields that summer, which means if you wanted to do any soil testing, you need to do it this spring, in which case, you’re already running behind, and that’s pretty much the rule of farming.
We’ll begin with considerations on when to seed and then we’ll talk about soil testing. Then we’ll go over a “timeline” of things to consider at one year and at six months prior to seeding. We’ll wrap up with some guidelines for doing the actual seeding. (yeah we’re finally getting near the end of it!)
You not only need to decide in what year you’re going to plant your forage crop, you also need to decide on what season. The season in which you decide to do your seeding will inform your timeline for preparations. As you’re deciding when you’ll plant your seed, consider the following pros and cons of seeding during the different seasons:
Late summer is generally the most successful time to do a forage seeding in the northeast. An early maturing grain crop can be grown and harvested, the seedbed prepared, and the forage crop seeded before late August. Fall rains and cool temperatures provide an ideal environment for forage seedling growth and establishment. Furthermore, late summer seedings typically have less competition from weeds as compared to spring seedings.
Spring forage seedings are common throughout the northeast and can be as successful as late-summer seedings. However, wet soil conditions make preparing a good seedbed difficult and obviously the elephant in the room is climate change. Increased weed competition and the possibility of summer droughts also increase the risks of planting forage seedings in the spring.
We’ve talked about it in the past, but soil pH, that is— the measure of how acid or alkaline the soil is— impacts the availability of nutrients to plants. For best pasture performance, you’ll want to maintain a soil pH between 6.0 and 7.0, with 7.0 being neutral. Over 7.0 is basic; less than 7.0 is acidic. You can try to neutralize your soil with lime or with ash, depending on where your current soil’s pH is, and further you can try to use species that are more accommodating of your soil’s pH.
While this might be the goal, if your soil is significantly higher or lower, it’s worth asking yourself what the native diversity looked like in the past, and how that might play into that soil pH. What plants belong on that landscape instead of the pasture you’re trying to create, and if your goal is to still develop a pasture-like system, how can you do it within that native context?
And of course, some of the species we mentioned are going to be better suited to certain soil types than others. For example, alfalfa does not tolerate poorly drained or low pH soils, while red clover and reed canarygrass perform very well under these conditions. While it often is difficult and expensive to change soil characteristics, you can select forage species that are adapted to specific soil conditions. Proper matching of forage species to soil characteristics not only makes establishment easier, but also improves production over the life of the stand.
The six months prior to seeding is your last chance to adjust soil pH. Most agricultural-grade limestone requires about six months from the time of application until it effectively changes the soil pH. Consequently, adding lime to raise the soil pH within less than six months of seeding will generally result in forages being seeded into soil with a pH lower than you want. I’ve tried the liming process for a number of years in the past, and it’s a short-lived solution. You’re not addressing the material conditions of the site with lime, although it can be a temporary buffer as you build biomass. Adding organic matter to soil can help neutralize soil pH, to an extent, so it should be the goal of using lime for this reason— not as a perennial application.5
The Art of Seeding
Seeding depth and seed-to-soil contact are critical. A general rule of thumb is that seeds should not be placed deeper than five times their diameter. For most forage crops, seeding depth should not exceed 3/8 inch. Deeper seedings will drastically reduce the number of seedlings that will establish. Something as simple as running the field with a rake a few times is usually enough to ensure seed viability.
After planting, seeds must absorb water from the soil before they germinate. Poor seed-to-soil contact will delay water absorption, allow seeds to dry after absorbing water, and in general cause poor germination and forage establishment.
Legumes have the ability to convert atmospheric nitrogen into plant nitrogen through a symbiotic relationship with rhizobia bacteria. In many soils, sufficient numbers of rhizobia bacteria are already present to adequately infect legume roots, particularly if the same legume species has been grown in the field within the past few years. Inoculation (that is, adding rhizobia bacteria to the seed prior to planting) is recommended when the legume being planted has not been grown in the field for the past three years. Inoculation is inexpensive insurance that sufficient bacteria will be in the soil for proper nitrogen nutrition of the legume plant. Most times, when you buy seeds, they’ll as you if you want inoculated seeds or not. If you can afford it, get the inoculated seeds.
Nurse crops are typically small grain species that are used to provide protection to the target forage species as it gets established. Use of a nurse crop with spring forage seedings is a common practice. A nurse crop can reduce the potential for soil erosion and weed infestations, but they also can compete with the forage seedlings for light, moisture, and soil nutrients. If you decide to use a nurse crop, remember to: Seed the nurse crop at a reduced rate— say, at a third of the rate of what you’re putting down for your actual ground cover, and mow the nurse crop off when it is in the vegetative stage to minimize competition with ground cover seedlings.
Perhaps you don’t need to establish a new pasture because you already have pastures. However, pastures can become less productive over time for various reasons; including soil fertility declines. Weed take over, Legume populations decrease, or Desirable species become more sparse.
This is often related to management issues, such as over-grazing. For example, overgrazing often results in pastures that are predominantly Kentucky bluegrass and smaller, unproductive varieties of white clover (such as found in lawns). We can look at this from a few perspectives; first that we have lost fertility in the soil from poor management, the second being possibly that the site is returning to ‘natural’ conditions, which we discussed might not be idea for pasture which is largely predicated on soil conditions found in Europe & Asia.
If we believe the need is around renovation, then pasture management involves several tasks: restoring soil fertility, controlling weeds, and reseeding.
Pastures often change composition over time, ecologies rarely stay static. When renovating pastures, always begin with a soil test and adjust soil fertility according to the context of the site. Many times, simply improving soil fertility will allow the preferred plant species to become more competitive and increase pasture production.
A good time to test soil is in the fall so that lime can be applied and have time to react with the soil prior to the start of the growing season the following spring. Add fertilizer when plants are actively growing, but preferably not during very cool and wet times of the year.
Throughout this process it’s important to remember an obvious fact; that erosion can occur when soil is disturbed. For example, if you’ve recently renovated a pasture, the soil is unstable and can be washed away with heavy rains, especially if you tilled it. Animal hooves can also facilitate erosion. Constant trampling in areas of high traffic can kill vegetation and create a path for water runoff because of compaction, destroying those air pockets in the soil created by the fungal and microbial community, which leads to washed out areas in the pasture and soil erosion.
We strive to be good stewards of the land and water resources. When soil erodes off our fields and pastures into waterways, the additional nutrients and sediment can negatively impact water quality. Furthermore, a goal of a pasture manager should be to keep nutrients on the land to benefit plant growth.
Before we get into pasture design, I want to backtrack quickly to this whole conversation about developing pasture, because it does make a lot of assumptions— that there is affordable access to seeds, that there is lime availability, that you’re working on a site that already is available to be worked— that is, it’s not a forest currently, or a parking lot, or whatever. All of this can be a challenge if you’re, say, deciding suddenly that growing food and having animals is important to your survival, right? This whole process, working from a place where you have something, say, a backyard that was already a grass, to creating a heathy, appropriately placed pasture, takes years, decades.
Further, if you’re trying to manage livestock or introduce livestock, because of the reduced good crops, chances are you’ll need a lot of supplemented food to offset the less productive forage. I hear you, and I’m in the same position. Before I moved to our current location, I had lived on the easy version—the grassy backyard, free of major trees or rocks or invasive species or pH concerns. My current location is and was a late-stage pole forest, primarily covered in very large pines, with pH around 5, and a thin, thin humus layer and almost no topsoil. The soil here is a very sandy loam, and despite this, the slopes of the property cause massive runoff. In short, by nearly every metric, the property is less than ideal.
I’ve been tackling the project in sections, more or less in order to get some of the property functional at a time, and trying to integrate native crops more and more as I better understand what specifically belongs here— and of course, when I have the financial resources to do so.
So, what are your options to get things rolling if you’re not in a place to spend years getting soil ready for clearing, remediating pH, building humus through biomass, and so on? First, identify the best spots on your property. So I mentioned that there are slopes with runoff issues on our site, so in keeping in mind what we had discussed in the forest ecology episode, the bottom of that slope offers the best soil on our site, and conveniently is also close to our house so this made an ideal placement for an annual vegetable garden. Additionally, we started clearing the land where the garden would go and the southern regions— primarily the southeastern regions—of the garden to increase light access without increasing temperature extremes— to the annual garden.
The wood that we cut down was burned to heat our home, and wood ash is a good alternative to lime to increase pH and add calcium as well as potassium back into the soil, so we started adding it to our soil. Additionally, unlike lime, it remains in the soil— mostly— working as a longer-term solution for neutralizing the soil. Although wood ashes usually have a lower percentage of lime (calcium carbonate, the active ingredient in lime which raises pH), the alkaline compounds present are more reactive than agricultural lime. Therefore, pound for pound, the two are about equal in raising soil pH.
Usually you’ll hear folks talk about adding lime based on acreage, and based on soil pH change goals. However, there are three triangulates which need to be considered when adding lime or ash to improve soils— the pH you are at, the pH you want to get to, and the type of soil you’re working with. Let’s assume you’re being cautious and don’t want to overdo it, or you’re trying to limit expenses. For sandy soil, you’re looking to add about 25 pounds of lime or ash per 1,000 square feet, while clay soil can be up to quadruple that figure.
Further, adding ash and lime takes time to work its way into actually changing the pH of the soil, and we wanted to start building up the biomass of our soil. Concurrently with adding ash— which doesn’t need to happen at the same time, it just worked out that way— I was able to mulch the leaf litter to accelerate the breakdown of the litter and increase the humus layer by running a lawnmower throughout the area I was preparing. I started seeding the forest floor with buckwheat, rye, snow peas, and hairy vetch in order to build biomass quickly and add nitrogen into the soil as those plants break down. As it thins, I’m working to incorporate more native grasses and forbs, while utilizing densely shaded areas for other native plants that are ill-suited for grazing.
While seeding, I focused on thinning the forest enough to get light penetration into the forest floor, aiming for about 40% light exposure in order to help germination of the understory. During late summer, it was a great time to rake in my pasture seed of clover, peas and grasses while the buckwheat was getting ready to get chopped down in order to provide protection to the seedlings. The varieties of grasses and clovers thrown down were used because they are ideal either for low pH soil or are pretty resilient in any types of soil.
In this way, I was able to provide firewood for my heat, using the branches for kindling, and anything that wasn’t good for firewood was chipped and dumped into the bottom of my raised beds. Anything extra is stacked out of the way for future use—I try to remove as little as possible from the property since all plant matter is stored energy from the sun.
As the tree canopy continues to be thinned, I planted and will continue to plant whips and seedlings throughout the property based on a plan I put together to create the system I want to use, which is the subject of another episode. Hopefully, this will help give you an idea of the process a bit, what goes into grass and forb choice, and we’ll be diving into the other facets of both grazing & land stewardship in future articles.
At this point, we’ve reviewed most of the big picture pieces of developing pasture for grazing—we’ve covered the general areas of how pastures work in theory and how to help pastures through identifying the correct species in your pastures based on the soil, as well as the basics of how grasses grow in order to effectively utilize the energy stored within those grasses. With this basic foundation, you can start identifying species that may work for you in terms of pasture crops before we even dive into pasture systems and other issues in regards to water management.
In our next few articles, we’ll cover some of the practical pieces of pasture planning and management including different pasture systems— some of which we have covered in the soils episode, as well as traditional and modern fencing systems with a focus on systems that don’t rely on supply chains to maintain their sustainability, water, and some of the philosophical components that are inextricably tied to the livestock process.
If you’ve enjoyed this piece, which is equal to a 30 page chapter, of (so far) a 215 page book with 91 sources, you can support our work a number of ways. The first is by sharing this article with folks you think would find it interesting. The second is by listening and sharing the audio version of this content, the Poor Proles Almanac podcast, available wherever you get your podcasts. If you’d like to financially support the project, and get exclusive access to our limited paywalled content, you can subscribe on Substack or Patreon, which will both give you access to the paywalled content, and in the case of Patreon, early access to the audio episodes as well.
Gerrish, J. (2004). Management-intensive grazing: The grassroots of grass farming. Green Park Press.
Strickler, D. (2019). Managing pasture: A complete guide to building healthy pasture for grass-based meat & Dairy Animals. Storey Publishing.
https://kb.jniplants.com/purple-prairie-clover-dalea-purpurea/
https://jasbsci.biomedcentral.com/articles/10.1186/s40104-019-0418-6
https://extension.umaine.edu/publications/2279e/

