Swale Science: Unpacking the Math Behind Earthworks
The worst thing ever that's sometimes actually okay
When I first got into thinking about growing food from the perspective of systems instead of individual plants, swale content seemed to be orbiting around the ‘systems thinking’ world. Swales were the solution for all of your issues— not enough water? Swales. Too much water? Swales. Water runoff issues? Swales. I quickly ripped through all of the content scattered across YouTube, studied the permaculture Bibles for an extensive discussion around their application, and felt fully ready to apply what I had learned. Turns out, I hadn’t learned much.
The last few chapters we have focused on forest systems, fruit tree systems, and their understory, and then we look at how all of this played into pasture systems, and how animals integrated within the landscape. In this chapter we’re going a little bit deeper, and talking about integrating water management systems into our land design. Water management systems give us the tools to reduce our need for water inputs and to help our soil withhold water for longer periods of time, making the root systems of our plants healthier and ultimately making our gardens and ecosystems more resilient. Good water management techniques from managing our topography can reduce our need to artificially water our plants, and, if you’re anything like me, you don’t want to be filling up buckets all day or walking around with a hose, especially if you’re using a rainwater catchment system which has a low flow rate.
Waterway Health
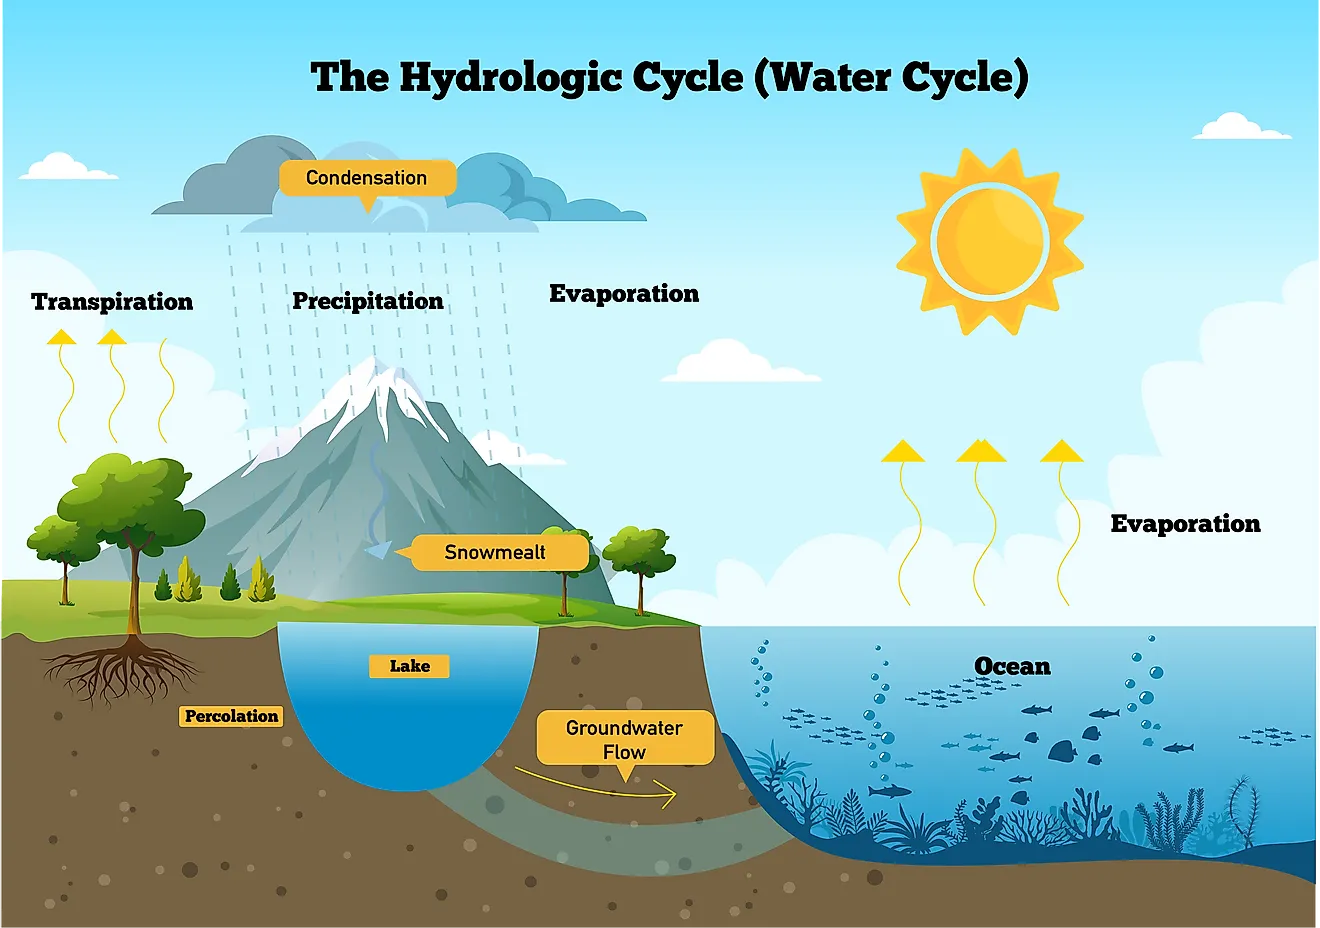
But, before we can talk about artificial manipulation of our topography, we need to examine how water operates naturally on our property, starting with the local source of water in the ground— our watersheds. Watersheds are the land-area that feed water directly into a water body. Watersheds are significant not only because they provide water for streams and ponds, but because they are a significant factor in water cleaning. These watersheds are fed through the hydrologic cycle, which is what you remember from third grade as the water cycle; it rains, rain goes in the ground, it collects and ultimately evaporates from the ground or through plants called evapotranspiration. Well, actually, there’s some other stuff that goes on. Not all of the rain gets evaporated— some, slightly less than a quarter, actually reaches into the recesses of the soil and recharges the groundwater systems — aquifers— and a bit actually makes it directly to bodies of water in the form of runoff.1
Groundwater systems are crucial for long-term sustainability, not just for communities in the form of a clean, consistent water source, but also as a buffer for rivers, streams, and ponds during severe droughts. While monocrop grass may absorb up to a few inches of rain an hour, a healthy forest can absorb up to 20 inches of rain an hour.2 What this means is that during an extensive downpour, rainwater in a forest will remain in the soil, reducing runoff and nutrient loss, and sending more water down into those aquifers for future availability. Runoff, on the other hand, will raise river and pond water heights, potentially damaging soils, crops, or homes. By retaining the water in a decentralized way— away from all being driven towards the base of the watershed, we are able to better utilize the resource. Further, using this type of knowledge, we can better plan communities in areas prone to the risks of water damage.
The biggest impact on the quality of water in an aquifer or in a waterway is the type of bedrock that the water either goes through or sits upon. Common types of bedrock in the United States are sandstone and shale, which are acidic, and lacking calcium and magnesium, which both impacts the soil and the water quality, creating a softer water with lower total dissolved solids. Conversely, Limestone, another common bedrock in the United States, which results in a harder water, will have higher amounts of calcium, magnesium, and higher total dissolved solids.3
We can further help provide support for waterway health by working with the waterways instead of trying to work against them. Buffer zones, called riparian buffer strips, are zones from 20 to 100 feet with trees which help reduce runoff and nutrient dumping into the water, while also helping reduce temperature extremes in the water by providing shade, which not only reduces evaporation but protects fish species from temperature extremes. Nutrient dumping concerns primarily stem from nitrogen runoff into the water. Excessive nitrogen in the water creates extensive algae blooms in the water, reducing the oxygen levels within the water, and ultimately leading to massive fish die-off.
Currently, in most small-scale irrigation systems we tend to pump water directly out of streams or farm ponds, if not directly then from a well or public water source like a municipal water tower. These water sources are generally sufficient for cases in which supplemental irrigation is used—in humid regions where rainfall and snowmelt supply most of the crop water needs but limited amounts of additional water may be needed for good yields or high-quality crops. A good source of groundwater is critical for the success of such systems, and low salt levels are especially critical to prevent the buildup of soil salinity. Most of the western U.S. Great Plains—much of it part of the former Dust Bowl area—is supported by the large (174,000-square-mile) Ogallala aquifer, which is a relatively shallow and accessible water source. It is, however, being used faster than it is recharging from rainfall—clearly an unsustainable practice. Deeper wells that require more energy to pump water will make this mining of water an increasingly questionable practice.
Healthy soils have more water supply capacity than soils that are compacted and depleted of organic matter. It is estimated that for every 1% loss in organic matter content in the surface foot, soil can hold 16,500 gallons less of plant-available water per acre.4
Additionally, surface compaction creates lower root health and density, and hard subsoils limit rooting volume. These processes are captured by the concept of the optimum water range where the combination of compaction and lower plant-available water retention capacity limits the soil water range for healthy plant growth. We discussed this peripherally when discussing forest ecology here. Such soils therefore have less efficient crop water use and require additional applications of irrigation water. In fact, it is believed that many farms in humid climates have started to use supplemental irrigation because their soils have become compacted and depleted of organic matter. As we discussed before, poor soil management is often compensated for by increased inputs. Reducing tillage, adding organic amendments, preventing compaction, and using perennial crops in rotations can increase water storage. A long term experiment showed that reducing tillage and using crop rotations increased plant-available water capacity in the surface horizon by up to 34%.5
Retaining Water
For the purposes of this chapter, we’re going to focus on water management in terms of keeping water on the land as it arrives from the sky in the form of rain and snow. Since we’ve been talking about that “big picture of regeneration”, and not our annual garden, it makes sense to start there. We’ll cover water management in the more traditional sense, eco-friendly ways to water your garden, rain barrel systems, and so on, at another time, but this one is of quite a literal higher calling, and that is the health of the entire soil region.
As you’ve probably noticed to this point, I tend to be leery of simple, plug and play solutions, and this is one of the issues I’ve had with permaculture as it exists in 2020. My goal with this episode isn’t simply to help you keep your pasture, or orchard, or whatever you’ve got going on healthy, but to build the health deep in the soil, the aquifers, which will become more and more important as climate change pushes the extremes of rainfall and lack of rain, requiring us to increase our storage capacity in the short-term and to re-fill our storage capacity in the long term.
For us to do this, I’m going to focus on three primary methods, swales and berms, keyline water systems, and gley ponds. The last one isn’t as much for that deep aquifer, but is an excellent tool for developing water storage on property that otherwise may really struggle to build accessible water sources for animals. It’s also the one you’ve probably never heard of. Finding information on it is almost non-existent outside of old school farmers, so a lot of it will be a bit more anecdotal than I’d like, but I do have some experience with it, so I think I can do the topic justice.
Our goal ultimately, when it comes to water management systems, is to spread, slow, and sink the water as it arrives on our property. By doing these things, not only do we retain the water on our property, but we protect the soil health by reducing nutrient runoff, which also protects rivers, ponds, and other properties near us from nutrient dumps. Our second goal is to capture as much water as possible, store that water, and distribute that water when necessary. To capture that water we need to give it time to work its way into the soil. Since water follows the flow of gravity, our goal is to keep the flow of gravity away from any path of little resistance, right? If we know it’s slowly percolating into the ground, the slower we keep it from following the path of least resistance with gravity away from our property, the more of it will slowly drip into the soil. Sounds simple right? Well, this is where the concepts of swales come from, and we’re going to cover how they work and don’t work, and we’ll be referring heavily to some of the lessons we got in the soil episodes.
Swales and berms are the poster-child product of most permaculturalists. Swales are, in their simplest form, a shallow channel with sloping sides, and berms are a raised side, usually where the soil from the swale was dumped, which increases the water capacity of the swale and provides increase surface area for water absorption. Google swale and the second word google recommends is permaculture, in case you were curious if this is something commonly seen in any other part of agriculture. Pop on Youtube, and the first 20 swale videos are low-quality clips of newly-minted permaculturalists showing you muddy, jagged inlets forced into what was recently a grassy backyard while the host explains what’s going on, and there’s usually rarely a follow-up video for it. This doesn’t mean it doesn’t work, but it does mean it’s a little more complicated than originally proposed, and there’s a lot of folks trying become youtube famous for whatever they think can stick, and that’s dangerous for other first-timers. For what it’s worth, I’ve been cutting in some swales and berms on my current property, and this is the third time I’ve done it and had to live with the consequences of it, unlike a lot of permaculture consultants, who’ve never had to live with any of their own advice, so I think I have a unique perspective in that I’ve gotten to try some things out, see how it plays out over the long term, try something new on a different site, and so on.
Swale Science
Let’s talk about the function of swales and berms, which parts are based in any evidence-backed science, and when they are appropriate tools for you, which is not always, but it is sometimes. I want to cover some of the basic ideas of swales before I jump into the nitty gritty details, so if it seems pretty obvious to you at first, wait a few minutes and we’ll get in as technically as I can.
Water is guided by gravity and follows the most direct path towards gravity. The basic function of swales is to guide that water along a path that you want it to take, instead of down your sacrifice lot, through your new planted grass slope— whatever. The idea is that you want to spread the water across the surface for as long as possible and across as much surface as possible to reduce runoff and increase saturation. As the water sits, it will make its way into the soil until it cannot go any further, at which point it will puddle, even underground, and continue along the fractures in the soil, into the subsoil until it reaches a stream or an underground spring or cavern. Or, it floods up to the surface.
By cutting swales into the property, we do a couple of things, some good and some bad. Let’s start with the good— by creating lower points in your land, you’re able to guide water towards certain sections of your property, as well as away from other sections of your property, all by using low-tech methods that can help keep your property healthy. Further, the soil that you dug up is typically dumped on one side of the swale, creating a hill called a berm, which not only increases the height of your swale’s water absorption capacity— to an extent— but also creates some interesting microclimates for specific species. The berms also tend to have super rich soil because you’ve now doubled the amount of topsoil in that berm. The berms also operate as a wick to release water from the ground as a high point where the wind can blow across and take that excess moisture as necessary. There doesn’t seem to be a lot of actual evidence on this point, even if it appears logical (and I’m not sure I’d disagree with it, but it’s worth noting that there doesn’t seem to be any science-backed evidence for this point).
Further, below the soil, those areas where water sits and collects, which are often called plumes in permaculture, can support temporary wetlands like vernal pools by reducing runoff during rainstorms. The negatives of this process of cutting in swales is that now the bottom of your swale has little to no topsoil remaining, creating a bit of a dead zone for grasses. Further, there can be unintended implications from manipulating the land that impact airflow around your property, as well as excess water issues. So, some things to keep in mind.
And, of course, there’s some assumptions we’re making here about your land, and this applies to both swales and keyline design; your land is almost guaranteed to not be perfectly level. It might be flat, but it’s not level. It might seem kinda like it, but get a torrential downpour and you’ll see the ebbs of the property, and that’s what you’re going to primarily be working with. Without understanding the high points and dips in your property, it will be impossible to plan your swale out in a way that will create meaningful change. While we need to make sure there’s enough pitch in our swales for water to flow throughout our property or into a pond, it’s equally important to consider not having too much pitch, which increases the velocity of the water running across our property, and pushing nutrients down to the end of our swale system, much like the nutrient build-up at a river delta. You’ll also hear folks do swales ‘on contour’, meaning they’re perfectly flat, so the water cannot run off, and soaks into the soil below instead of running further down the property. This can be a good or a bad thing.
Lastly, and I think this is a part that is ignored by way too many people in permaculture circles is that many areas do not need water retention— they already have enough, and in some cases, too much. I have heard horror stories of massive flooding issues because of swale system implementation where the general idea was that more water is always better, and that’s not always the case. It’s also worth being aware of how much water your land can realistically absorb— most folks are simply not aware at the sheer volume of water that works across a landscape from a few inches of rain (and we’ll be talking about it shortly), and there’s a wide difference between needing to have better land management practices to absorb that rain and to need something like swales. It makes sense to consider your water table and your rainfall volume— do you really need more water, or are you just looking to add something for the sake of saying you have it? It’s important to be practical about this, because the consequences are far reaching.
When water enters the soil, there’s three primary stages of water volume within it— we talked about this a bit, very quickly, in one of the soil episodes, but I didn’t go deep into it at all and just kind of mentioned these stages. The first stage is permanent wilting point, which is when water is practically devoid in the soil, and the gaps between the soil particles are completely filled with air. The soil can tend to bind up, and if you’ve ever had a potted plant you forgot about, it becomes almost like a rock and even watering it is pointless, and the water practically trickles right out. The alternate extreme is complete saturation, which is when the air bubbles have been completely pushed out by water, and leads to anaerobic conditions in the soil due to lack of oxygen. The ideal condition is when soil is at field capacity— that is, there is a large amount of water in the soil, with air pockets still available, allowing moisture to enter roots as it is needed, and is slowly wicked away through the plants and through the surface of the soil, as well as by working its way deeper and deeper into the soil. The goal is not only to help fill the soil’s water capacity to reduce the need to water during dry spells, but to push perennial plants to build deeper root systems to tap into that water source, increasing their long-term viability by helping guide their root systems into new areas for nutrient extraction. These deep soil water systems that we’re talking about are the same feeder systems that go into rivers and are necessary to creating natural ponds.
So, we talked about how we want the water to move along the property, but not too quickly, right? We can do this by using the contour lines on our property, which, if you’re not familiar with the term, is by identifying where you can find contiguous linear heights, where water will pool up instead of running downhill, and those are places where we can naturally guide water from one contour to the next, using targeted swale cuts to guide the gravity feed.
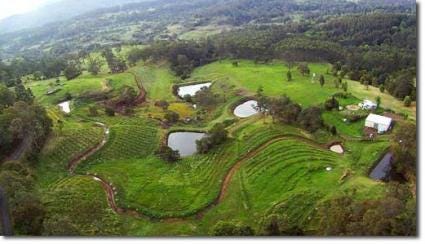
Many times, you can build up sections on the contour, so instead of pooling and running further down, you can create long sections of swales in that same pooled space using berms. If your goal is to slow the rate of water flow to the point that you’re building long sections of swales on one contour plane, you might want to consider why you’re having so much water runoff. If you are looking to do so because you simply want to and enjoy seeing the swales, and plan on using a lot of rock to create more of a stream effect, then go for it, but keep in mind the impacts sitting, slowly percolating water might have on, say, foundations below the height of where your swale is. You can do that, but on each contour. And, at some point, the overflow of these swales will drop off somewhere, and this place is usually targeted as a candidate for vernal pools. Depending on your system, they can range from a few feet to legitimate ponds— it all has to do with your rainfall volume, swale sizes, property sizes, soil type, and the slope of your property. If you are not looking for water sitting on your property, sheet flow spreaders are a great option.
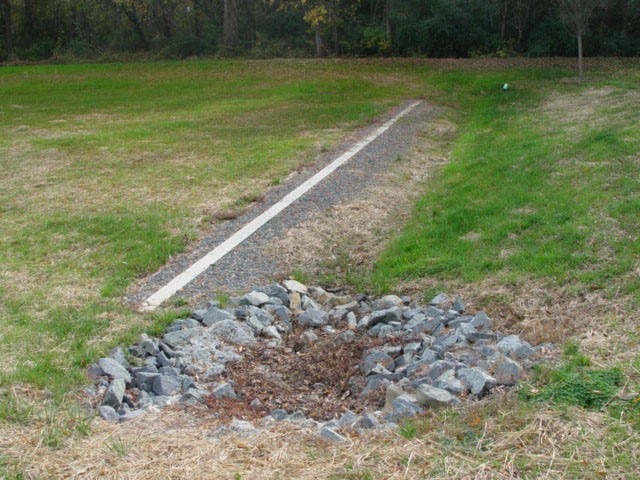
Much like the on contour swales, sheet flow spreaders are rocks— 3 inches to a foot long, spread 1 row of rocks deep, on contour at the bottom of the swale system where the water hits the rocks and is dispersed throughout the rocks. At the end of the rock system are slightly larger rocks, stacked one row higher, keeping the moisture from flowing through the sheet flow spreader quickly, and dissipating into the remaining land. Beneath the rocks, seed native grasses that can take over and absorb the water without getting washed away. This helps absorb the sediment that washes downflow and puts it to use without it going to waste. Keeping the rocks only 1 rock high allows the plants to grow through the structure.
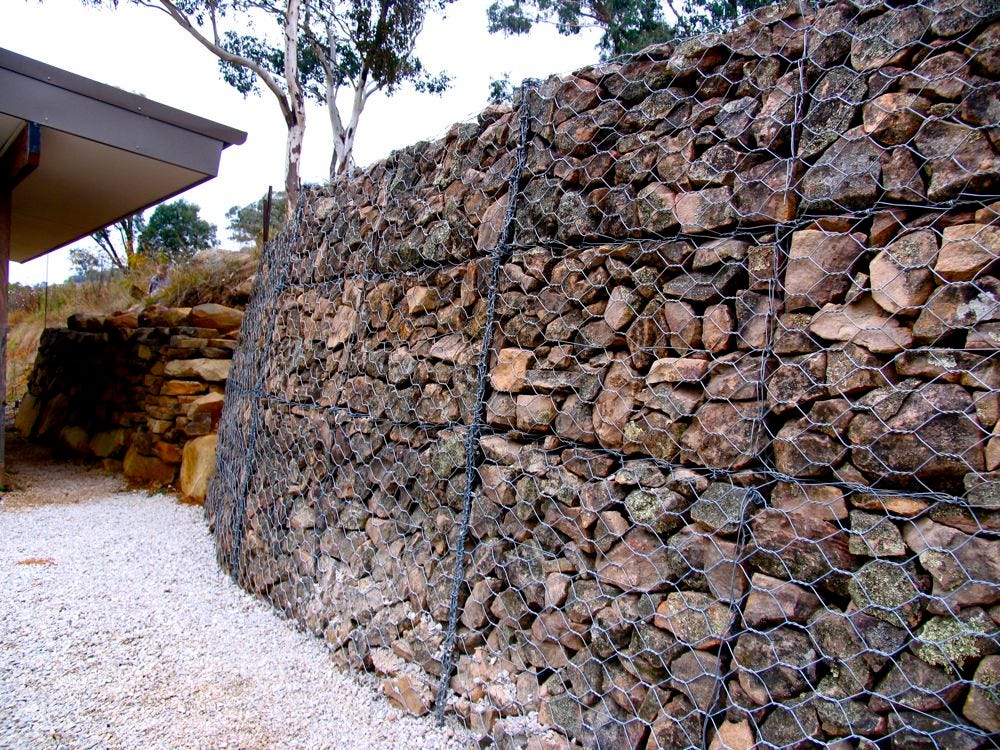
If you’re familiar with permaculture, you’ve probably heard about the greatness of gabions as check dams to reduce flow from massive swales and other water flow systems, but the challenge with these is that gabions is that they tend to blow out. While sheet flow spreaders may not be as effective with larger systems, they’re a better long-term solution to reducing flow without the risks associated with gabions. Sorry, I know that was a little off-subject, but I wanted to touch on the bigger version of it real quick.
Swale Math
Like everything i enjoy covering on here, I also like going into the technical aspects of how these things do— or don’t— work. My largest concerns come from the fact that anyone can say anything on the internet, including myself, and nothing is fact checked, and everyone is looking to get famous, but usually they want to get famous for something before they’re good enough at any particular thing to get famous for. So, I like to go through some of the technical details. Fortunately, Oregon State University’s extension school has some great content on swale systems focused on the technical underpinnings of the system, so I’m going to jump into that next, and then I want to circle the conversation back to the pragmatic approach of when swales might be right for you. Their swale content is designed primarily around road rainwater runoff, which is an excellent area to source from, since there’s very accessible evidence on whether or not the systems are as successful as they claim.
Our first goal when it comes to developing swale systems is to identify how much water we’re dealing with. How much is really going to impact our soil, and how big does our swale need to be to handle it? There’s two methods, the rational method and the hydrograph procedure method; the latter which requires specific details about your location, so I’m not going to get into that for all of our sanity. It’s gonna get dense for about 30 seconds, and then we’ll unpack it.
The rational method formula to figure out your peak rate of runoff is fairly simple, but sounds complicated at first. It starts with the runoff coefficient, that is, the runoff volume to rainfall volume, times the average intensity of rainfall for a duration— that is, inches per hour, times the tributary area, which is how many square feet are feeding into your swale. So, for example, if you are getting 4 inches of rain an hour, across a quarter acre, with a runoff coefficient of .5, it’s 4 (inches) times .25 (acres) times half (the runoff co-efficient), which is .5. That’s your peak rate of runoff in cubic feet per second across the entire quarter acre.6 Two of those figures seem pretty easy to figure out, your tributary area and the average intensity of rainfall for a duration. If you’ve measured out your swales, you know the area that will feed into your swales, which is your tributary area. The average intensity of rainfall, if we’re thinking about worst case scenario, you can probably think back to some of your worst storms and what the rainfall per hour was.
The last figure, the runoff coefficient, is the one that sounds scary and complicated. What it really is is trying to figure out is how impervious your soil is; how much of the water is actually running off into the swale, versus going directly into the ground. There’s some really basic tables for runoff coefficients online, and I’ll give you some examples. A flat grassy yard has a runoff coefficient of between .12 and .17— that is, only 12-17% of the water that hits the soil in that grassy yard is going to runoff into the swale, on average. If you have a driveway near your swale, that area that feeds into the swale has a different coefficient— between .7 and .95, meaning 70 to 95% of water that hits that driveway will runoff into the swale. It makes sense, right? I promised it wouldn’t be too complicated. If you are looking for a specific surface type, google it, there’s someone online who has posted a chart with it. Using this, knowing the topography of your soil, and knowing what you’re preparing for in terms of how much rain you’ll get at once will give you a framework of how big your swale needs to be.
I’m sure you didn’t expect to get a math lesson today, and we can make this process more complicated, by talking about things like overland flow time, and the time of concentration, and so on, but this is really sufficient, and more than 90% of folks that put in swales know, so you’re in a good place already.
So, let’s use that half a cubic inch per second peak runoff rate we calculated earlier. That means you’ll have half a cubic foot of rain falling across your land that will not penetrate into the soil, but run off and ultimately into the swale during your worst rains. How this water plays on your property is impacted by the function of your swale— if it’s on contour and not meant to flow downhill, you’ll want to make sure it can hold all of the water. So, let’s go back to our example, we have a half cubic foot per second, that’s 30 square feet per minute, 2400 square feet of water for an hour of your worst case storm. On our quarter acre, let’s say it’s a square lot that’s a lot that’s 100 feet long by 109 feet wide. Let’s use the land to tell us how large it should be—since we would be working with a 100 foot long lot, let’s have two swales that come together that are 100 feet long, meaning 200 feet total of length. That means each foot of length of that swale needs to be able to absorb 12 cubic feet of rainwater, because we had to absorb 2400 cubic feet. 2400 cubic feet divided by the 200 foot long swale leaves you with 12 cubic feet per linear foot of swale length. So you can come up with a few different ways to come up with that 12 cubic feet. You can have 6 foot wide swales, 2 feet deep. You can have 3 foot wide swales, 4 feet deep. I know this is a hard concept to try to understand through this format, but if you try to find an answer on how big your swale should be, there’s a lot of hand-wringing and no real answers, just a lot of bullshit explanations that aren’t really helpful in guides, and fortunately, some permaculturalists are starting to admit that a lot of swale guidance has been based on bullshit rule of thumbs that aren’t based in any math, just what they’ve seen on other properties, which may or may not work.
I want to reiterate, this is a basic, conservative starting point for the framework for how swales work, how to size them, and so on. Obviously the bigger the project, the more you want to consider hiring a specialist, because small mistakes in large systems cause large problems. If you’re working on a couple acre property and you’re putting a swale on a small part of it, then you’ll probably be fine with this. If you’ve got a 100 acre property, do a little more math, or find someone else who can. The point that’s obvious but deserves to be stated repeatedly is that if you’re keeping water on your property longer, that can be good, but remember we cannot control how it trickles through the landscape, into our foundations, and potentially even making soils uninhabitable for certain tree species that are already there.
Swale Observation
So, now we’ve got a good sense of what swales are, what they do, the different ways they are used to function on the landscape and the different goals they have on impacting the landscape, some of the negative consequences you may face with them, and how to calculate roughly the size of a swale you might need, if that’s the direction you want to go. This is all great functional knowledge of how swales exist in an abstract way, but when you’re saying, okay, I’ve got all this, now what? Then, well, where do you start? The first thing is observation. Watching the way rainfall flows across your property, across seasons, is imperative before you start doing anything. Why? Because, not only will it give you an idea of areas which may have thin topsoil, compact soils, and which areas may drop further than you thought, but you can see how the change of seasons impacts these flows, which they will.
You’ll want to start at the top of your property, topographically speaking, and work your way down. This will help you see where the water starts, and you can start identifying the contours on the property as well as the clusters of areas where the land changes more dramatically, or may be faced with stronger runoff issues. We can also use the free power of gravity to guide water towards places we want water— whether that might be a seasonal pond you’d like to be year round, an area that gets more sunlight and dries out more quickly, or whatever it might be.
You might think, well, my property isn’t at the top point of the local topography. That’s fine, you can’t control what your neighbors might do, so we need to start at our highest point, or where that water enters from another property. We gotta work with what we’ve got, right?
From there, we want to start small and simple. Not only are big and complex intimidating, and something we fear doing because of the risk of screwing up, but small and simple usually doesn’t come with costs— chances are you can get a shovel for next to nothing from somewhere or already have one, and it’s simply a labor of love to put in your first swale. And, I do want to say, like a lot of things you hear or read on the internet, it’s one thing to understand them as a concept, it’s another to see it be applied in action.
Some rules about putting in swales— while we know the water is supposed to drain slowly into the soil and then wick out through the berm, because of the extra topsoil available on the berm, this is an ideal place for planting trees, and swales are primarily recommended for trees. If you’re working around existing trees, your goal is to stay outside of the drip edge of the tree— that is, the furthest leaves on the tree from the center of it, because we can estimate that is about how far the core roots extend on the tree, and we don’t want to damage those. Roots extend further, which is how they can access this water source, but these roots are more malleable and replaceable for the tree.
We can also make small tests of on contour swales near our home, because the high impermeable surfaces mean extensive runoff from roofs, walkways, patios, and driveways, up to 10 times the amount of runoff of your grass, if we think back to our runoff calculations. You’ll see the term rain gardens used a lot around peoples’ homes, but these are just on contour swales.
When we put in swales, even small ones, we want to have some kind of overflow, in case our math is wrong up above, and we also don’t want that overflow to go to waste (or into our basements), because water is valuable, right? When we don’t have a plan overflow, there will eventually be failure. With a small system, it might not be a big deal, but the larger the system, the more risk that comes with it. When we are talking about these overflow spots, we also need to realize that these are generally the weakest points in our swales— this is where water flows quickly and often moves downhill quickly, and can cause the most damage not to the overflow spot in the swale that’s overflowing, but to the swale that’s receiving the excess water from the overflow.
And this brings me to my last point on the subject— when is it appropriate to do swales? While we haven’t touched on keyline systems for water management on site, I do want to talk about when swales are a better choice. Generally speaking, less steep slopes— under 3% or so, are better for keylines, as well as grades higher than 15%. Further, swales make sense when you’re working on a site that has a lot of unique features, and are not designed for industrial equipment to harvest or large monocultures. Additionally, earlier succession is primarily a better condition for your site-- grasslands, prairies, and early tree stages, and you don’t want to really touch older forests for a few reasons. First, the roots for the older forests are likely covering the entire landscape, and if the trees have survived this long, they likely don’t need any water conservation.
If you’ve enjoyed this piece, which is equal to a 24 page chapter, of (so far) a 286 page book with 111 sources, you can support our work a number of ways. The first is by sharing this article with folks you think would find it interesting. The second is by listening and sharing the audio version of this content (Episode 16), the Poor Proles Almanac podcast, available wherever you get your podcasts. If you’d like to financially support the project, and get exclusive access to our limited paywalled content, you can subscribe on Substack or Patreon, which will both give you access to the paywalled content, and in the case of Patreon, early access to the audio episodes as well.
https://www.americangeosciences.org/geoscience-currents/groundwater-use-united-states
https://www.hrwc.org/trees-and-forests-fight-climate-change-and-water-pollution/
http://www.uwyo.edu/barnbackyard/_files/documents/magazine/2008/fall/geology-waterquality-fall-2008.pdf
https://www.canr.msu.edu/news/compost_increases_the_water_holding_capacity_of_droughty_soils
https://www.sare.org/publications/building-soils-for-better-crops/managing-water/#Irrigation-Management-at-the-Farm-Level-
https://extension.oregonstate.edu/stormwater-green-infrastructure







Hi Andy, so good to find your stuff on Substack. I followed a while back on FB but quality pages like yours just get lost amongst the distraction. And I’m not a podcast listener so am happy to see that you’re writing.
Love your review of swales, admittedly I hoped there was going to be more of a dig at GL but the memes will have to do.
Over here in the Philippines people love their swales. I’m not sure what they’re expecting them to do. They just like copying out of the “permaculture toolbox” and applying it to our tropical soils and our extremely heavy rainfalls and expect what?
I had an ex-friend go and do GL’s 2 week course over in Australia and then he came back and wanted to design my property. After his PDC he had know idea how to do basic mapping with triangulation but his resulting design had swales over most of my property including right adjacent to the top of a fairly precarious cliff face. Nothing else in the design, just swales.
I ended up going and doing a PDC after quite a few years of being quite against it and the cult-y guru vibes I sometimes got from it. However I was already by this stage quite familiar with a lot of the good permaculture texts. My teacher wouldn’t even discuss swales. Too advanced and much easier, much less energy intensive solutions.
Anyways, good to see you here and I’ll try to have a read of your other stuff